Tesla Remote Energy Meter: Installation Best Practices
This document was last updated on August 20, 2025.
- Update the Tesla One app and the Powerwall system before pairing Tesla Remote Meter
- When pairing Tesla Remote Meter over Wi-Fi, extend the Tesla Remote Meter antenna wherever possible
- Configure CT(s) before starting system
- Start System and allow all device updates to complete before troubleshooting
- Retry updates by selecting Stop System, then Start System in Tesla One
- Stock Tesla Remote Meter RS-485 harnesses, and use when practical
- For repeated update failures, temporarily connect Tesla Remote Meter to Powerwall 3 with the RS-485 harness to complete meter updates
Summary
This document outlines best practices for installers working with the new Tesla Remote Meter. For a comprehensive summary of all meters and installation guidance, see the useful documentation below.
Useful Documentation
Table of Contents
Key Differences from Neurio Meter
- Up to two Tesla Remote Meters can be paired wirelessly to a Powerwall 3
- Only one Tesla
Remote Meter can be hardwired to Powerwall 3 via the RS-485 harness and
16-24 AWG communication wire NoteIf two Tesla Remote Meters are paired wirelessly and one is hardwired, the site can have a total of three meters
- Tesla Remote Meter is only supported by Powerwall 3NoteDo not install Tesla Remote Meter with Backup Gateway 1 or 2, Powerwall+, Tesla Solar Inverter, Wall Connector, or Powershare Gateway. See Supported Product Configurations for more information.
- Neurio meter accessories (Y-splitter, antennas, RS-485 harness) are not compatible with Tesla Remote Meter
- Y-Splitters are not yet available for Tesla Remote Meter, and CTs cannot be manually spliced
- CT4 Port is not yet functional
Minimum Software Versions (Before Pairing)
The following software versions are required when installing a Tesla Remote Meter.
- Tesla One 12.22+
- Powerwall 24.28.16-rm-9 or 24.36.10 or later
Best Practice: Update Tesla One and the Powerwall system before attempting to pair (wired or wireless) a Tesla Remote Meter.
Pairing Method (Wired vs. Wireless)
Tesla Remote Meter can be connected to the controller within Powerwall 3 using RS-485 or Wi-Fi. Each connection method has benefits which will depend on the specific site conditions.
Best Practice: RS-485 harnesses are not included in the Tesla Remote Meter kit. It is advisable to maintain some stock of these harness as a consumable item.
Best Practice: Where practical, or where there is existing conduit, Tesla encourages the use of RS-485 connections to Tesla Remote Meter for better system performance.
| Connection | Wired | Wireless |
|---|---|---|
| Max Distance | 328 ft (100 m) 24-16 AWG (0.2-1.5 mm2) communication wiring | Site-specific depending on obstructions such as walls and Wi-Fi interference |
| Pros |
|
Less wiring required |
| Cons | Requires additional low voltage wiring runs | Risk of intermittent communication issues |
Extend Antenna Wherever Possible
When using Wi-Fi as the connection method, remote meters placed inside of load centers can be subject to signal interference, especially when a deadfront is installed. For best performance, always attempt to extend the antenna where possible.
Best Practice:Use the included antenna extension cable and extend the antenna through a ¼-inch hole; if the load center is installed outdoors, the hole must be in the bottom of the load center to prevent water intrusion.

Updating Tesla Remote Meter (After Pairing and Configuring CTs)
In many cases, Tesla Remote Meter will require an update after pairing. Before updates are completed, installers may see a “Meter Data Unavailable” message. Select Start System to initiate the meter update, then track the progress of the update by selecting System > Metering tab.
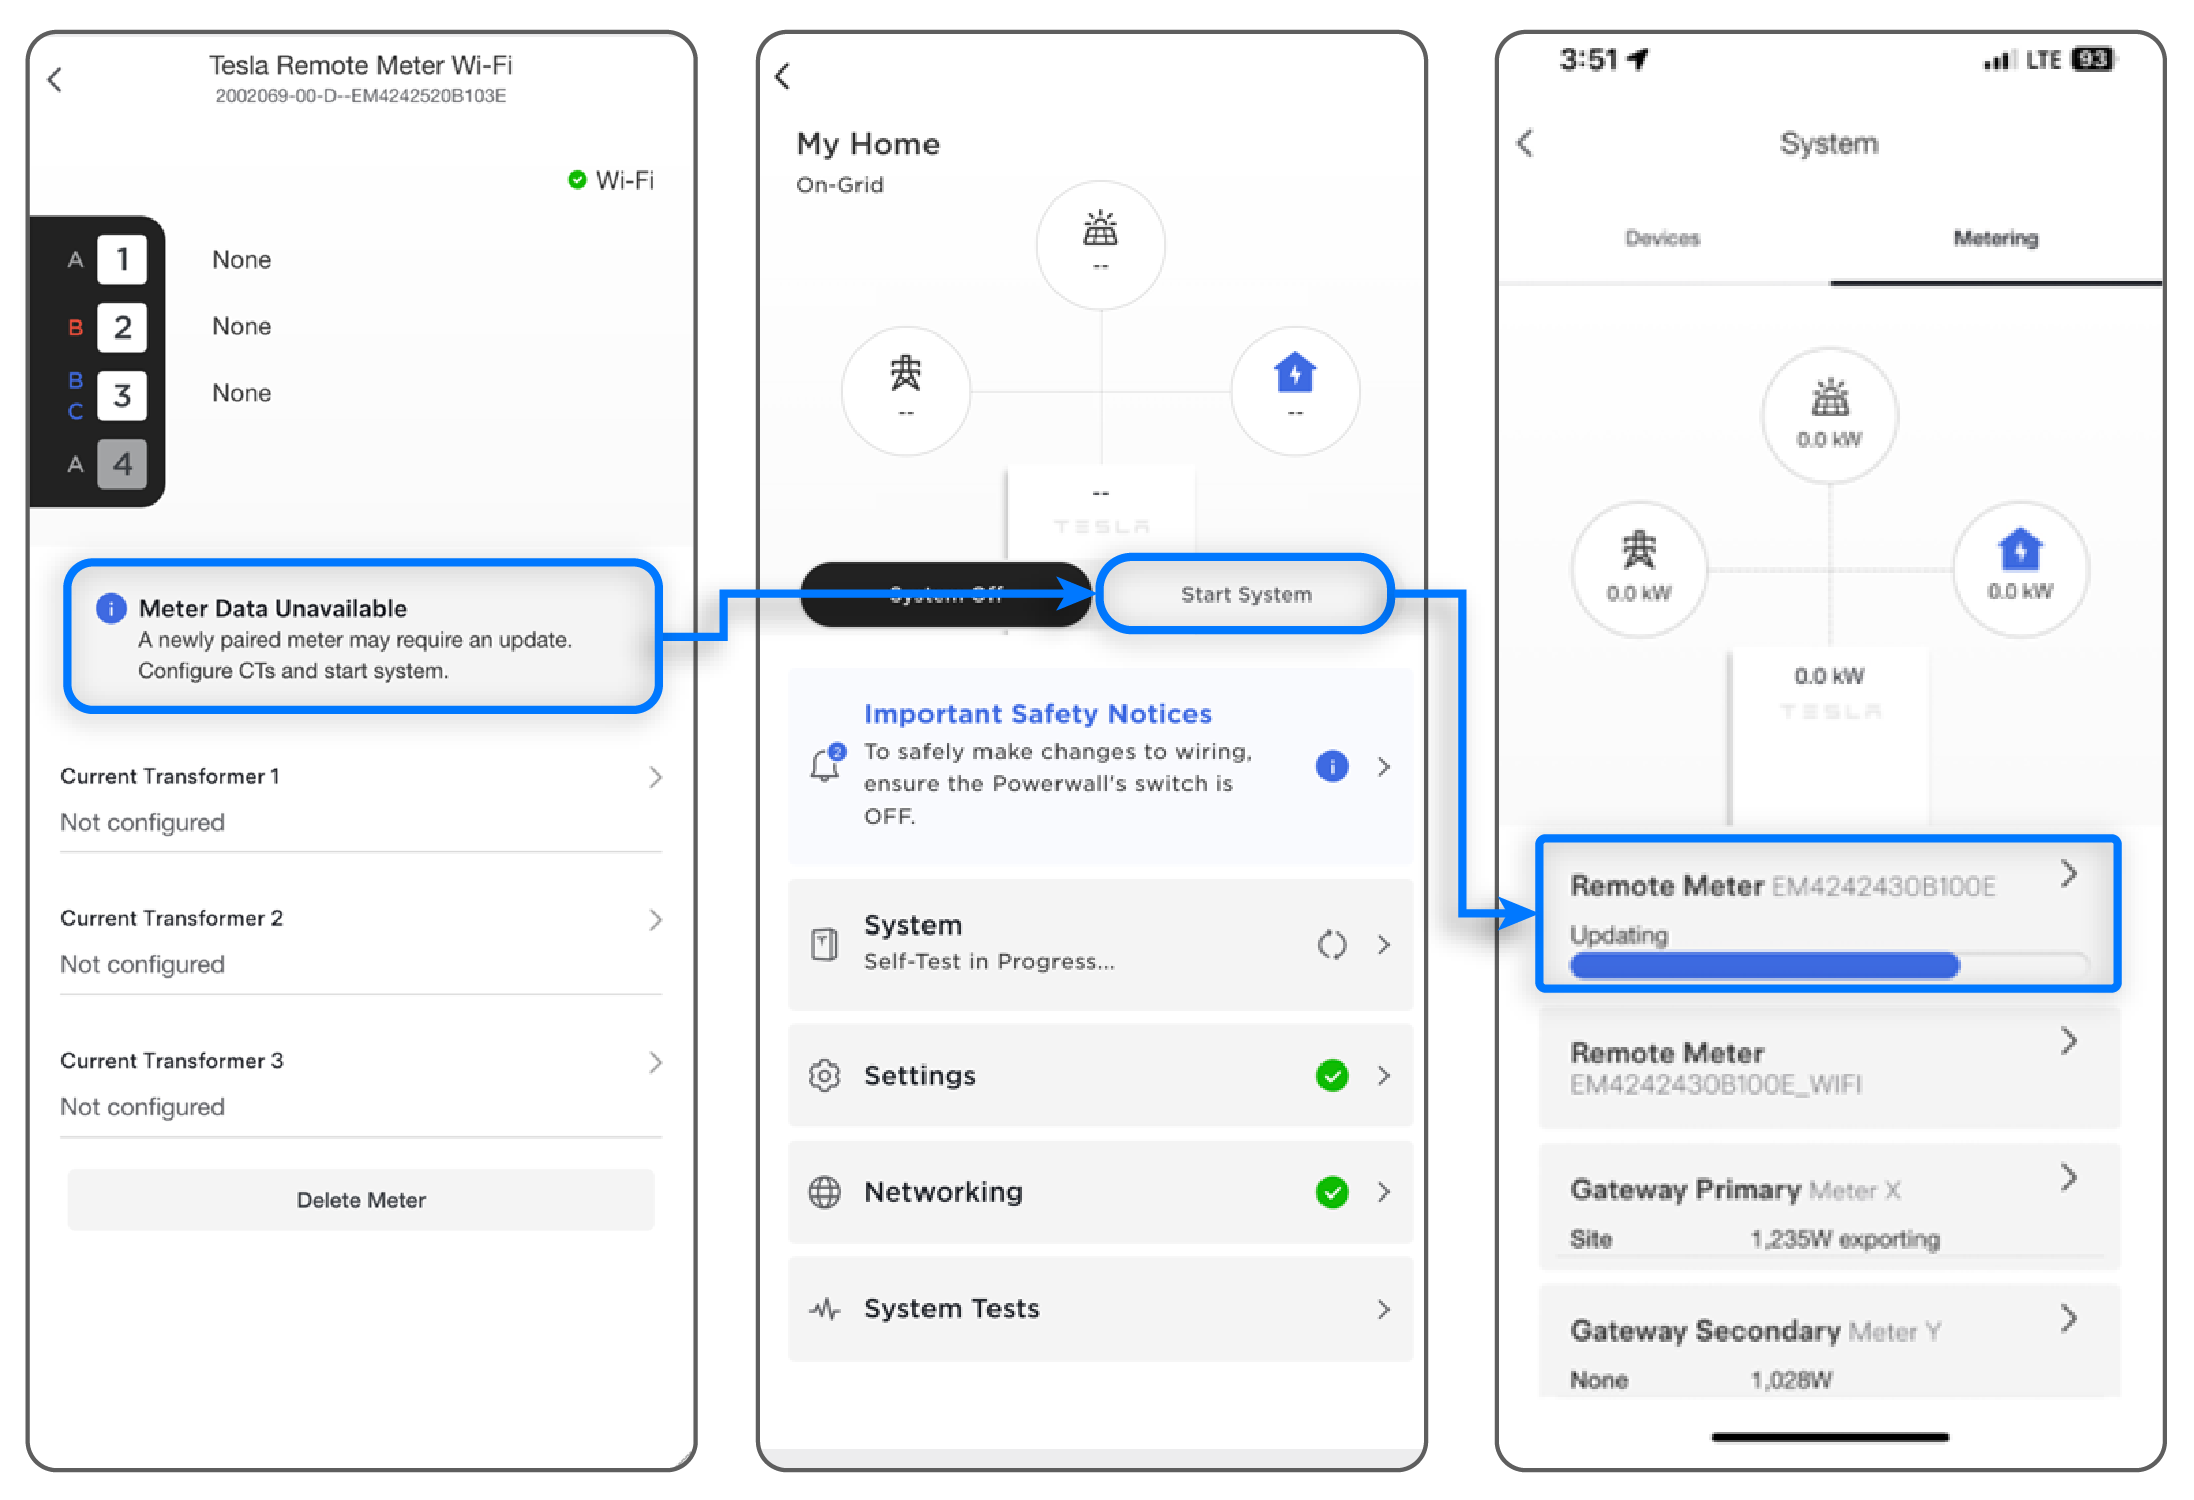
Best Practice: After pairing, Start System and ensure all device updates are completed before troubleshooting Tesla Remote Meter. This may take ~10min as it will include all Powerwall, Gateway and/or Backup Switch updates.
Best Practice: Retry meter updates by selecting Stop System, then Start System in Tesla One.
Best Practice: When using Wi-Fi, if you continue to encounter ‘Meter Data Unavailable’ after multiple attempts to update (including stopping then starting the system to power cycle it between attempts), try using an RS-485 connection to update the meter, which is often more reliable.