Add Follower Powerwall 3 and/or Expansion Units
Designate the Powerwall 3 Leader
The Powerwall 3 connected to the Backup Gateway over 12V/CAN wiring is designated as the Leader Powerwall 3. Before connecting to any Powerwall 3, note which unit is the Leader; any other unit(s) are Followers.
Note
As described in the following
procedures, only commission and register the Leader Powerwall 3. Do not attempt to
commission or register any Follower units.
Note
As shown below, Expansion units must be connected to
the Leader Powerwall 3. They will not
function if connected to a Follower unit.

Connect to Leader and "Scan for Devices" to Pair Follower(s) and/or Expansion Units
Note
Before you pair a Follower
unit, ensure that each Powerwall 3 is on software version
24.20 or later. See Launch Device Setup in Tesla One and Update Powerwall 3 Software to find the software version. If a Powerwall 3 is on an earlier version,
update the software, and do not perform any other commissioning steps on any
Follower unit.
- Connect to the Leader Powerwall 3 in the Tesla One Device Setup interface. See Launch Device Setup in Tesla One for instructions.
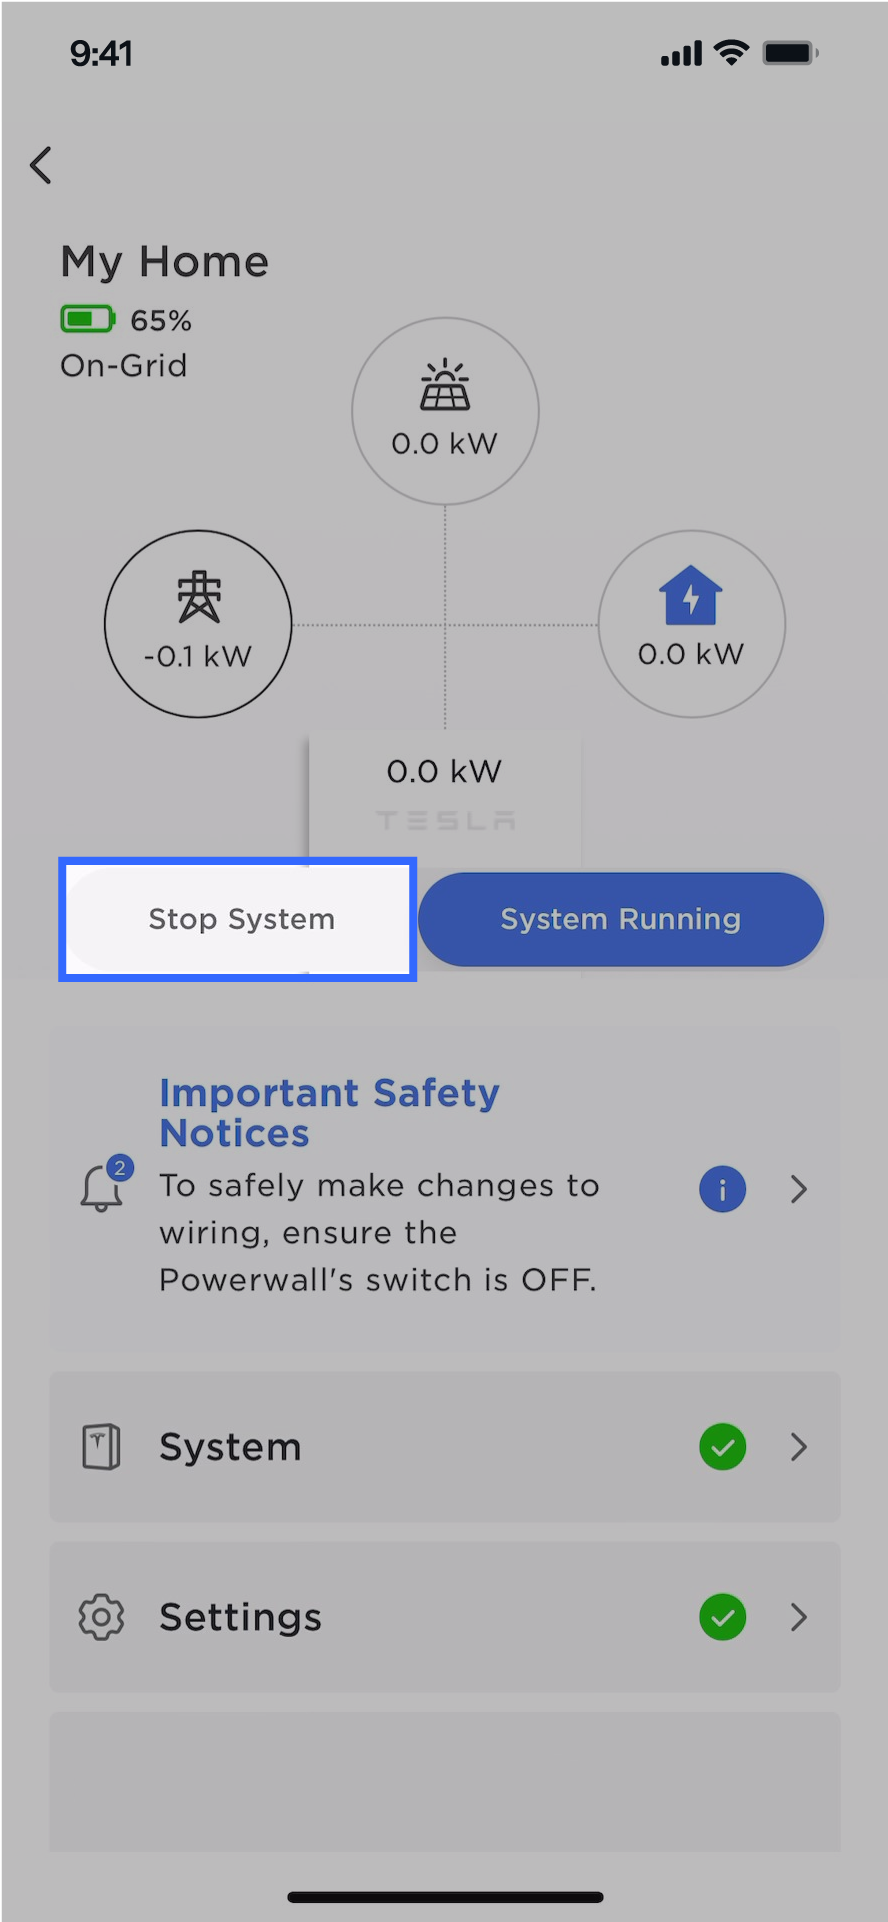
- On the landing page, select
Stop System.
- Select .
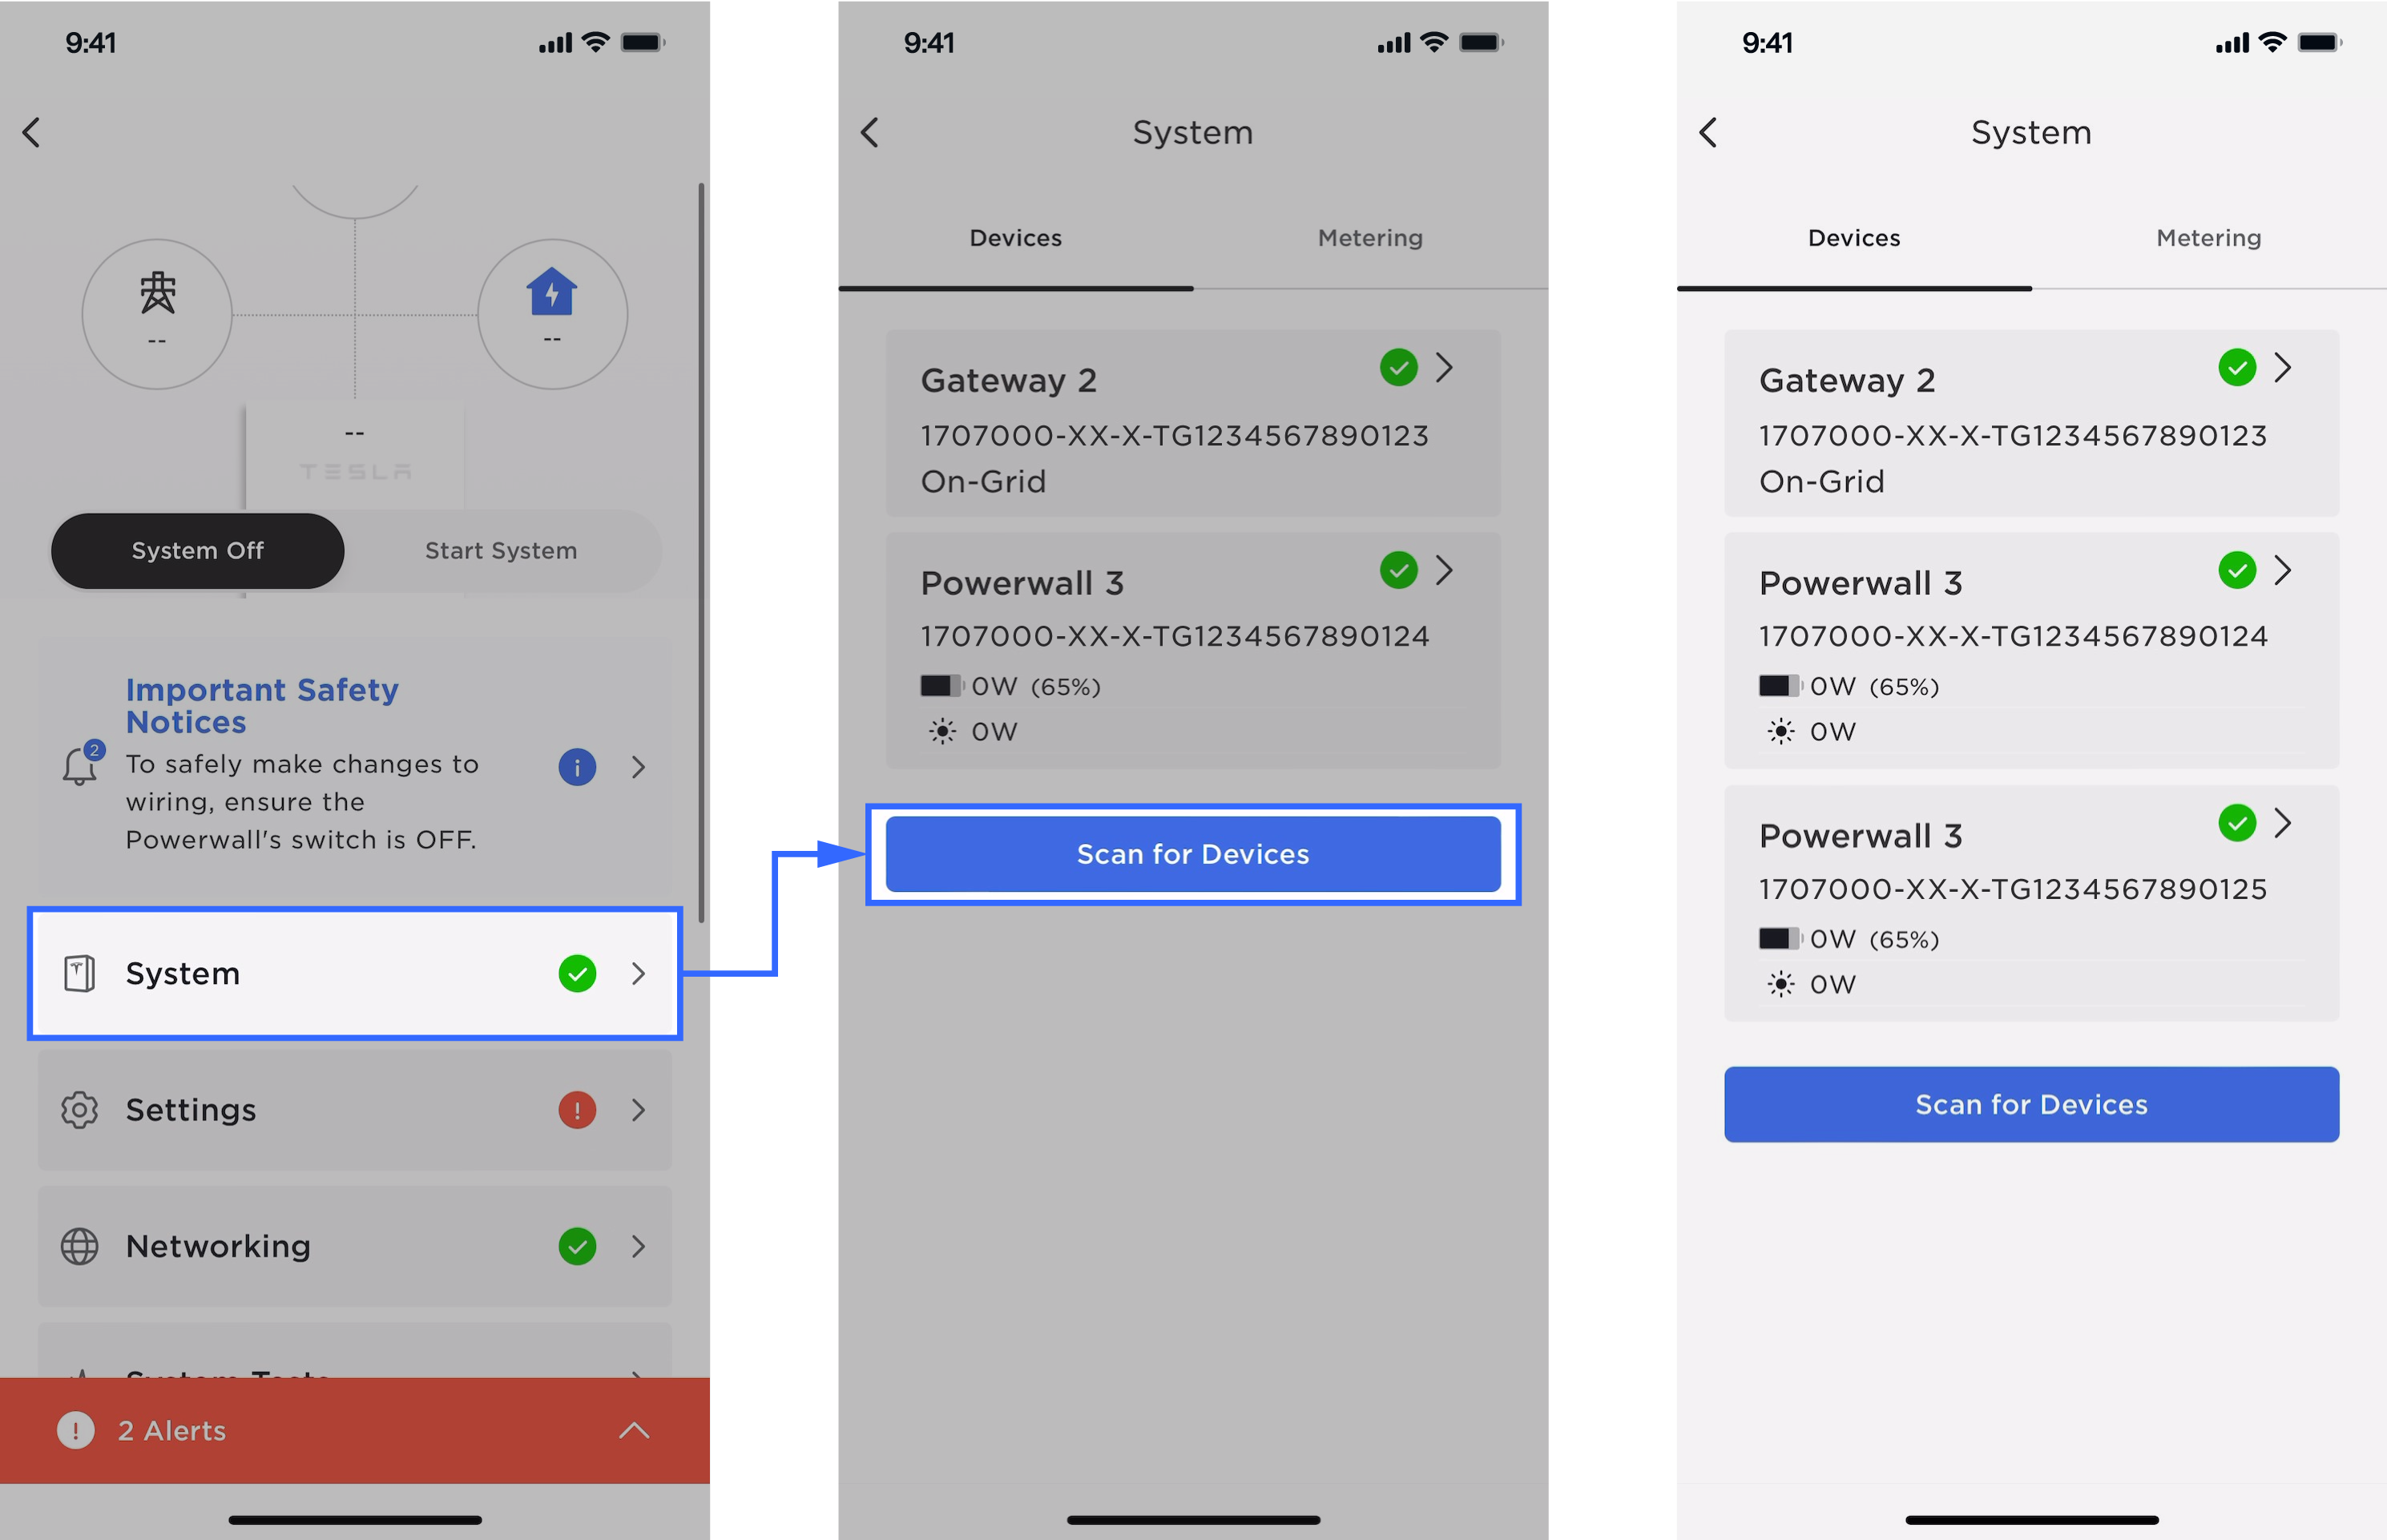 NoteConfirm all Follower units appear before proceeding. A green checkmark indicates the device has successfully paired.
 - If the system has Expansion units:
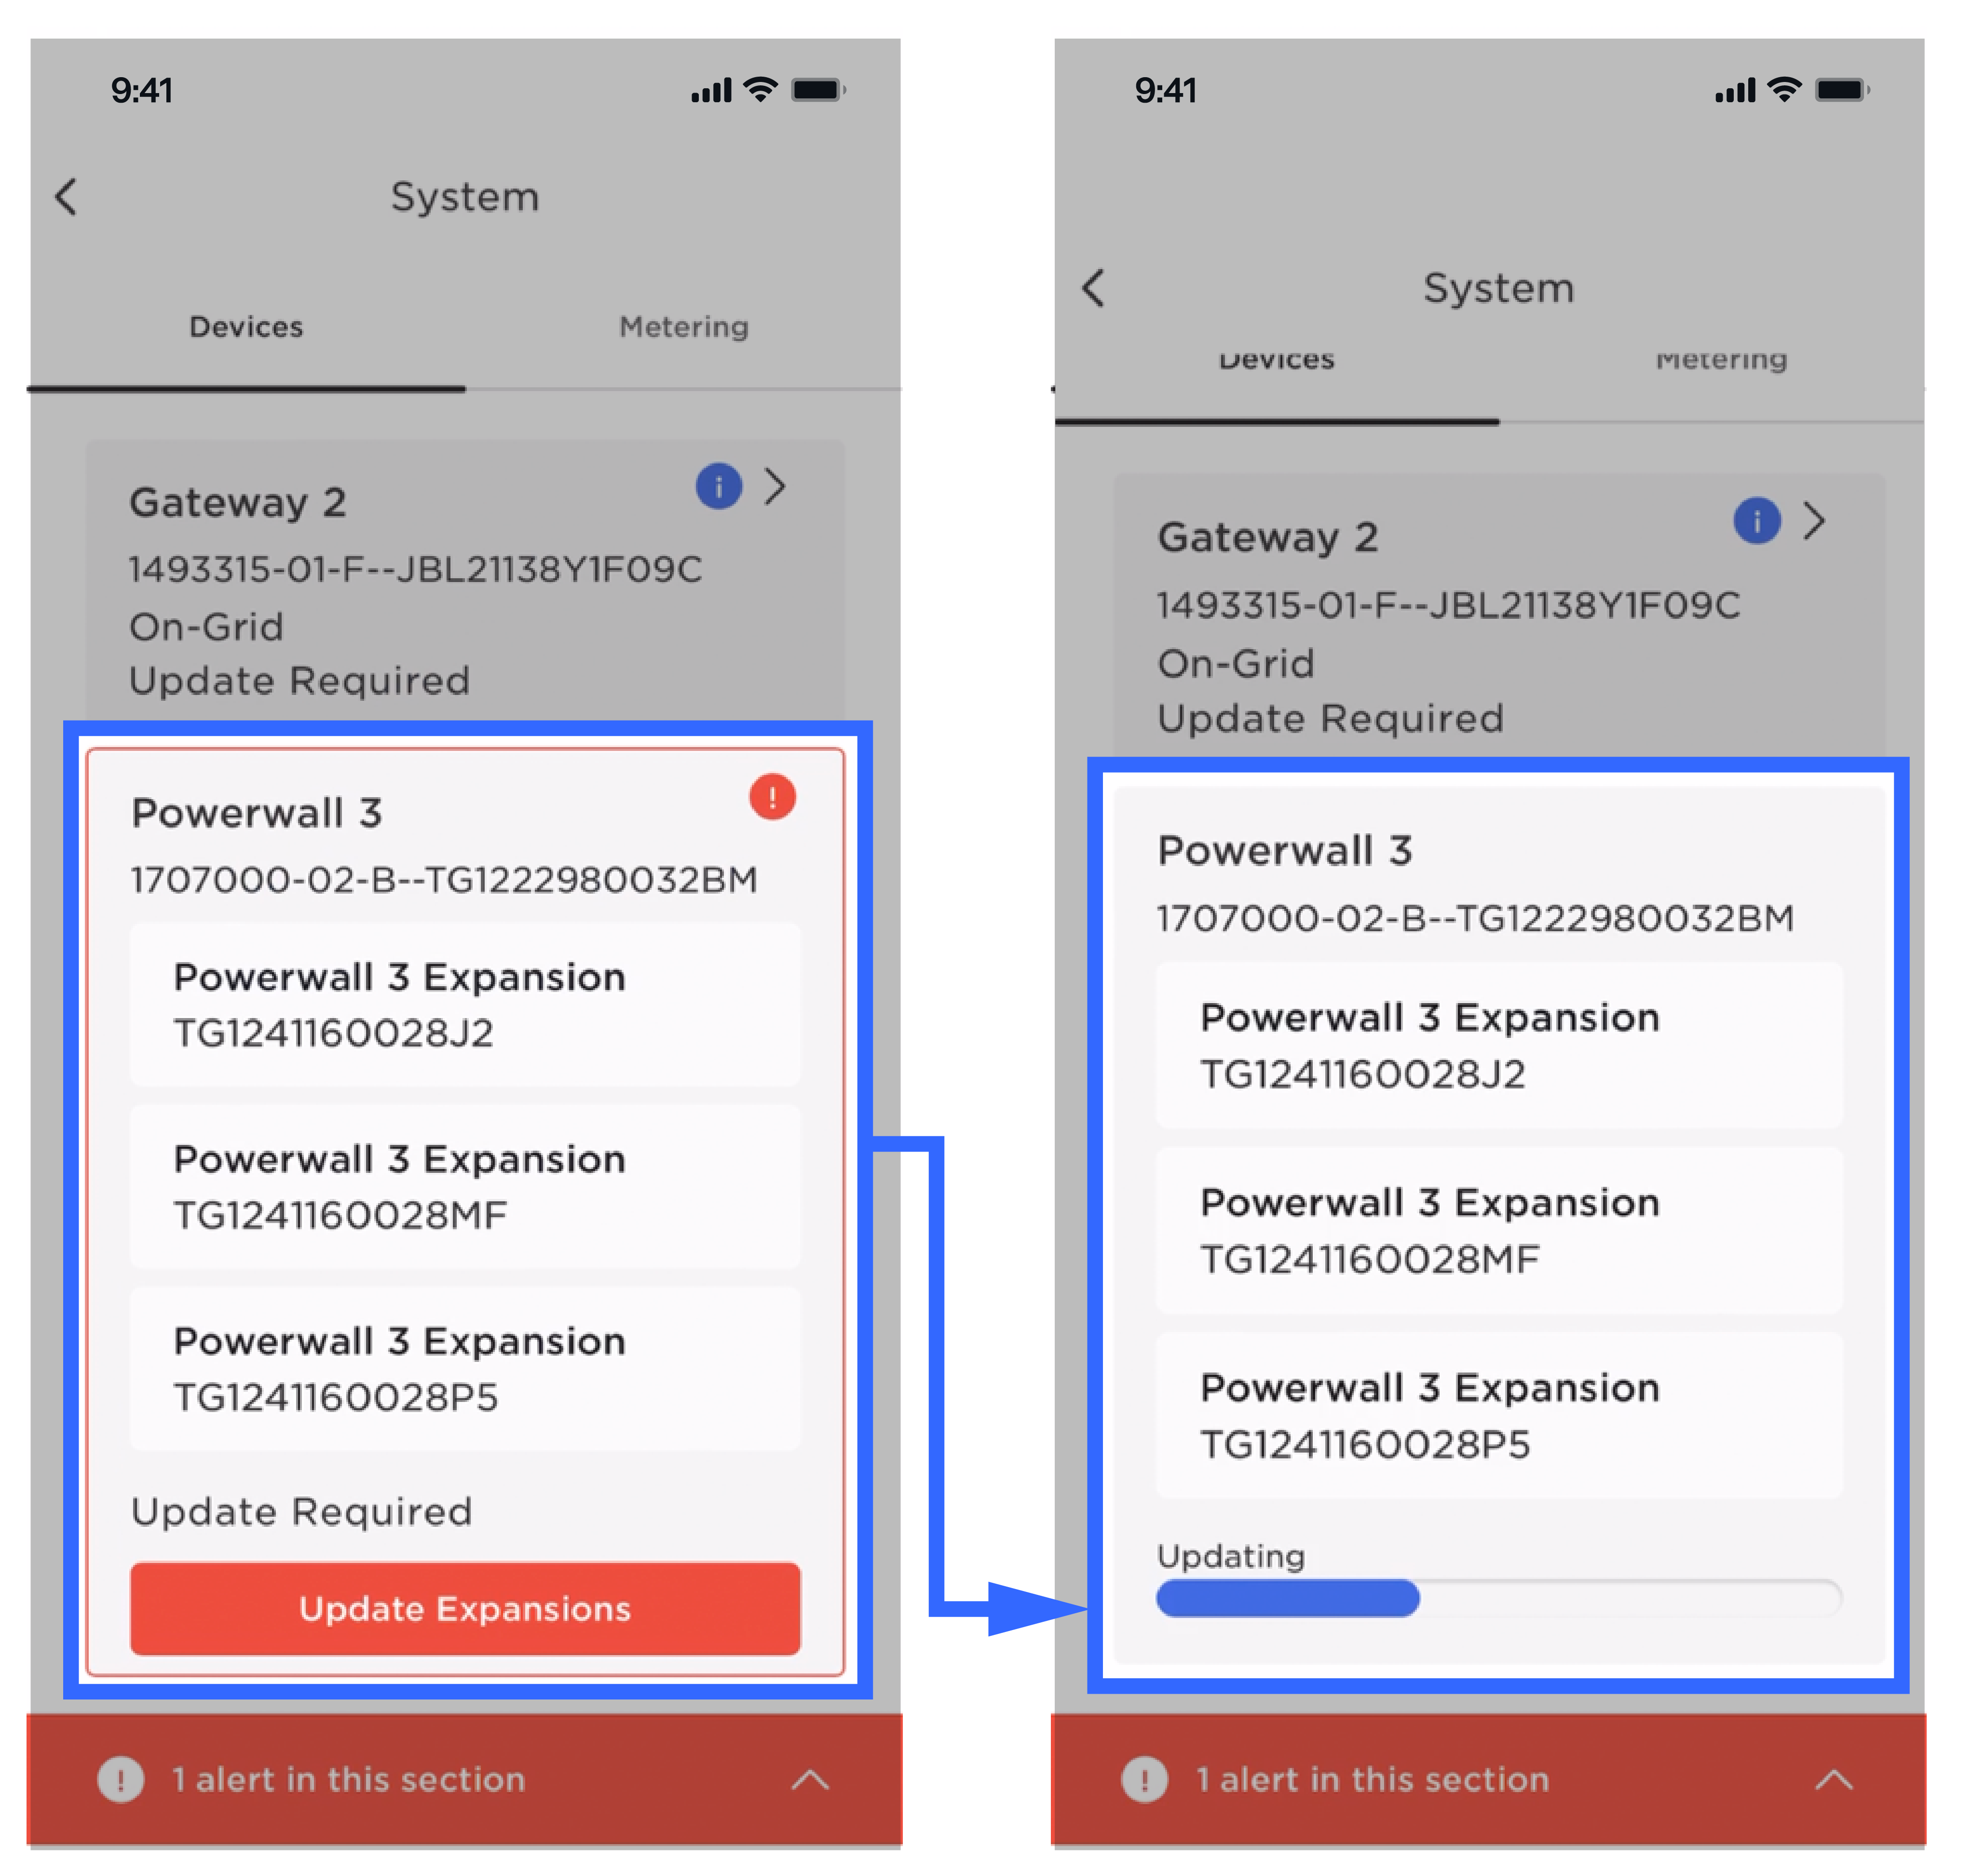
- Confirm the Expansion units appear in
the Devices tab.
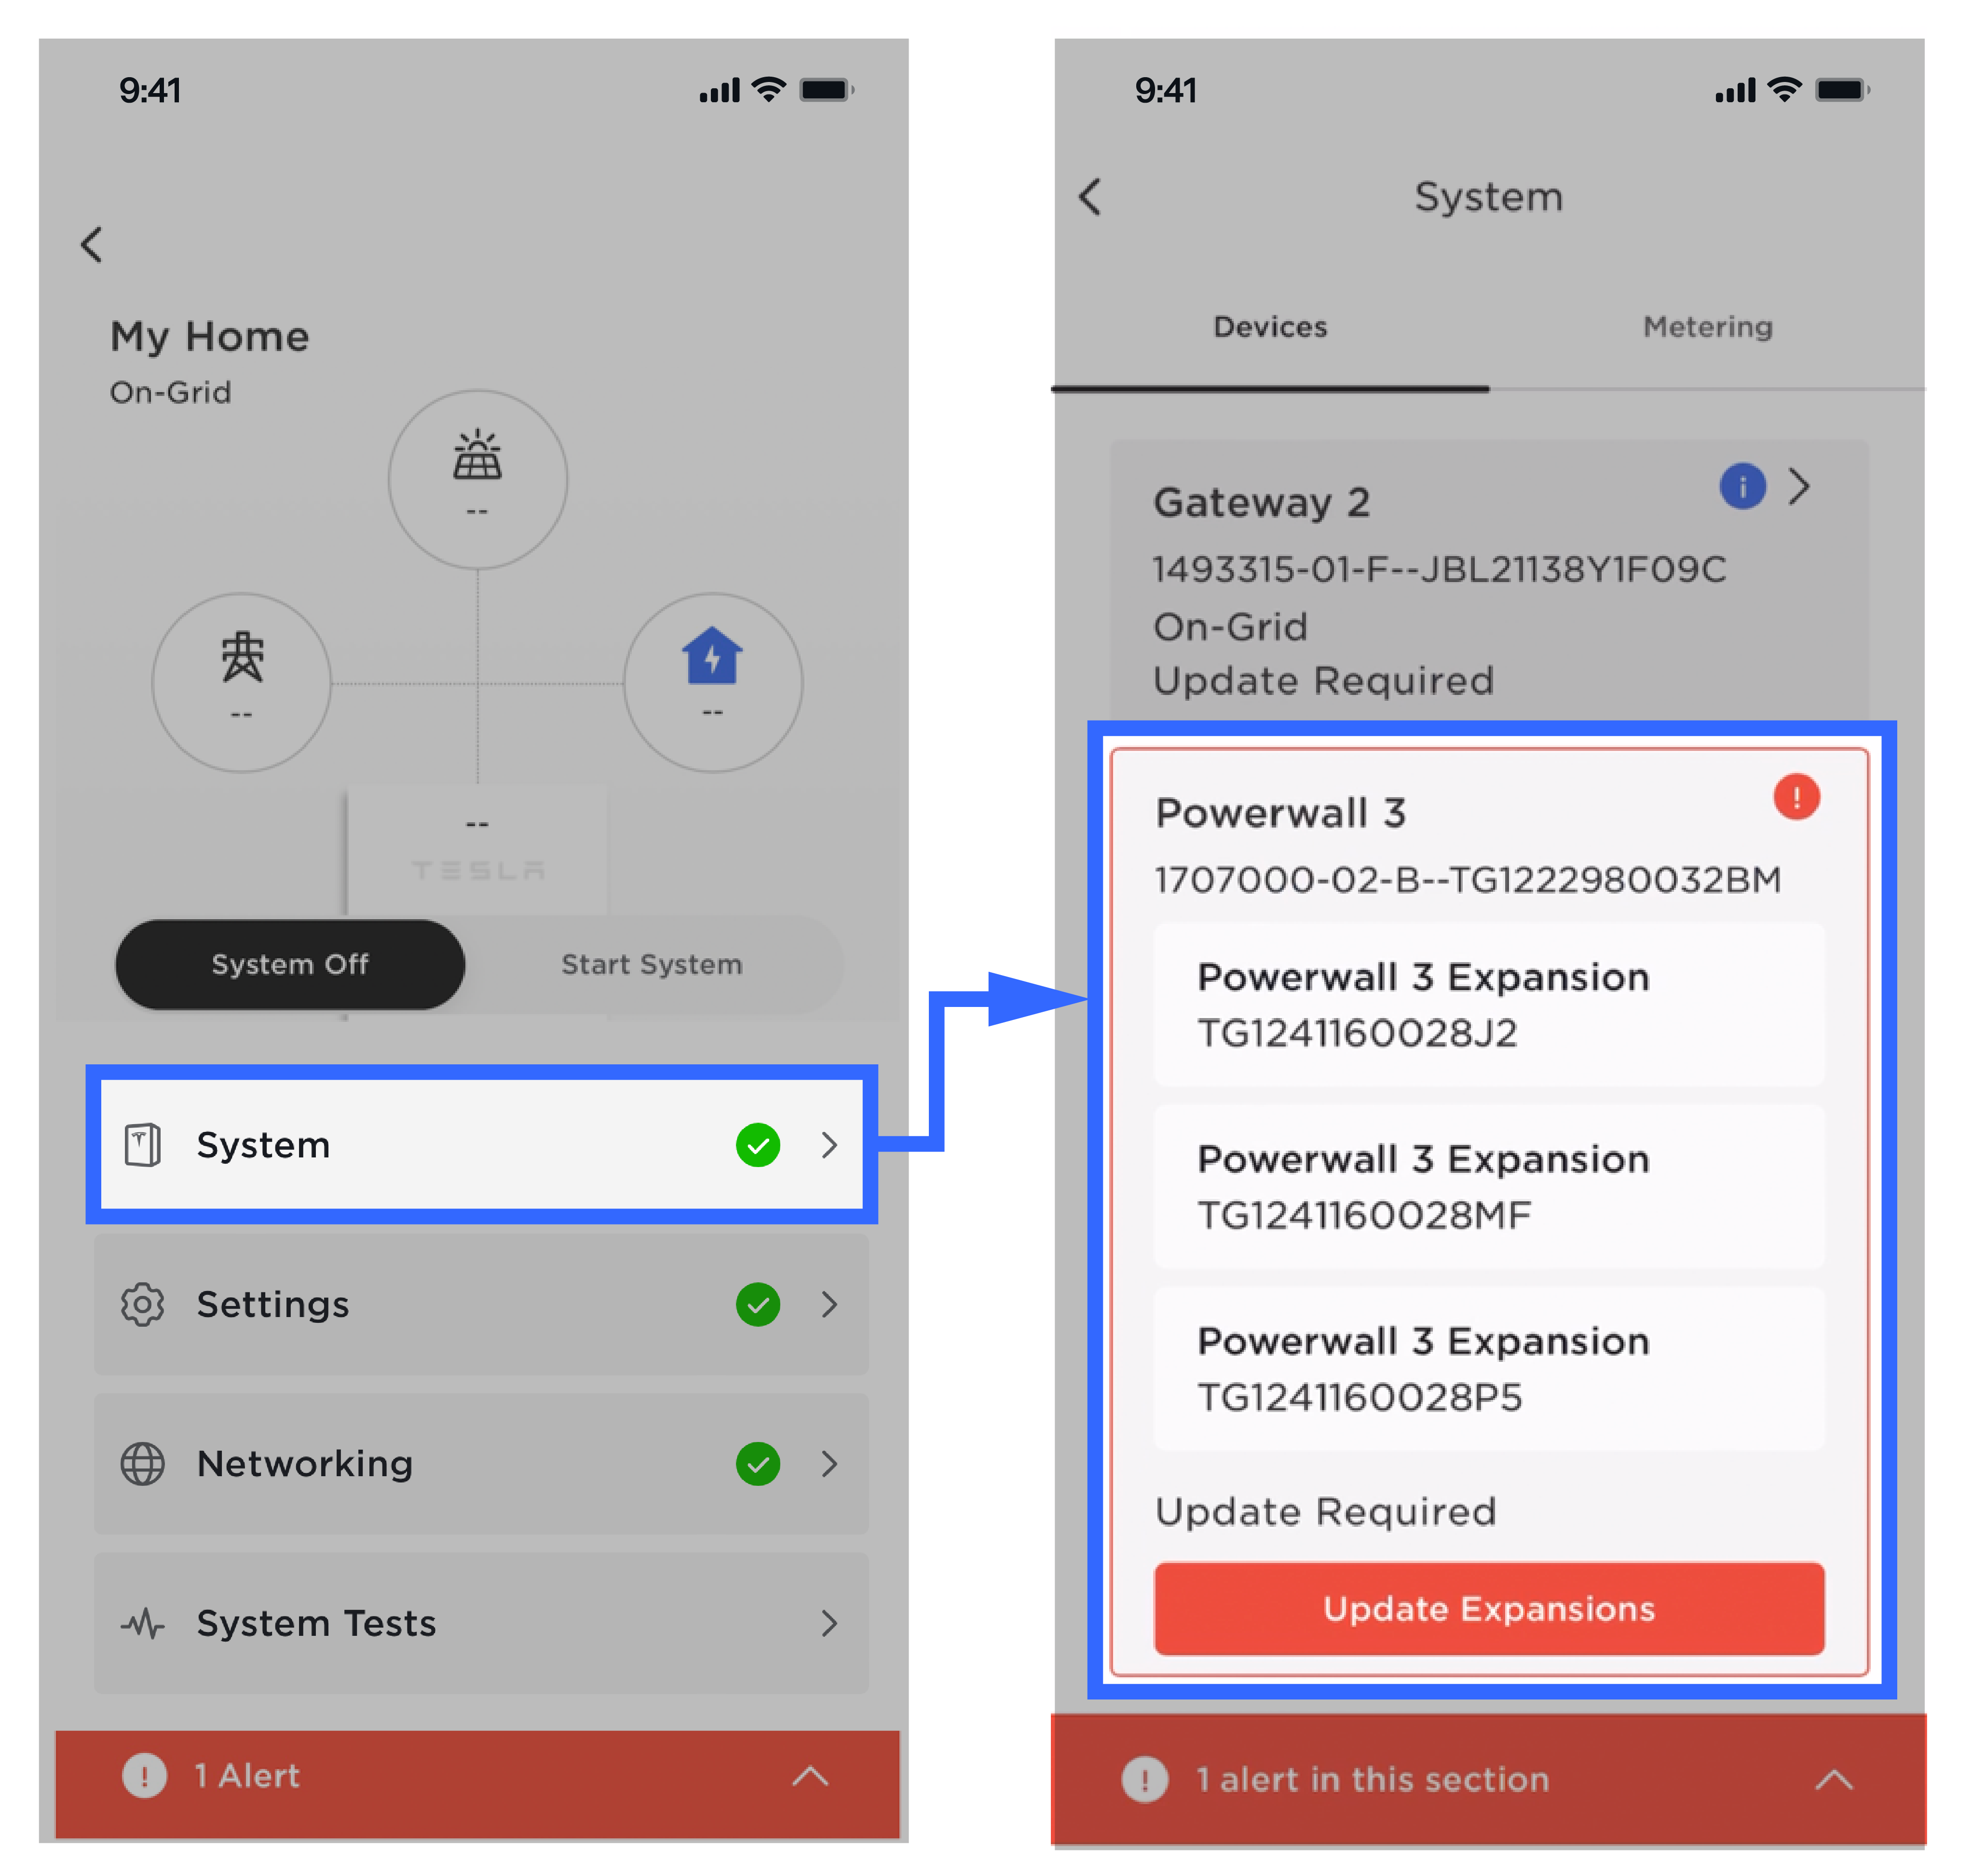
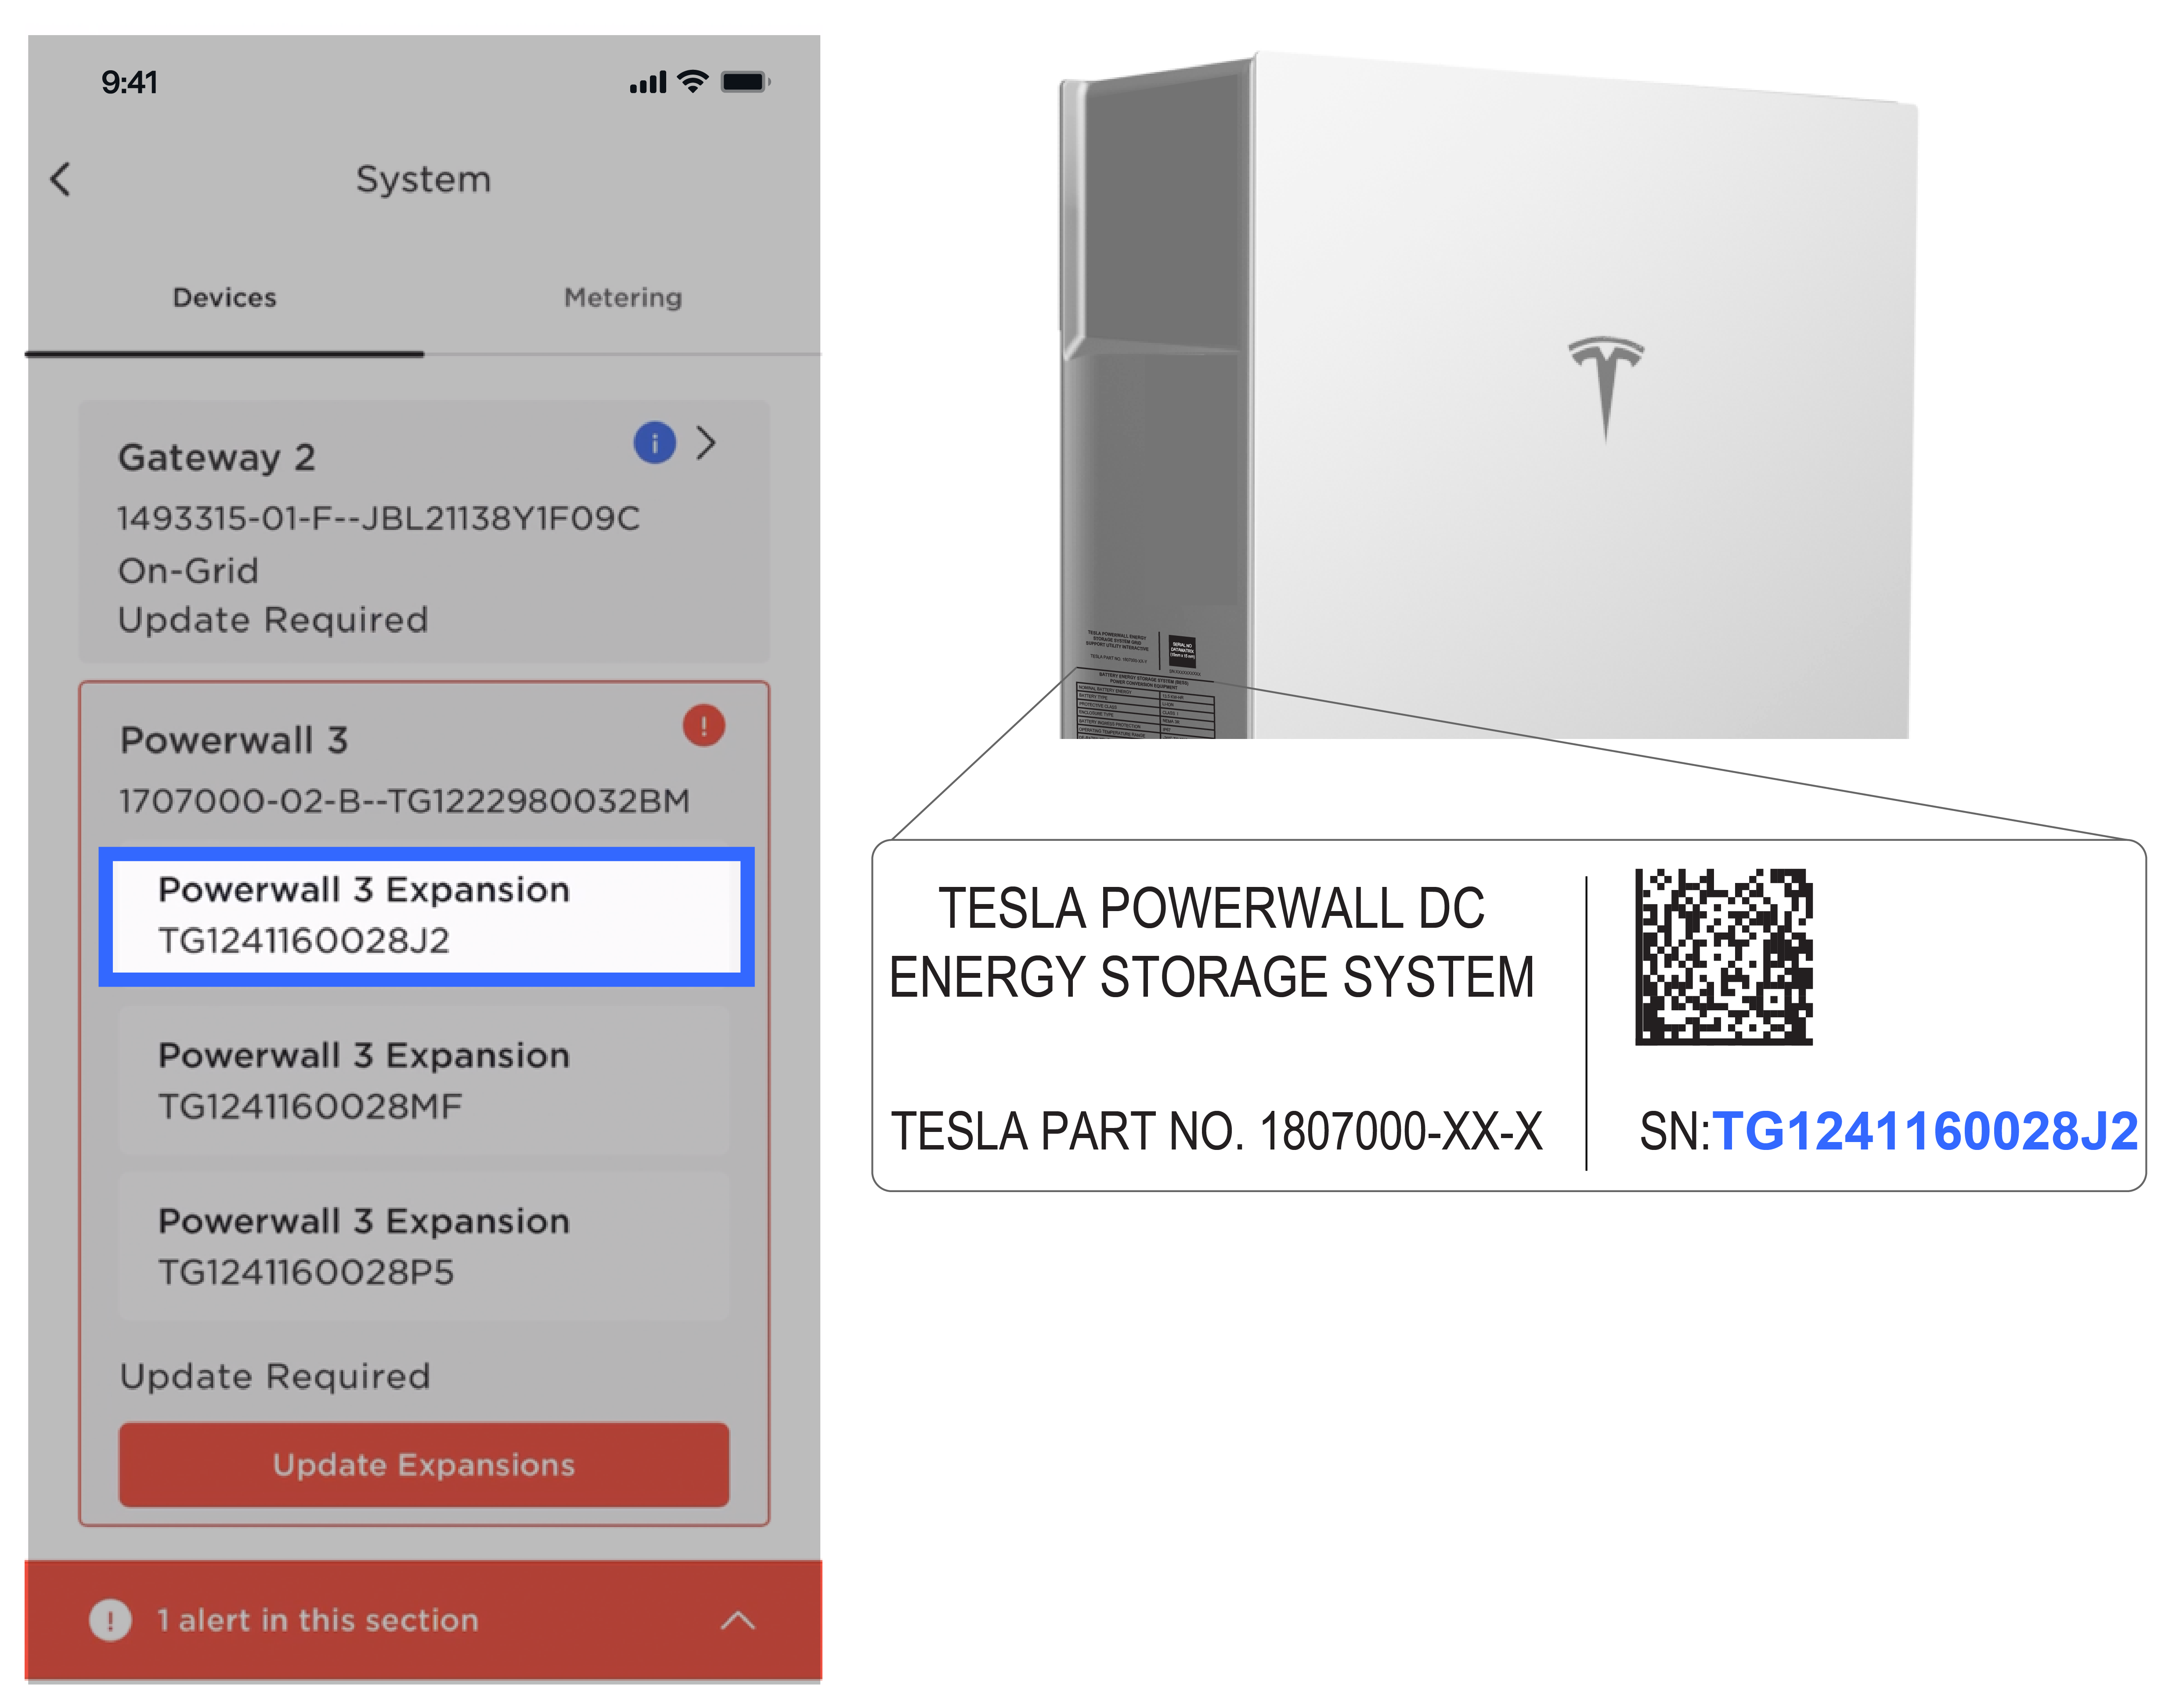
- Confirm the Expansion serial numbers
in Tesla One match those on
the installed units (found on left side of unit).
- Select Update
Expansions.NoteIt should take a few minutes to update each Expansion.
- Confirm the aggregate
Battery State of Charge (SOC) for Powerwall 3 and Expansion units is
healthy (>10%).
- If the SOC is <10%, ensure Device Setup has been successfully completed. If Device Setup could not be completed, turn the Powerwall 3 switch OFF and leave the Powerwall 3 breaker closed to enable charging.
- Confirm the Expansion units appear in
the Devices tab.
- While connected to the Leader Powerwall 3, return to the landing page and select Start System.
- Wait for all device firmware updates to complete (to view progress, select System then review the Devices tab).
- If the system includes Expansion units, Calibration will automatically begin, with the system
calibrating (1) Expansion unit at a time. Within
approximately one minute, Tesla One will display Calibration in
Progress.NoteExpansion units have an internal relay that is initially opened. To close the relay, the voltage of each Expansion unit must be the same as the other units. The calibration process charges OR discharges the Powerwall 3 to match voltages across the units.NoteNo installer action is necessary during calibration; as it may take from a few minutes to a few hours, it is not necessary to remain at the site until calibration is completed.

- Confirm there are no alerts and both solar and battery are operating for all Powerwall 3 units.
- Perform Backup Test to
confirm the system is operating as expected. See Perform Backup Test for
instructions.NoteThe Backup Test is required and can be performed during calibration.
- Select Registration and
register the system to the customer.NoteThis will register the Leader Powerwall 3 and any Follower(s) to the customer.