Quick Guide: Commissioning Powerwall 3 in Tesla One
- Launch device setup in Tesla One:
- Launch the Tesla One app and log in with
your Tesla Partner Portal account credentials.NoteSee Install / Update Tesla One for instructions to install Tesla One if it has not already been installed on the commissioning phone.
- Select .
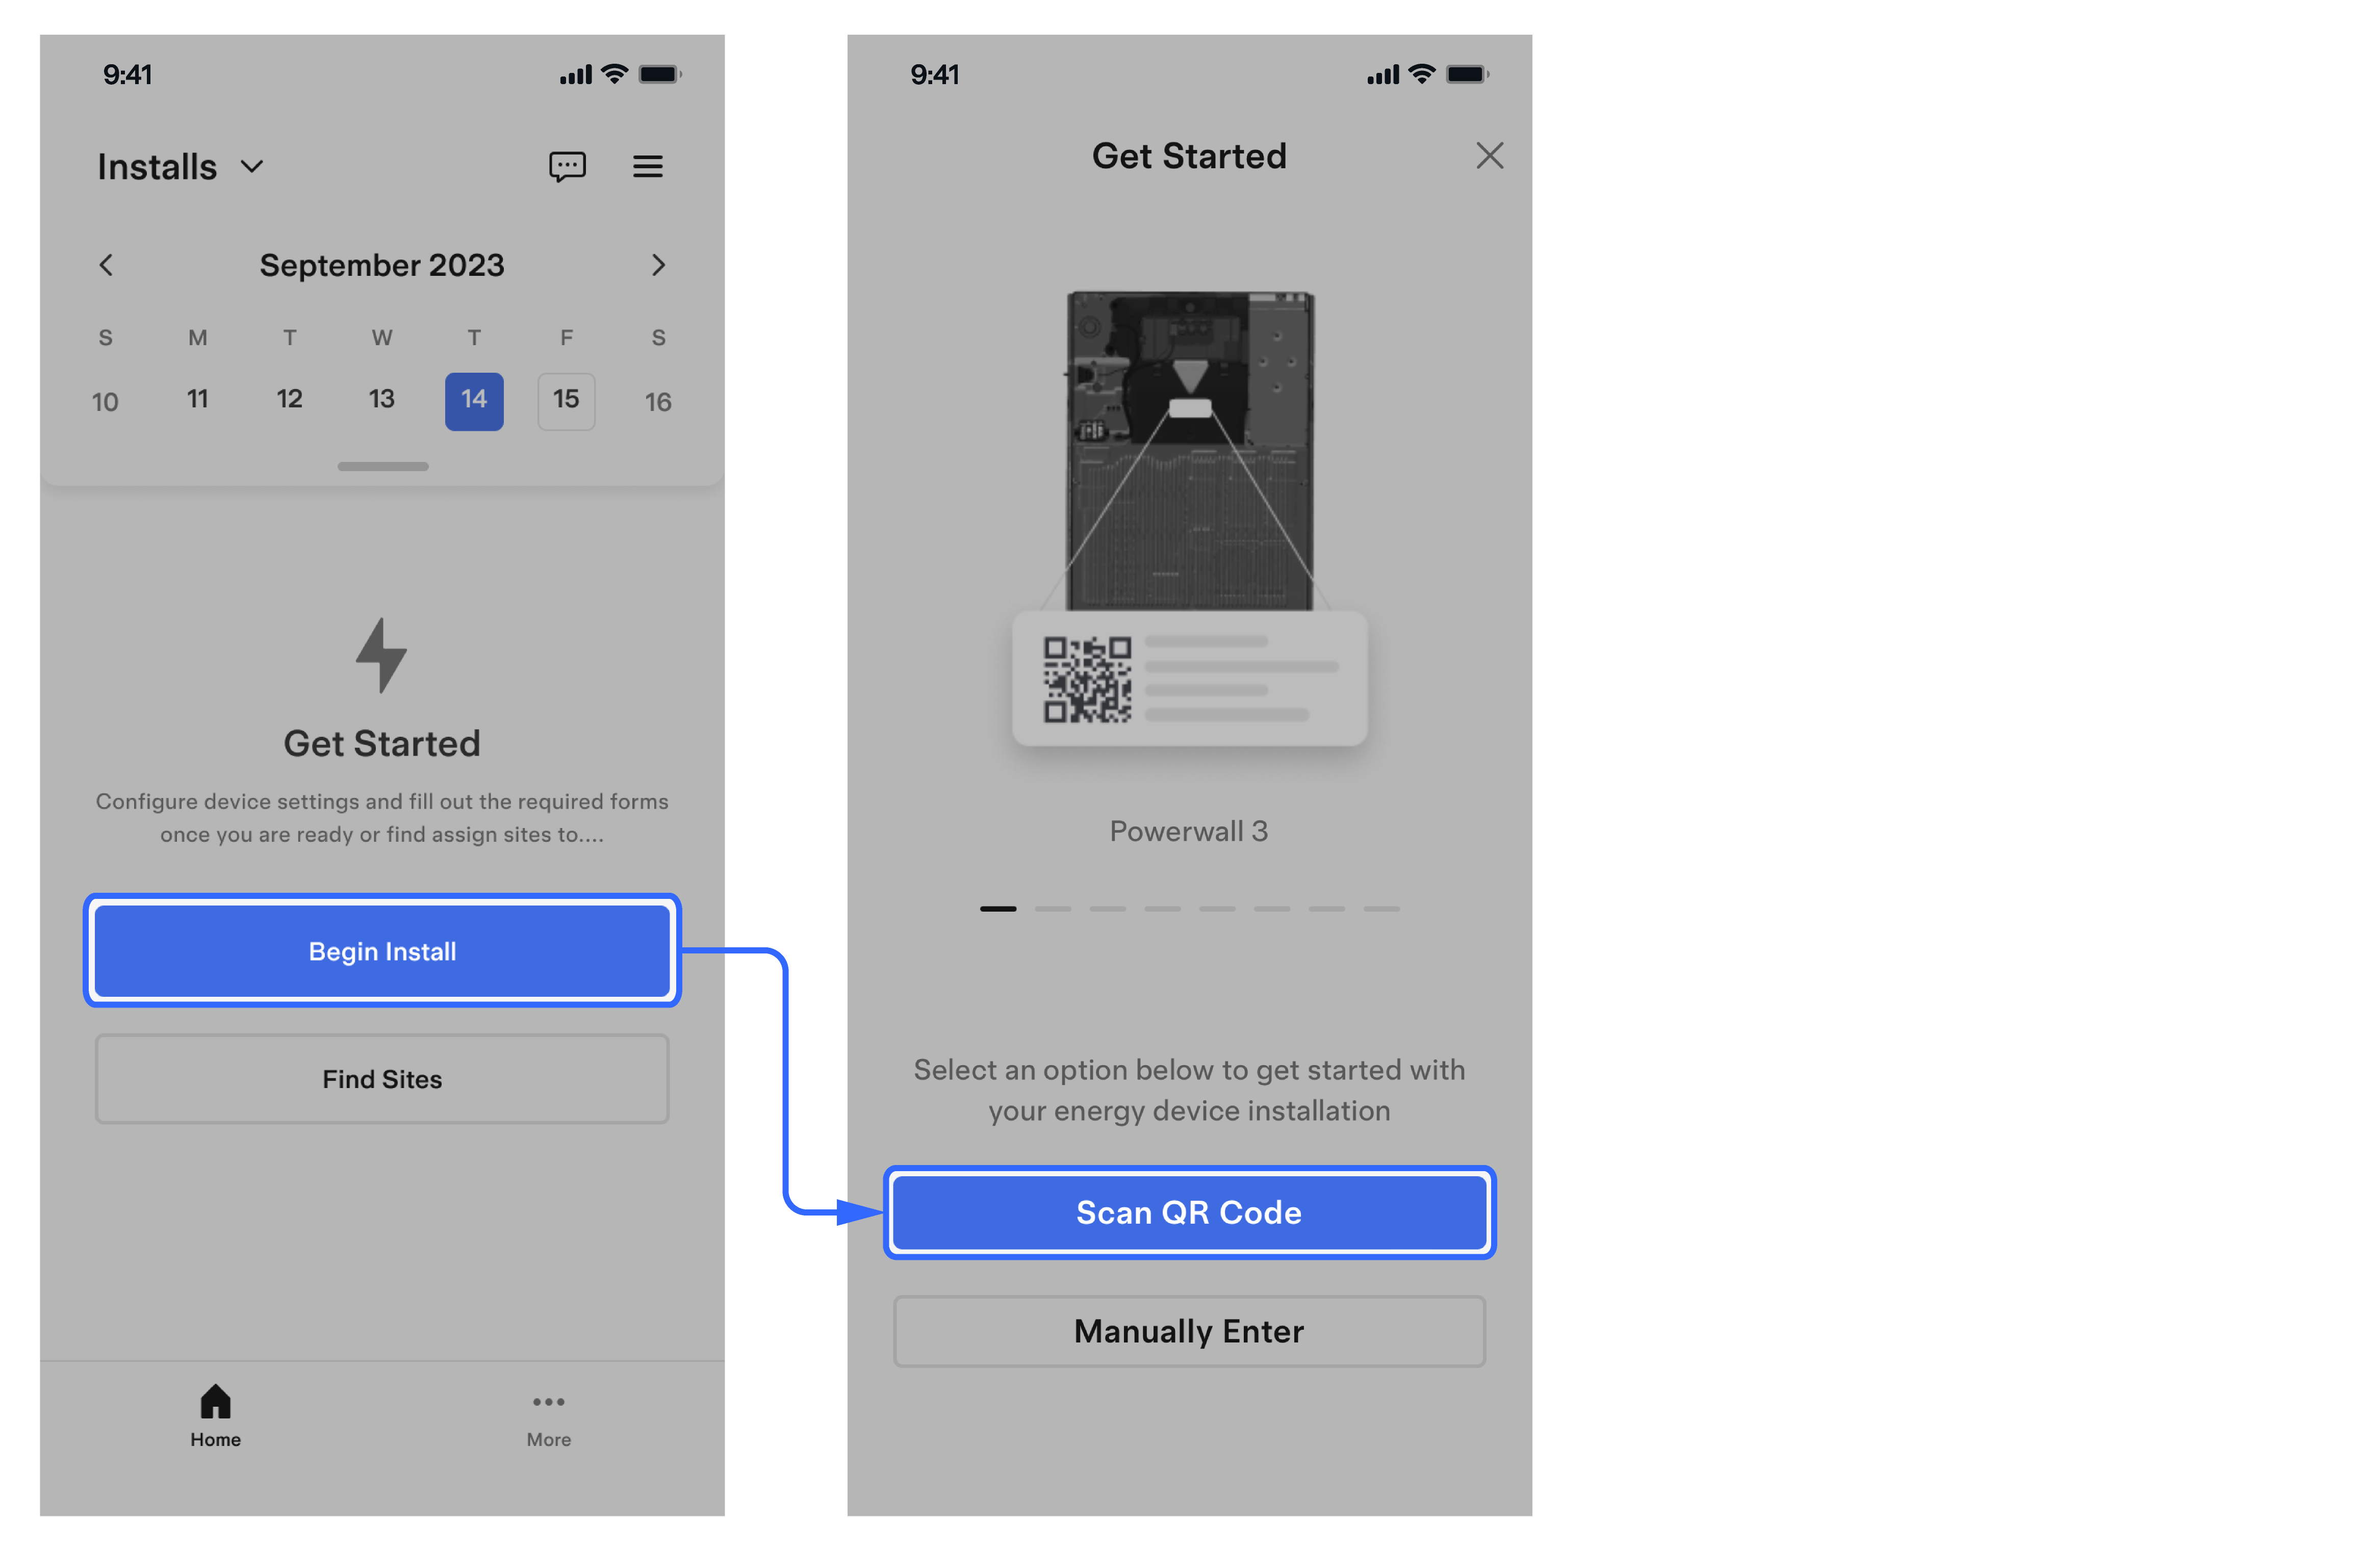
- Scan the QR code on Powerwall 3 to join its Wi-Fi
network and launch device setup.

- Launch the Tesla One app and log in with
your Tesla Partner Portal account credentials.
- Configure the internet
connection:Note
- Internet connectivity is required to receive the full 10-year Powerwall warranty, and for the customer to see their system in the Tesla App.
- For customers without a strong Wi-Fi connection, ensure that Ethernet is connected.
- Select .
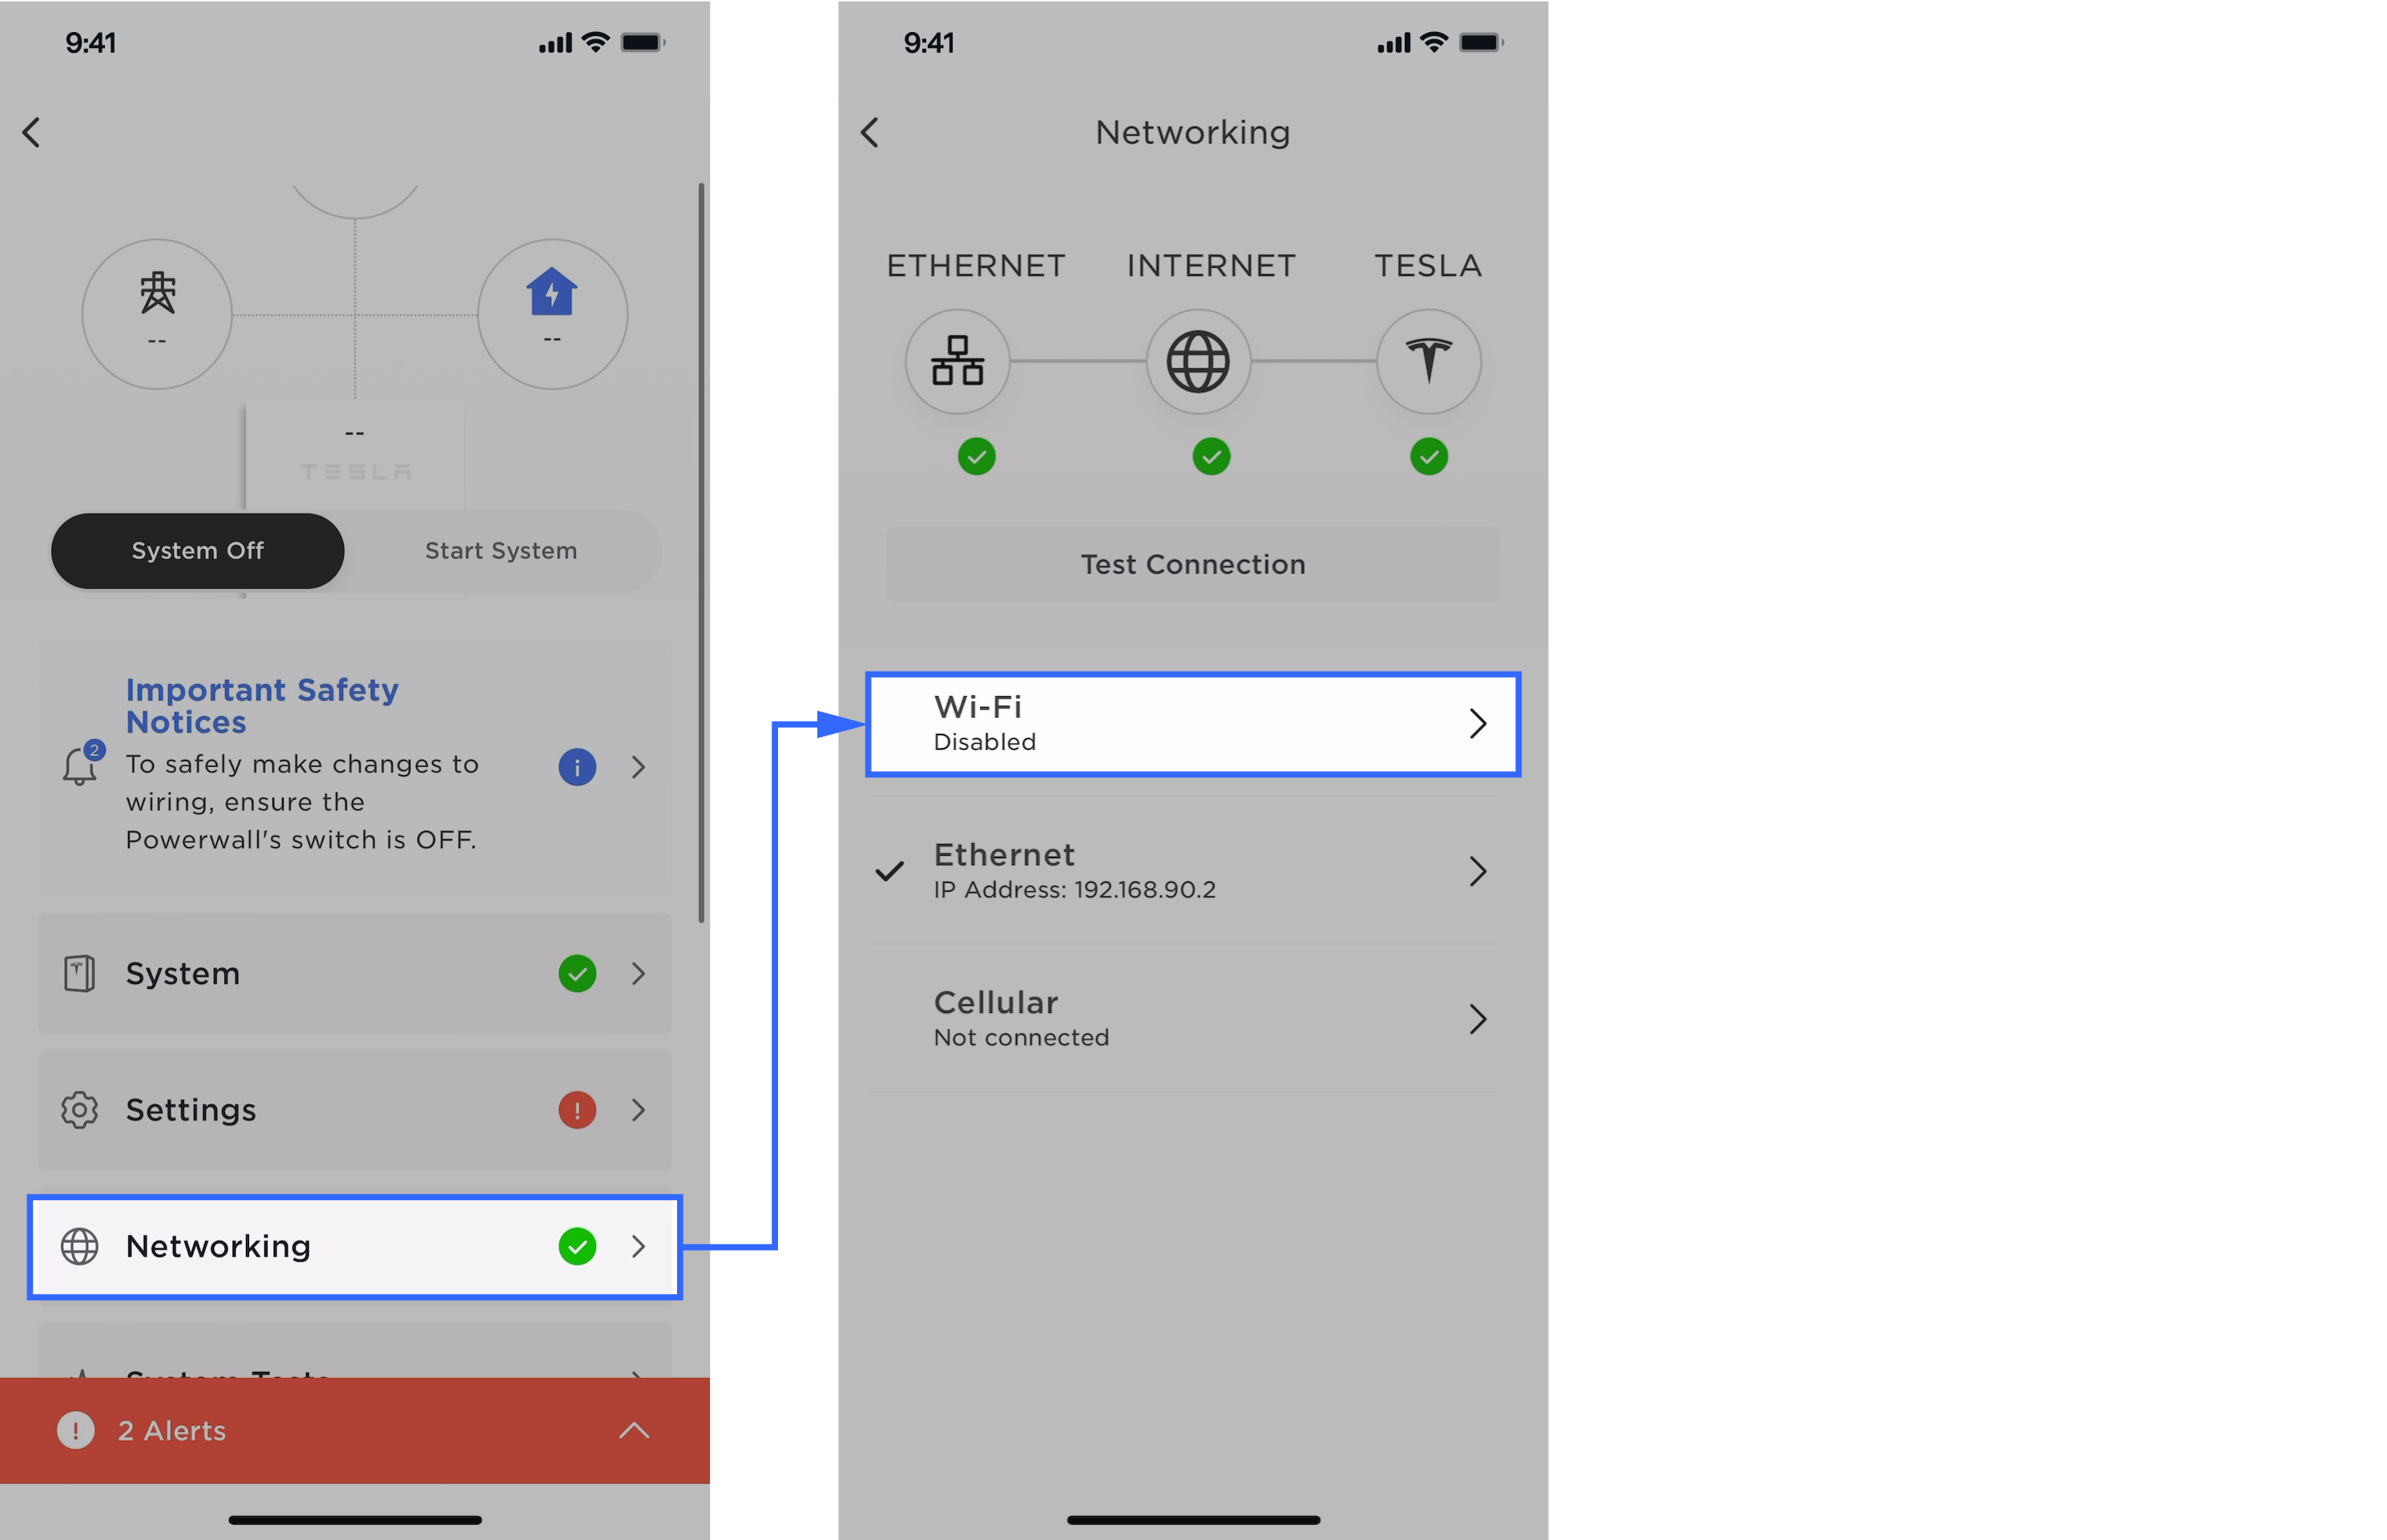
- Select the customer's Wi-Fi network to connect.
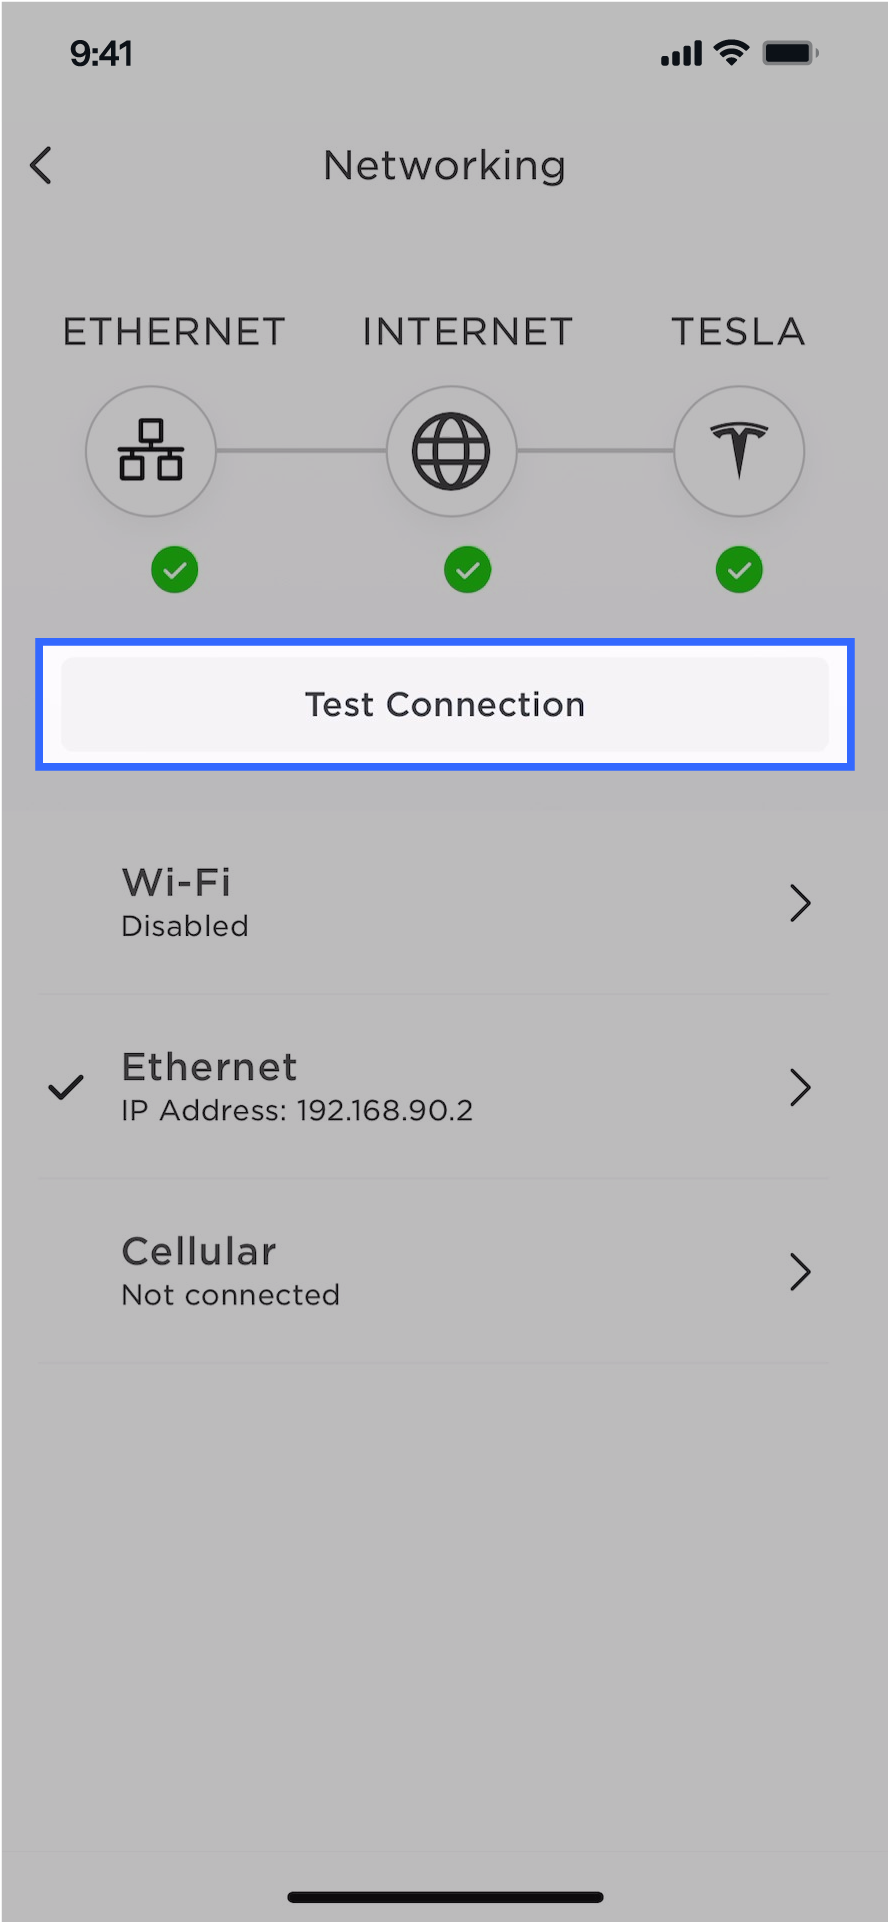
- Select Test
Connection to verify that Powerwall 3 is connected to the internet.
- Check for Powerwall 3 software update and install
if available:
- Select .
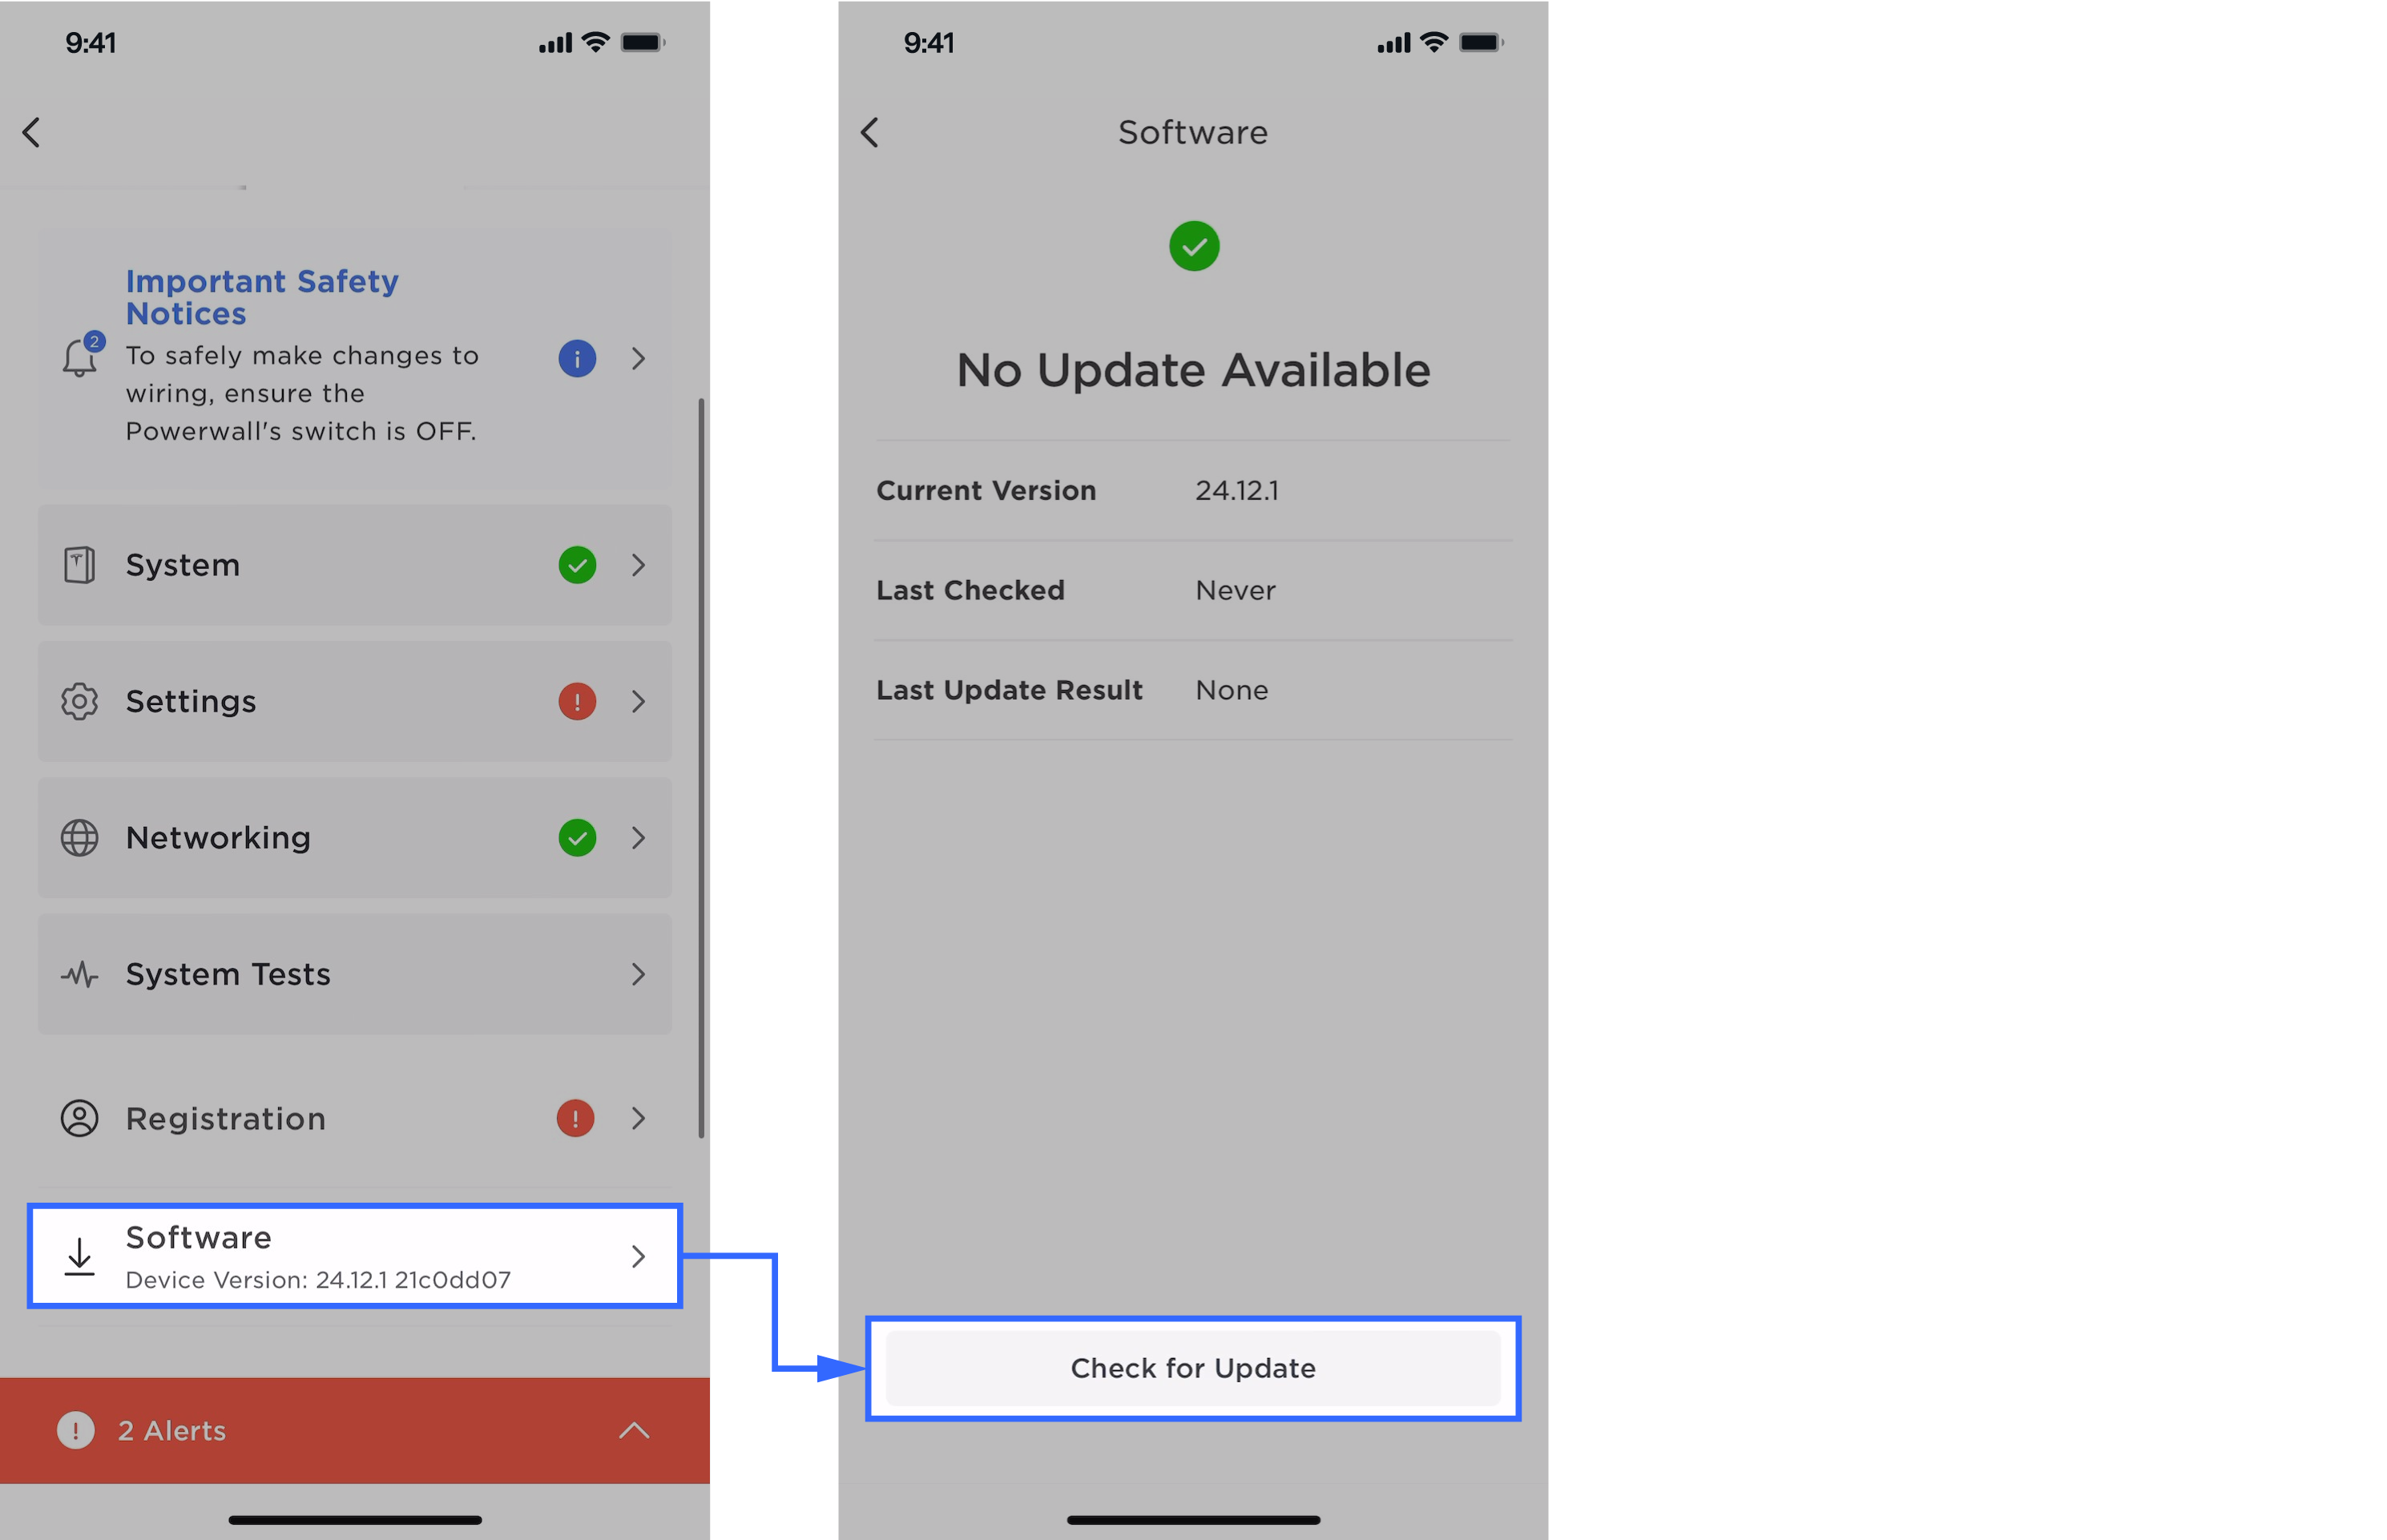
- If an update is
available, select Perform
Update and choose either Download on my
phone (if this option is available) or Download on the Tesla
device.
- Download on
my phone or sideloading allows you
to download an update to your commissioning phone rather than
directly to Powerwall 3. This
method saves time, as cell phones generally have a much stronger
and more reliable mobile connection, allowing for a faster
download. The update downloaded on your commissioning phone can
also be used repeatedly, meaning no software download is
required until a new software version is available; at that
time, the new update can be downloaded to the phone.NoteIf this option is not available, select Download on the Tesla device.
- Download on the Tesla device allows you to download an update directly to Powerwall 3 rather than to your commissioning phone. This method is often used when Powerwall 3 is connected to the Internet via customer's Wi-Fi or Ethernet.
NoteTo learn more, see the Update Powerwall 3 Software. - Download on
my phone or sideloading allows you
to download an update to your commissioning phone rather than
directly to Powerwall 3. This
method saves time, as cell phones generally have a much stronger
and more reliable mobile connection, allowing for a faster
download. The update downloaded on your commissioning phone can
also be used repeatedly, meaning no software download is
required until a new software version is available; at that
time, the new update can be downloaded to the phone.
- Follow the onscreen
prompts to download the software update.NoteWait for the update to be downloaded and installed. Powerwall 3 will reboot and a Lost connection to Tesla Energy Gateway message will display; connect to Powerwall 3 again and select Software to confirm the update was successful.
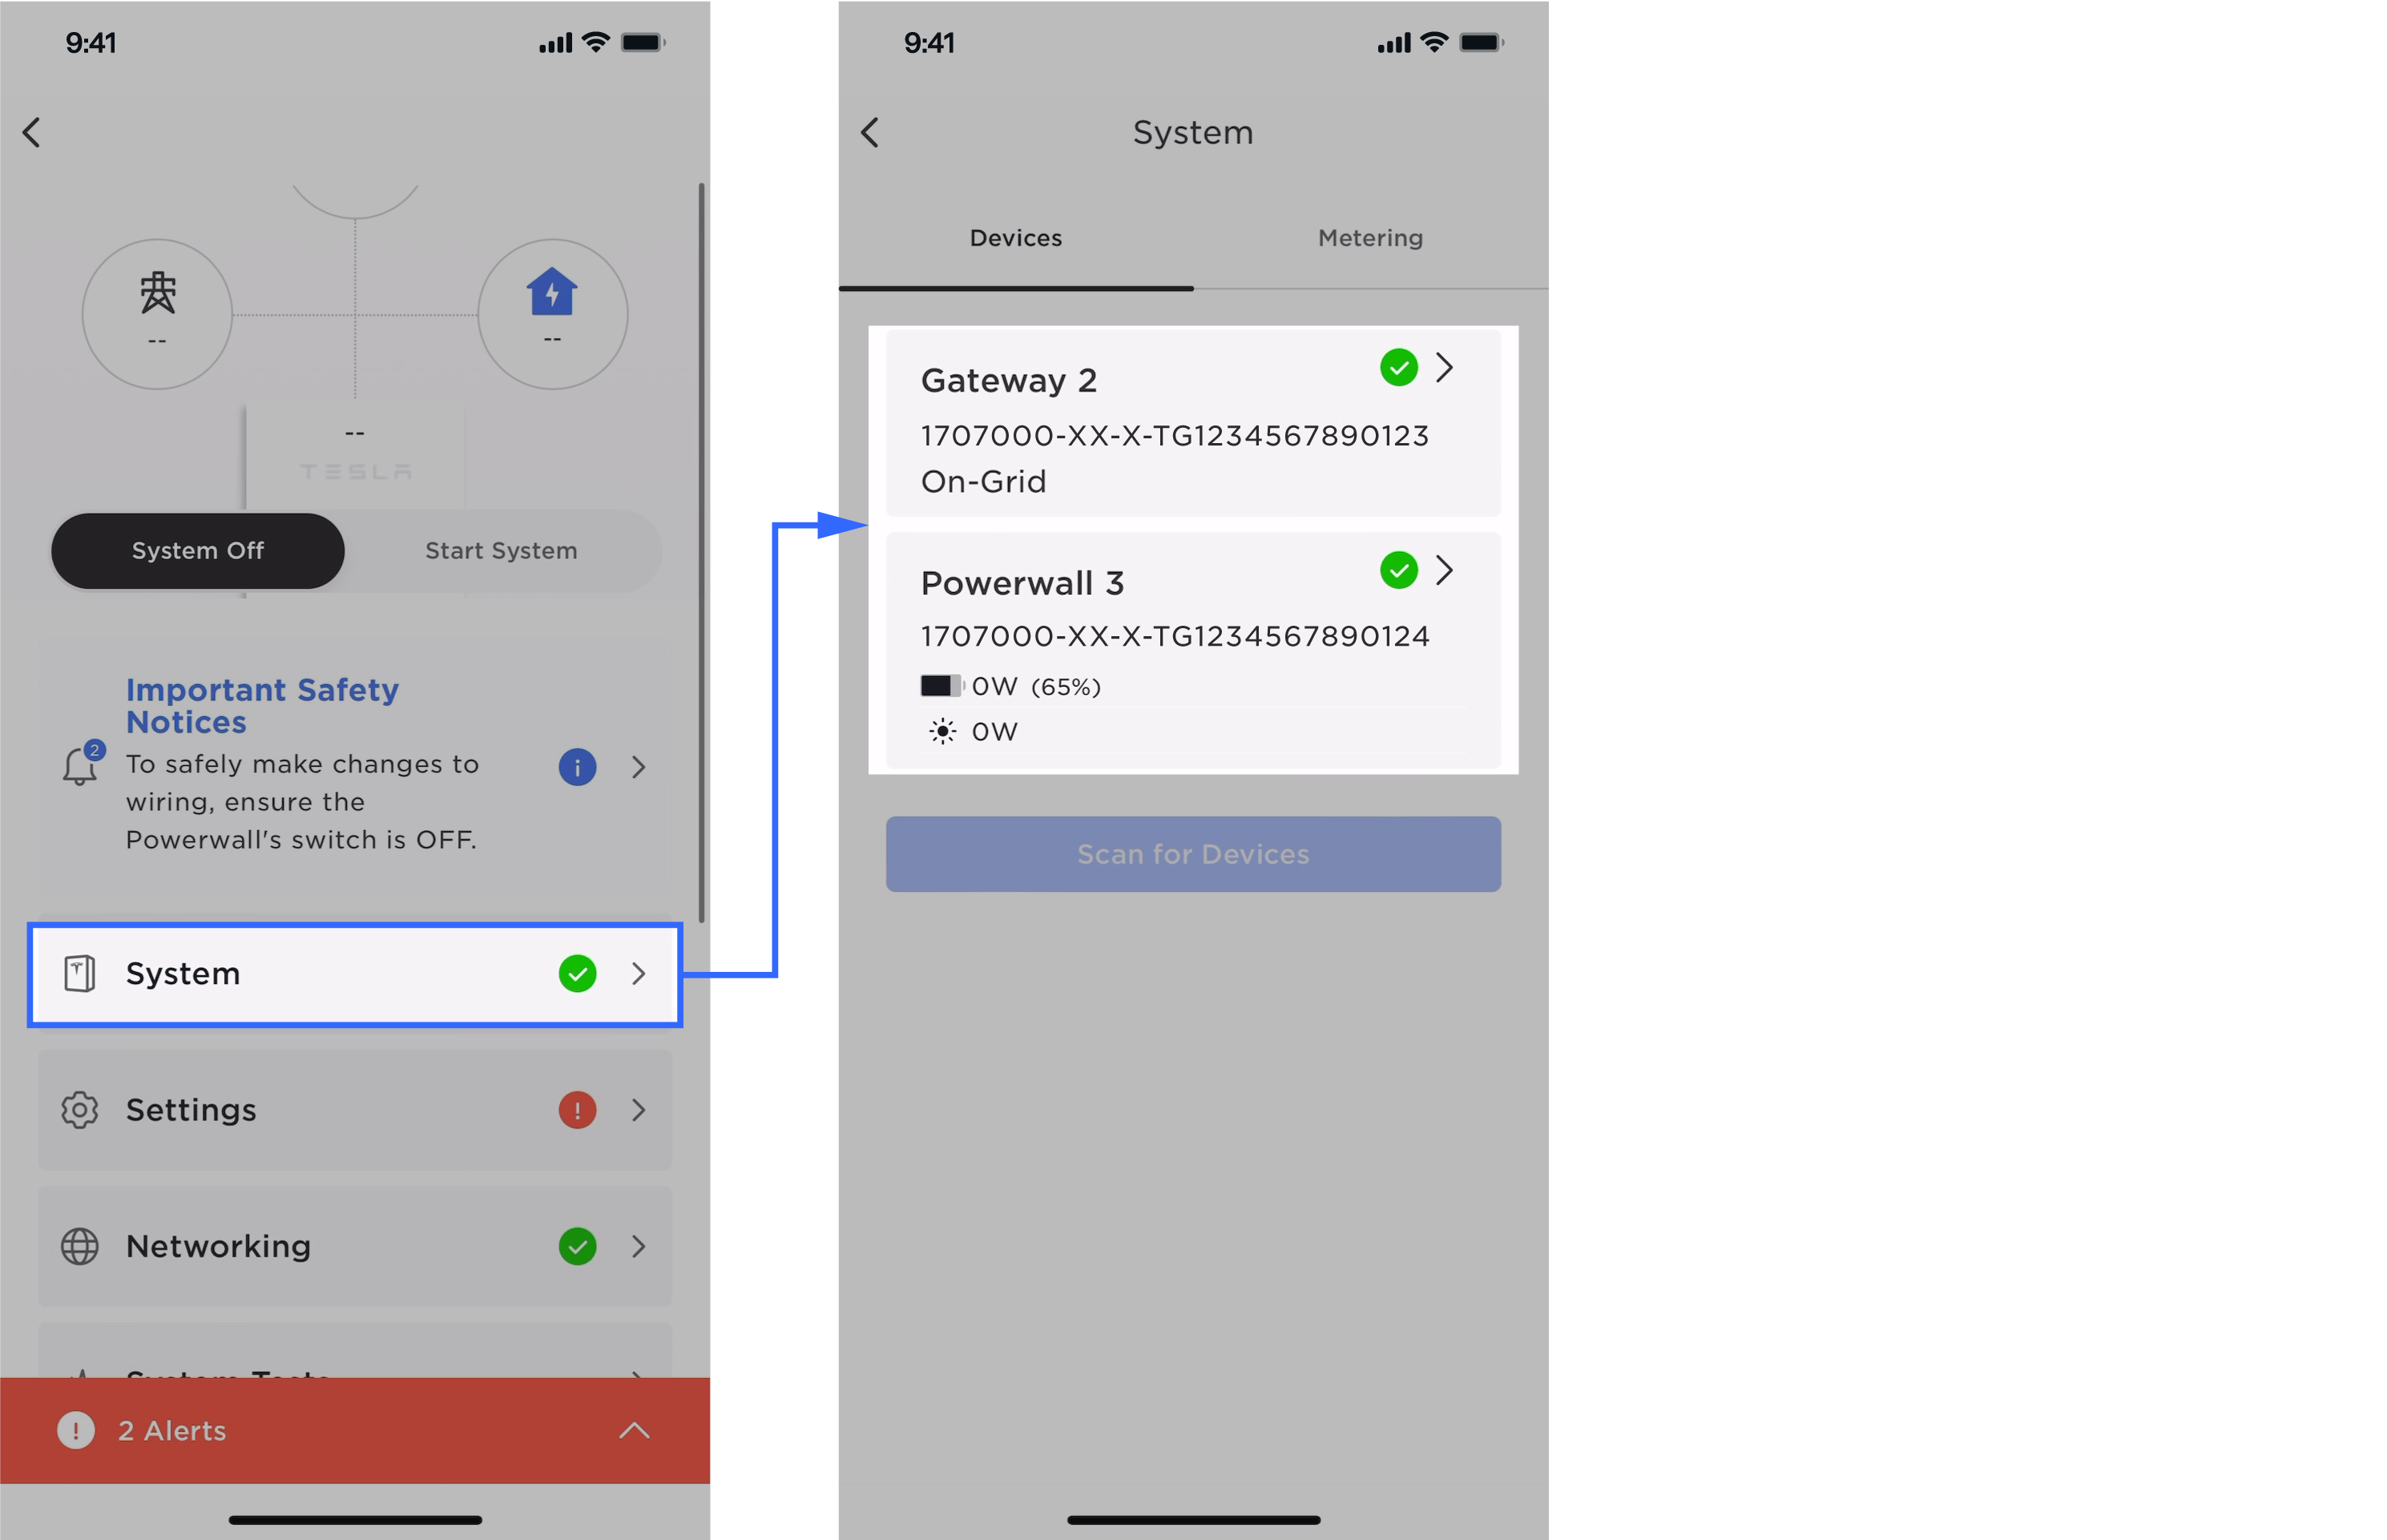
- Select .
- Select to check the connected devices. NoteThe Devices page must display all devices; if a device does not appear, check the communication wiring for errors.
- Configure energy metering:
- Select .
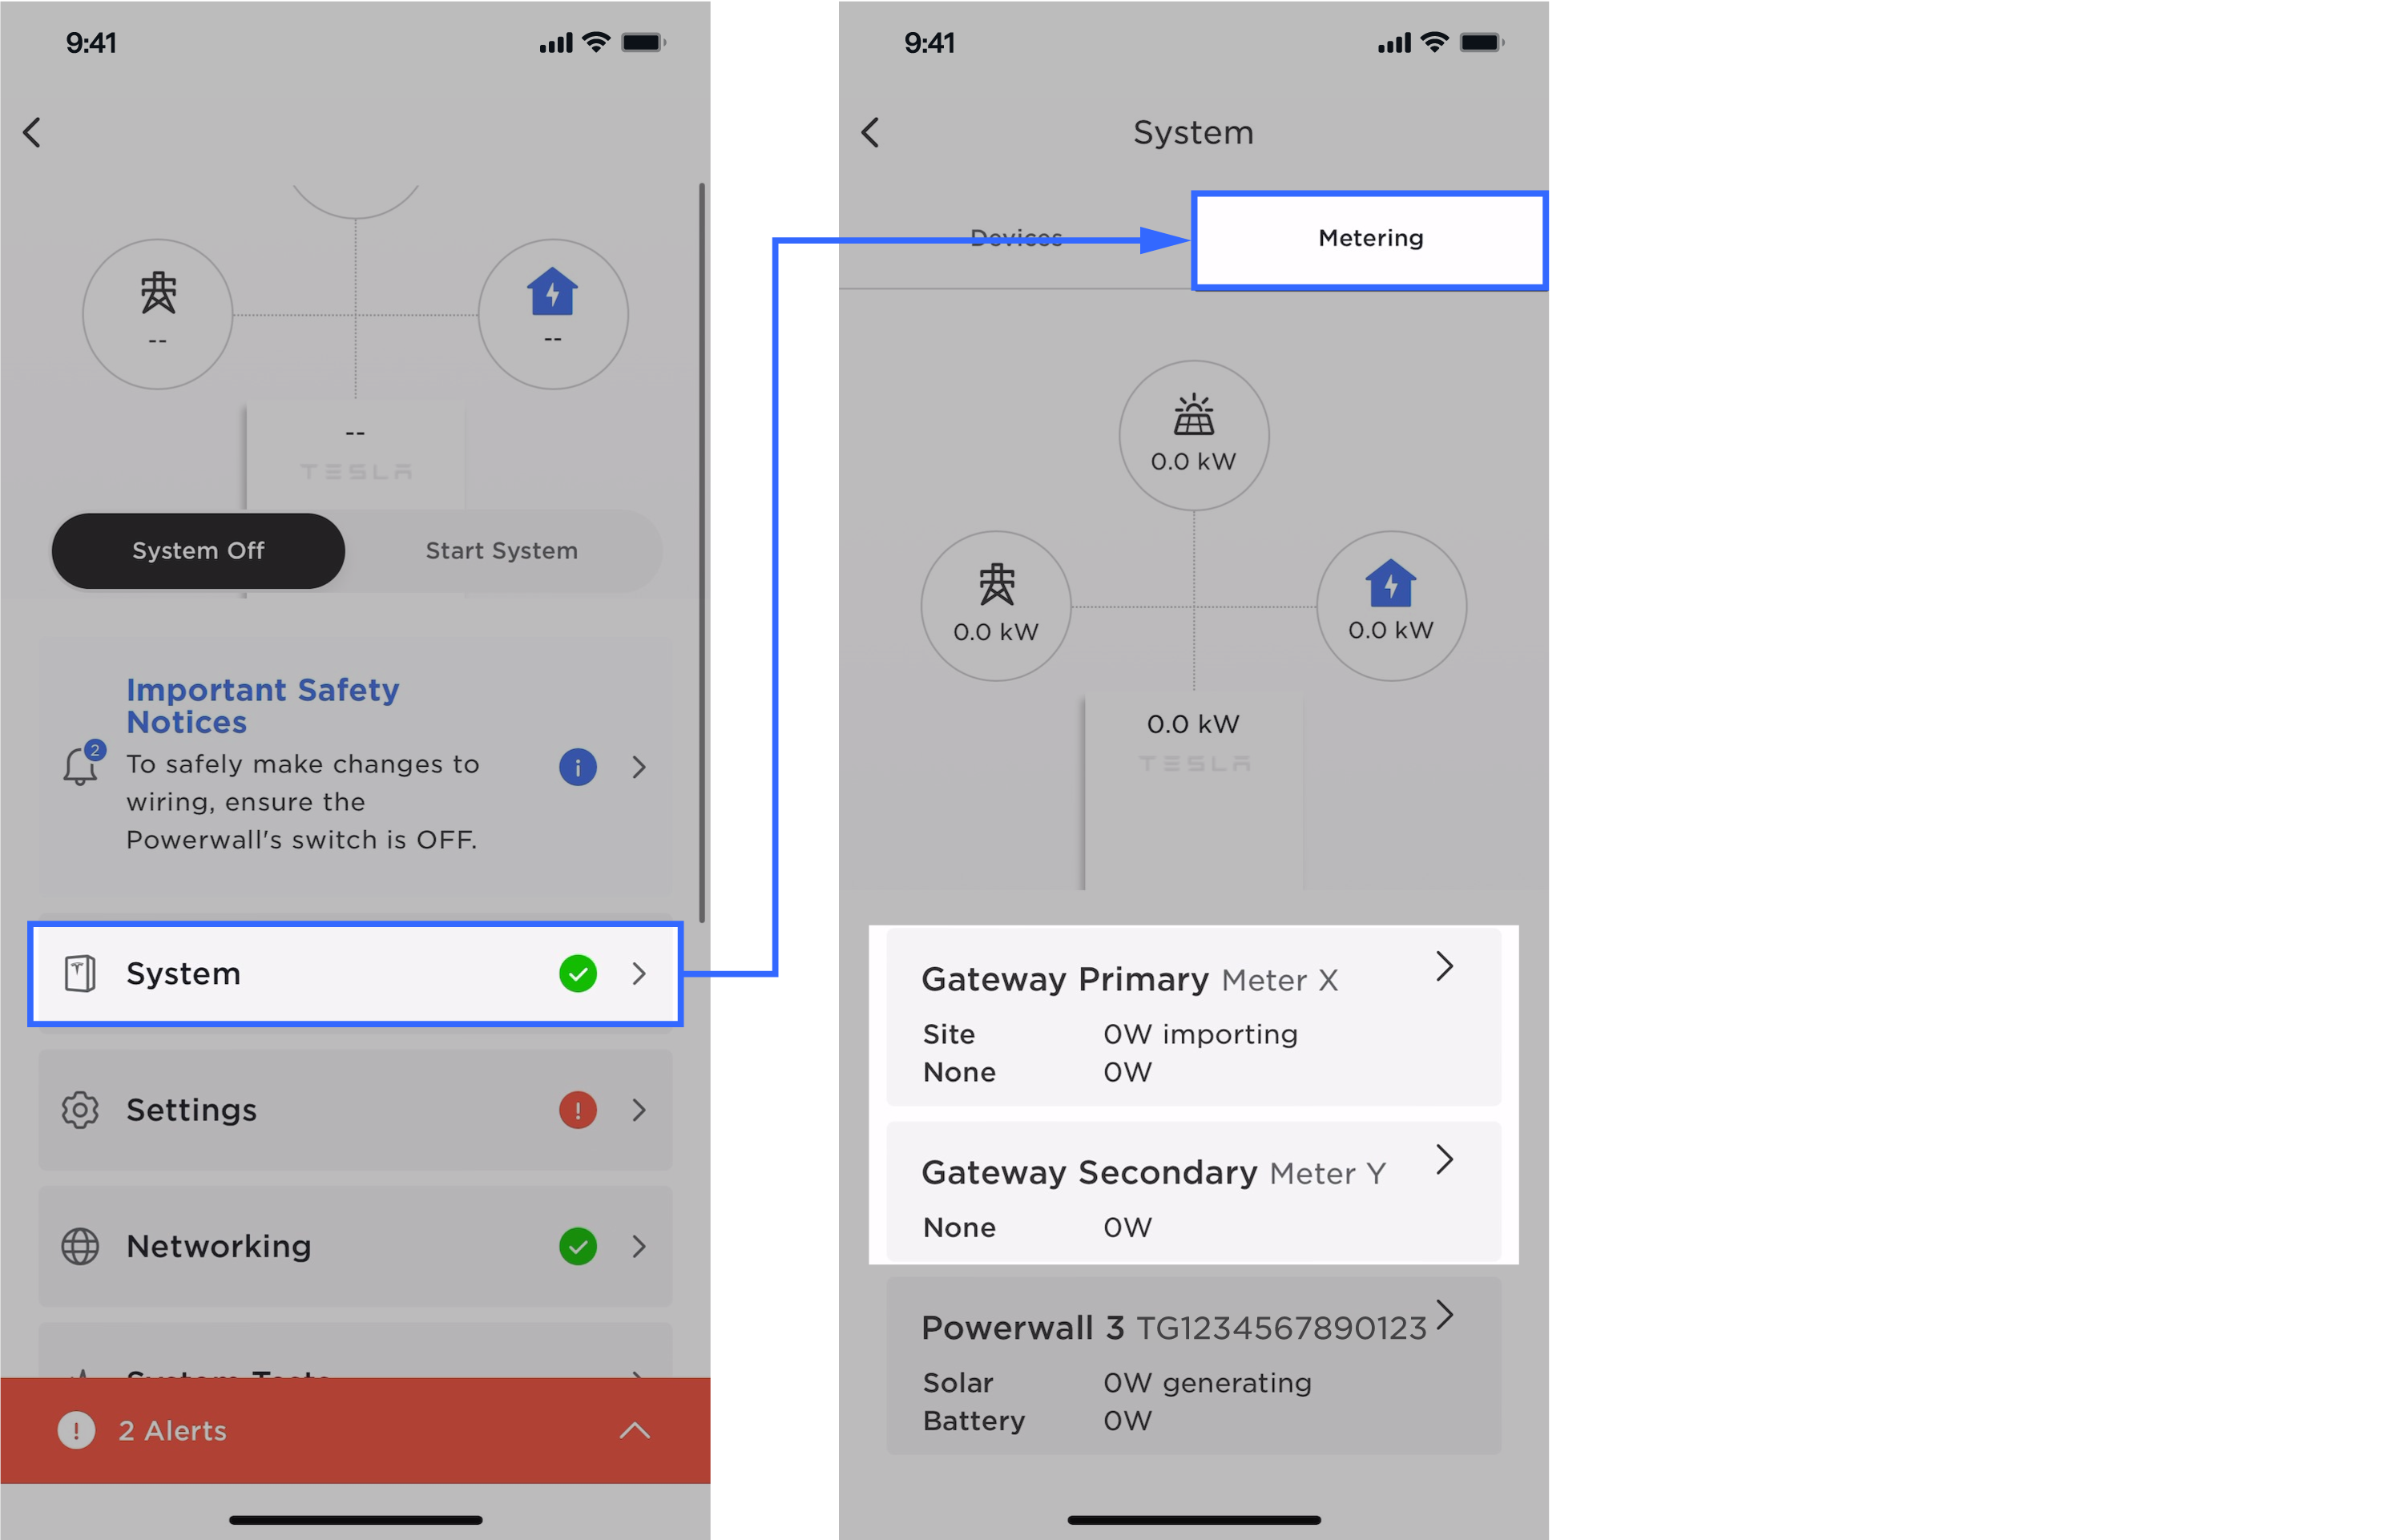
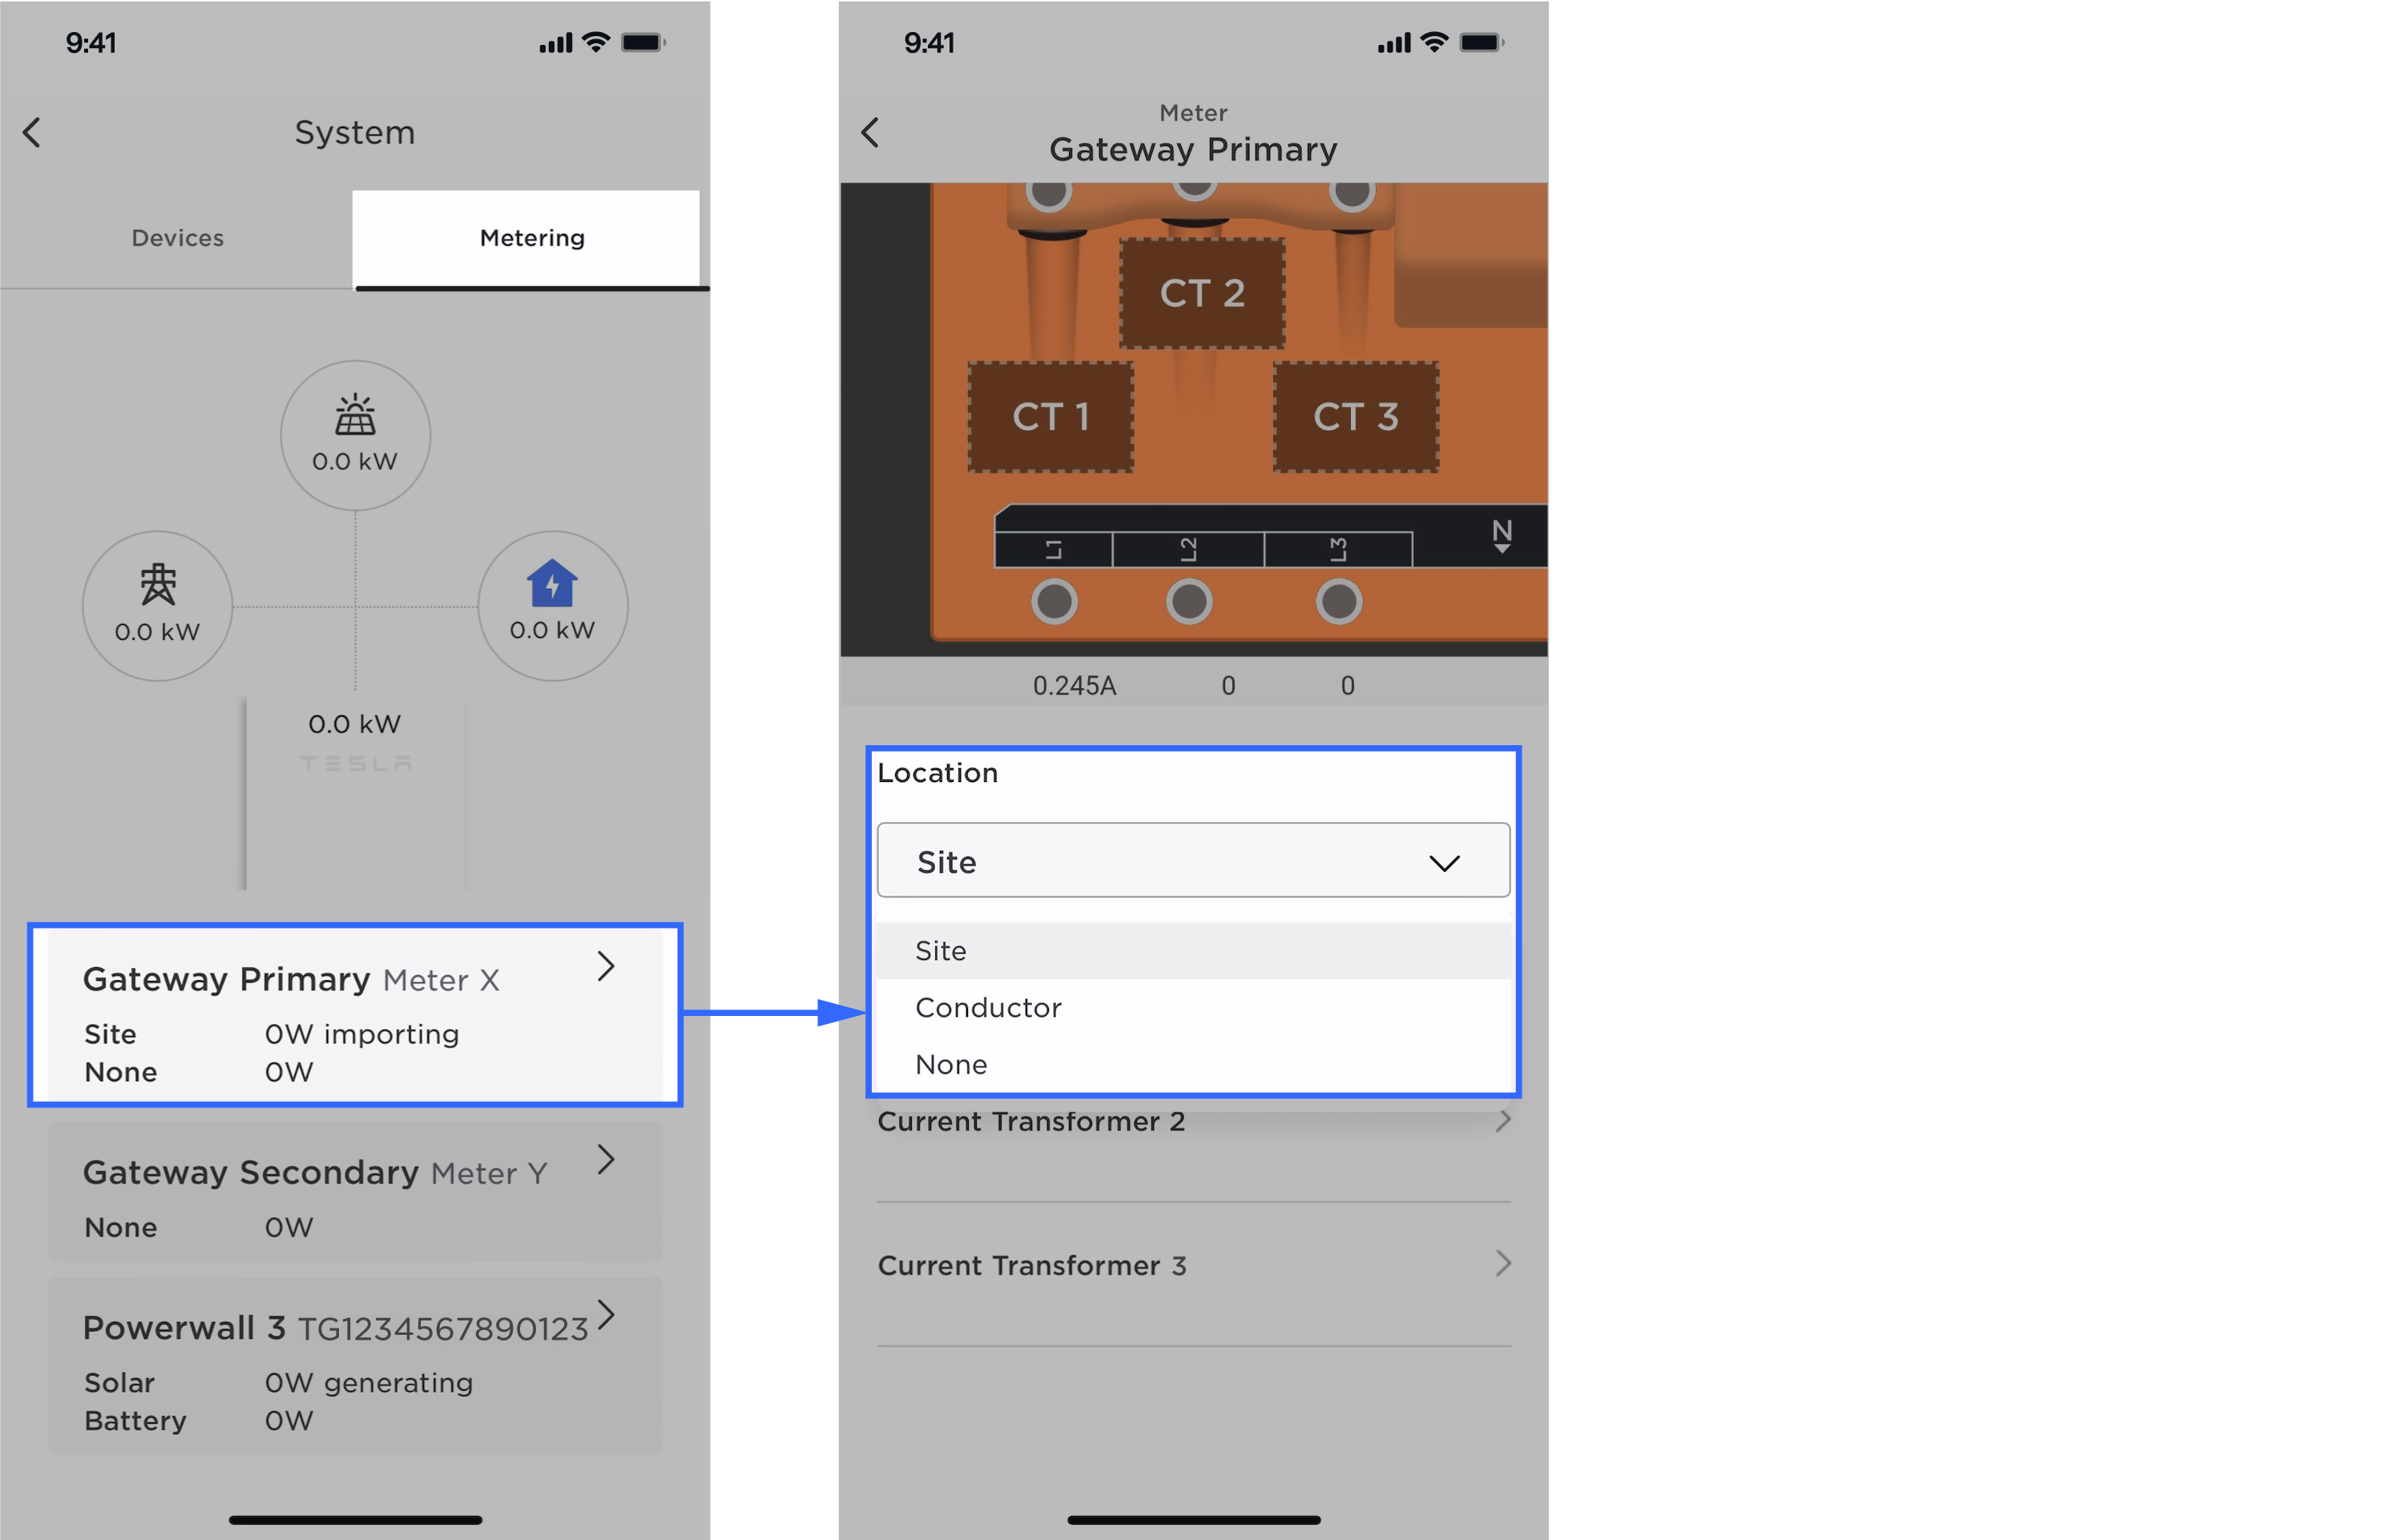
- Select Gateway Primary Meter
X and select what the CTs are measuring from the
Location dropdown. If the CTs are not measuring
anything, select None.NoteMeter X has a CT for each conductor (i.e., CT1 for L1, CT2 for L2, and CT3 for L3).
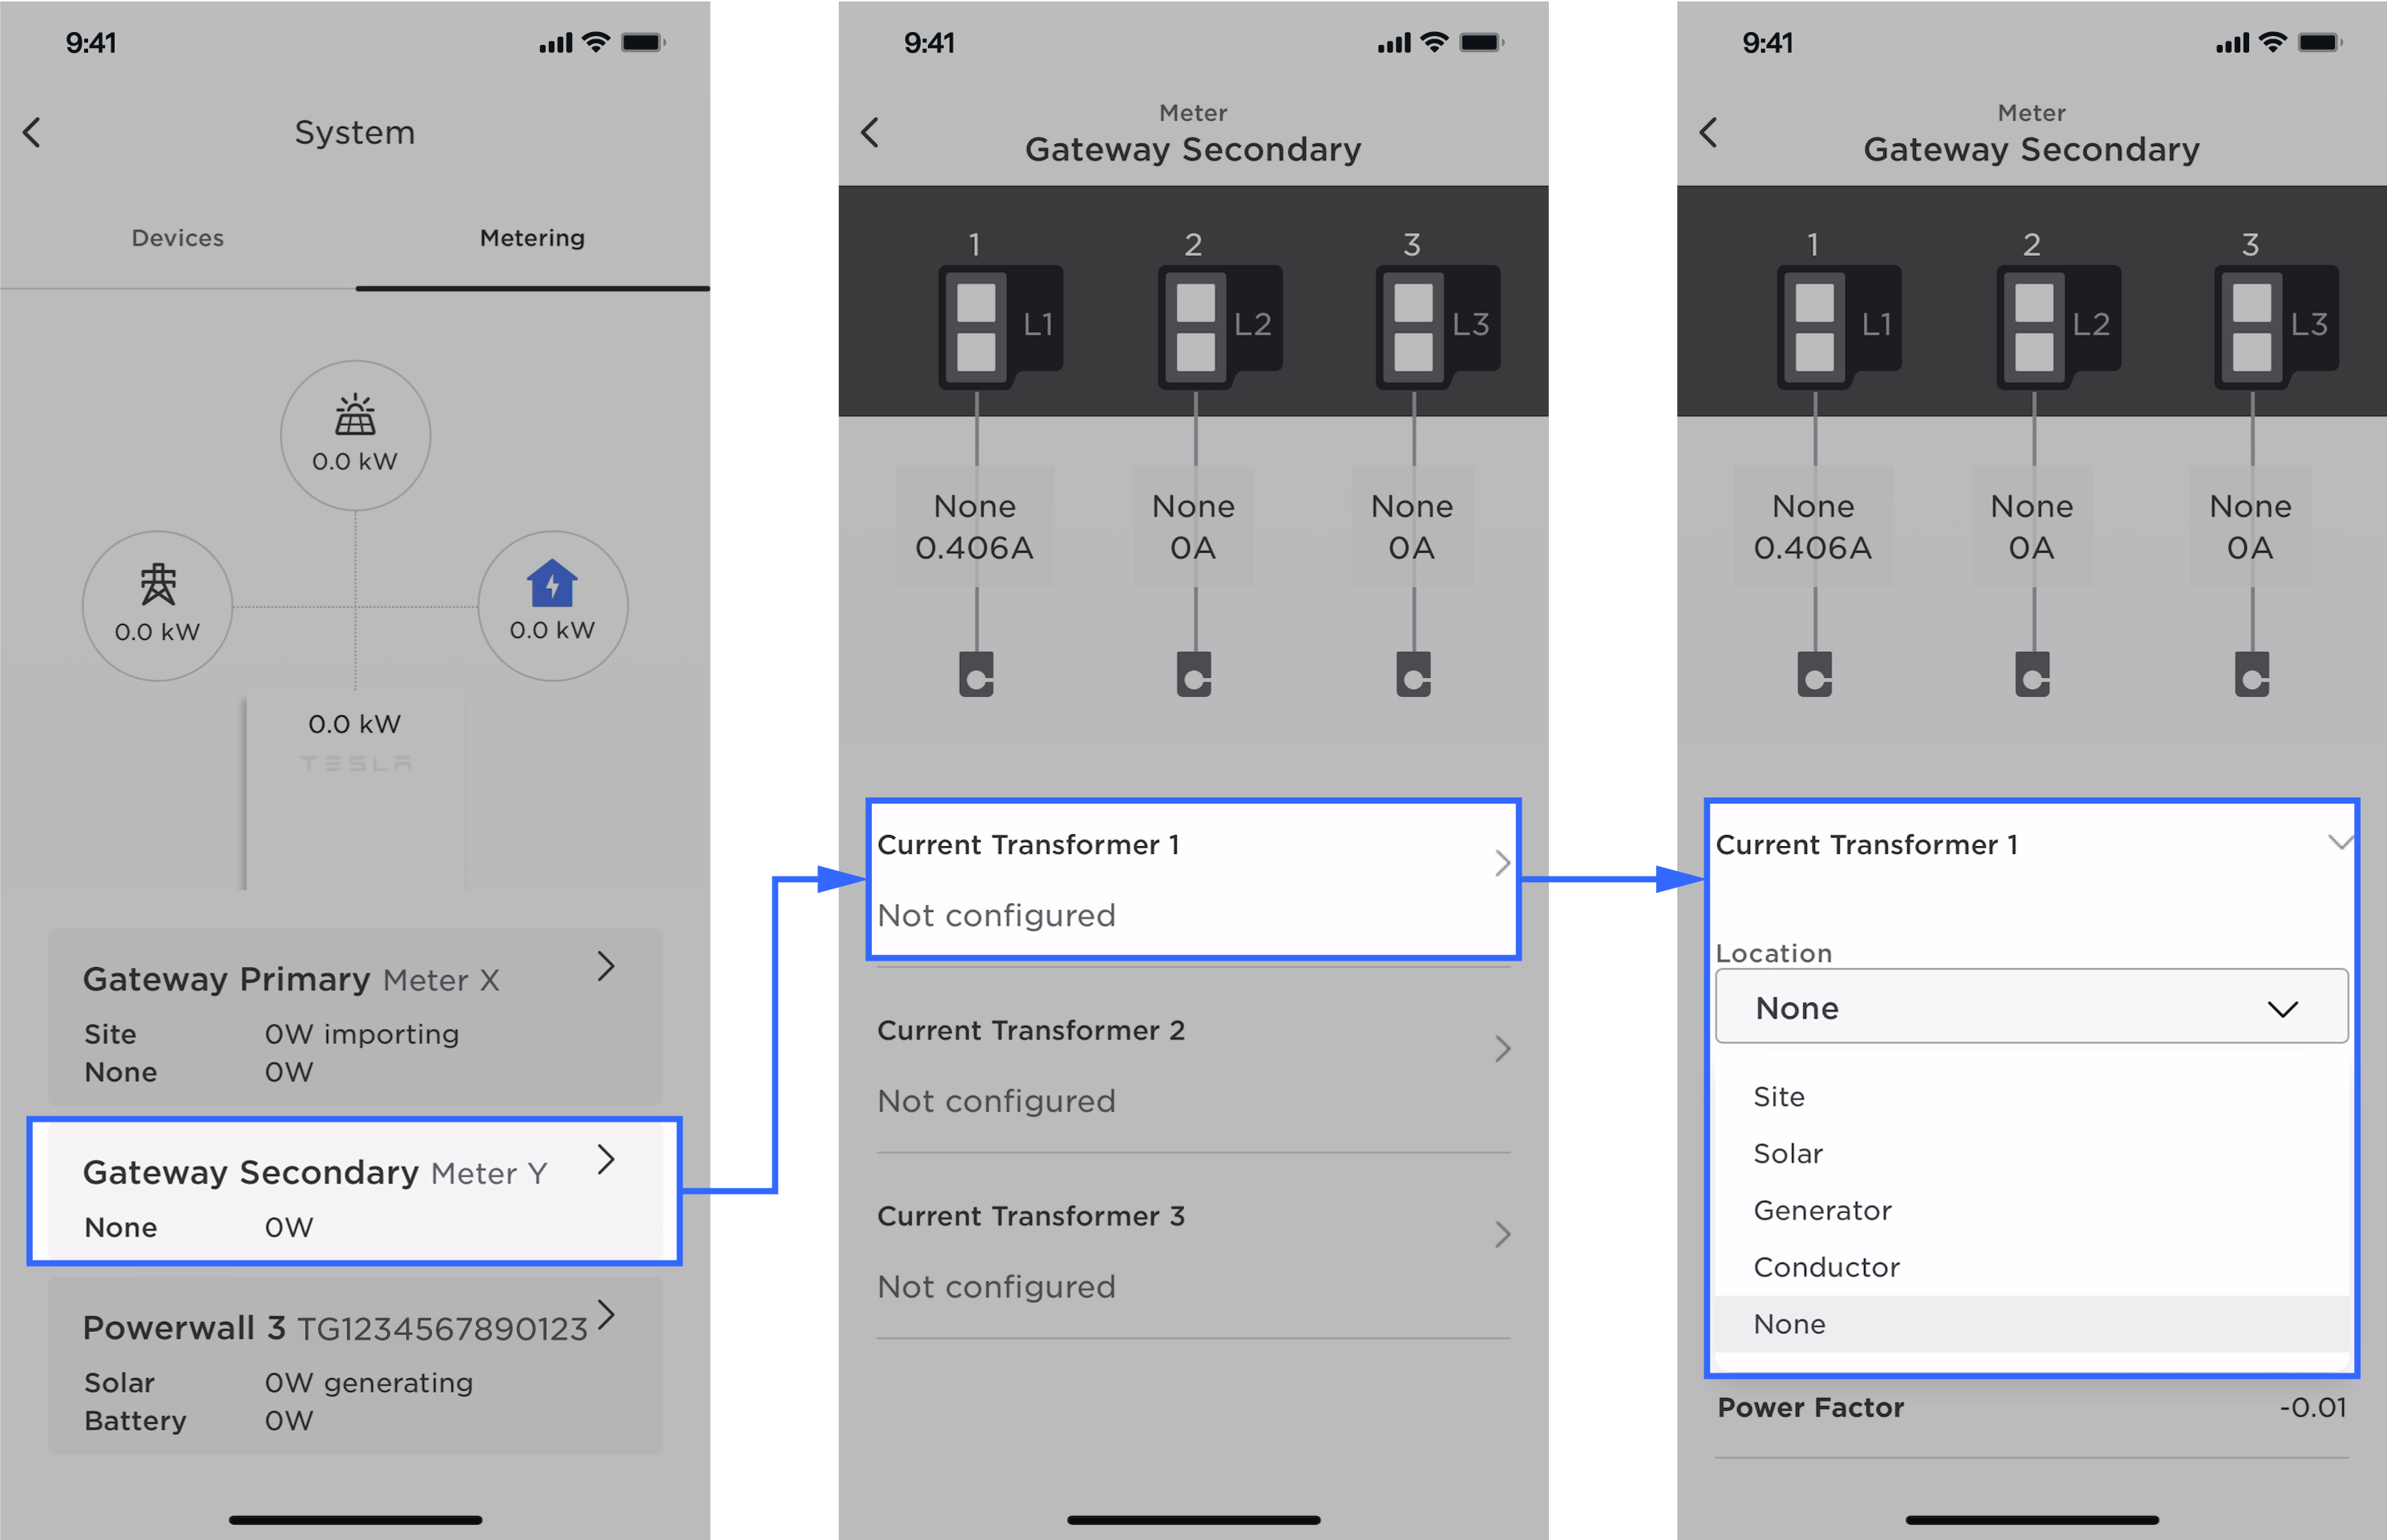
- Select Gateway Secondary
Meter Y and select what each CT is measuring from the
Location dropdown. If a CT is not measuring anything,
select None.
- If necessary, follow the onscreen prompts to complete the configuration of energy metering.
- Select .
- Configure settings:
- Configure the system grid
code:
- Select
and choose the Country,
Region, Distributor,
and the grid code standard, and ensure that the Voltage/Frequency selected for the site is correct.
NoteIf a dropdown menu does not have the desired option, select All Other or select the option that most closely resembles the desired region.
- Select
Done.NoteYou cannot change the grid code while the system is running.
- Select
and choose the Country,
Region, Distributor,
and the grid code standard, and ensure that the Voltage/Frequency selected for the site is correct.
- Select the solar
installation type:
- Select Solar
Installation Type from the Settings
page to choose from one of the below options:
- Select Solar Panel when the customer's house has solar panels installed on top of the existing roof.
- Select Solar Roof when the roof of customer's house is made of solar tiles.
- Select No Solar if solar is not installed.
- Select
Done.NoteThis field is required so that solar inverter functions properly, and so the Tesla app uses the correct graphics.
- Select Solar
Installation Type from the Settings
page to choose from one of the below options:
- If required, select site import / export limits:
- Select Import & Export Limits from the Settings page.
- Select site import or export permissions, and/or set site import or site export limits.
- Configure Powerwall 3 maximum power /
current output:
- Select .

- Select the desired maximum current / power output from the dropdown menu.
- Select
.
 NoteOnce the setting has been confirmed, it cannot be changed by the installer. Contact Tesla Support if the setting must be changed.
- Select .
- Configure the system grid
code:
- Run phase detection:
- Select .

- In case of single
Powerwall, ensure that the phase assigned to the Powerwall is selected
as a Backup Phase.

- In case of multiple
Powerwall units, ensure that each Powerwall has been correctly assigned
to the phase it is physically installed on. If the Backup Phase
selected is incorrect, select the correct one from the Backup
Phase dropdown.
- If a Powerwall's phase is
undetected, check the alerts tray to determine how to proceed, and run
phase detection again if necessary.
- Select .
- From the landing page, select
Start
System and allow devices to update and self-test. You can select
System
to view the progress. Once all devices are updated and self-tests are completed,
you can see a green check mark next to each of the devices.
- If solar is connected, select
Powerwall
3 to ensure that the solar inverter is active and solar
is producing.
- If solar is connected, select
Powerwall
3 to ensure that the solar inverter is active and solar
is producing.
- Complete system registration:
- Select and enter your contact information.
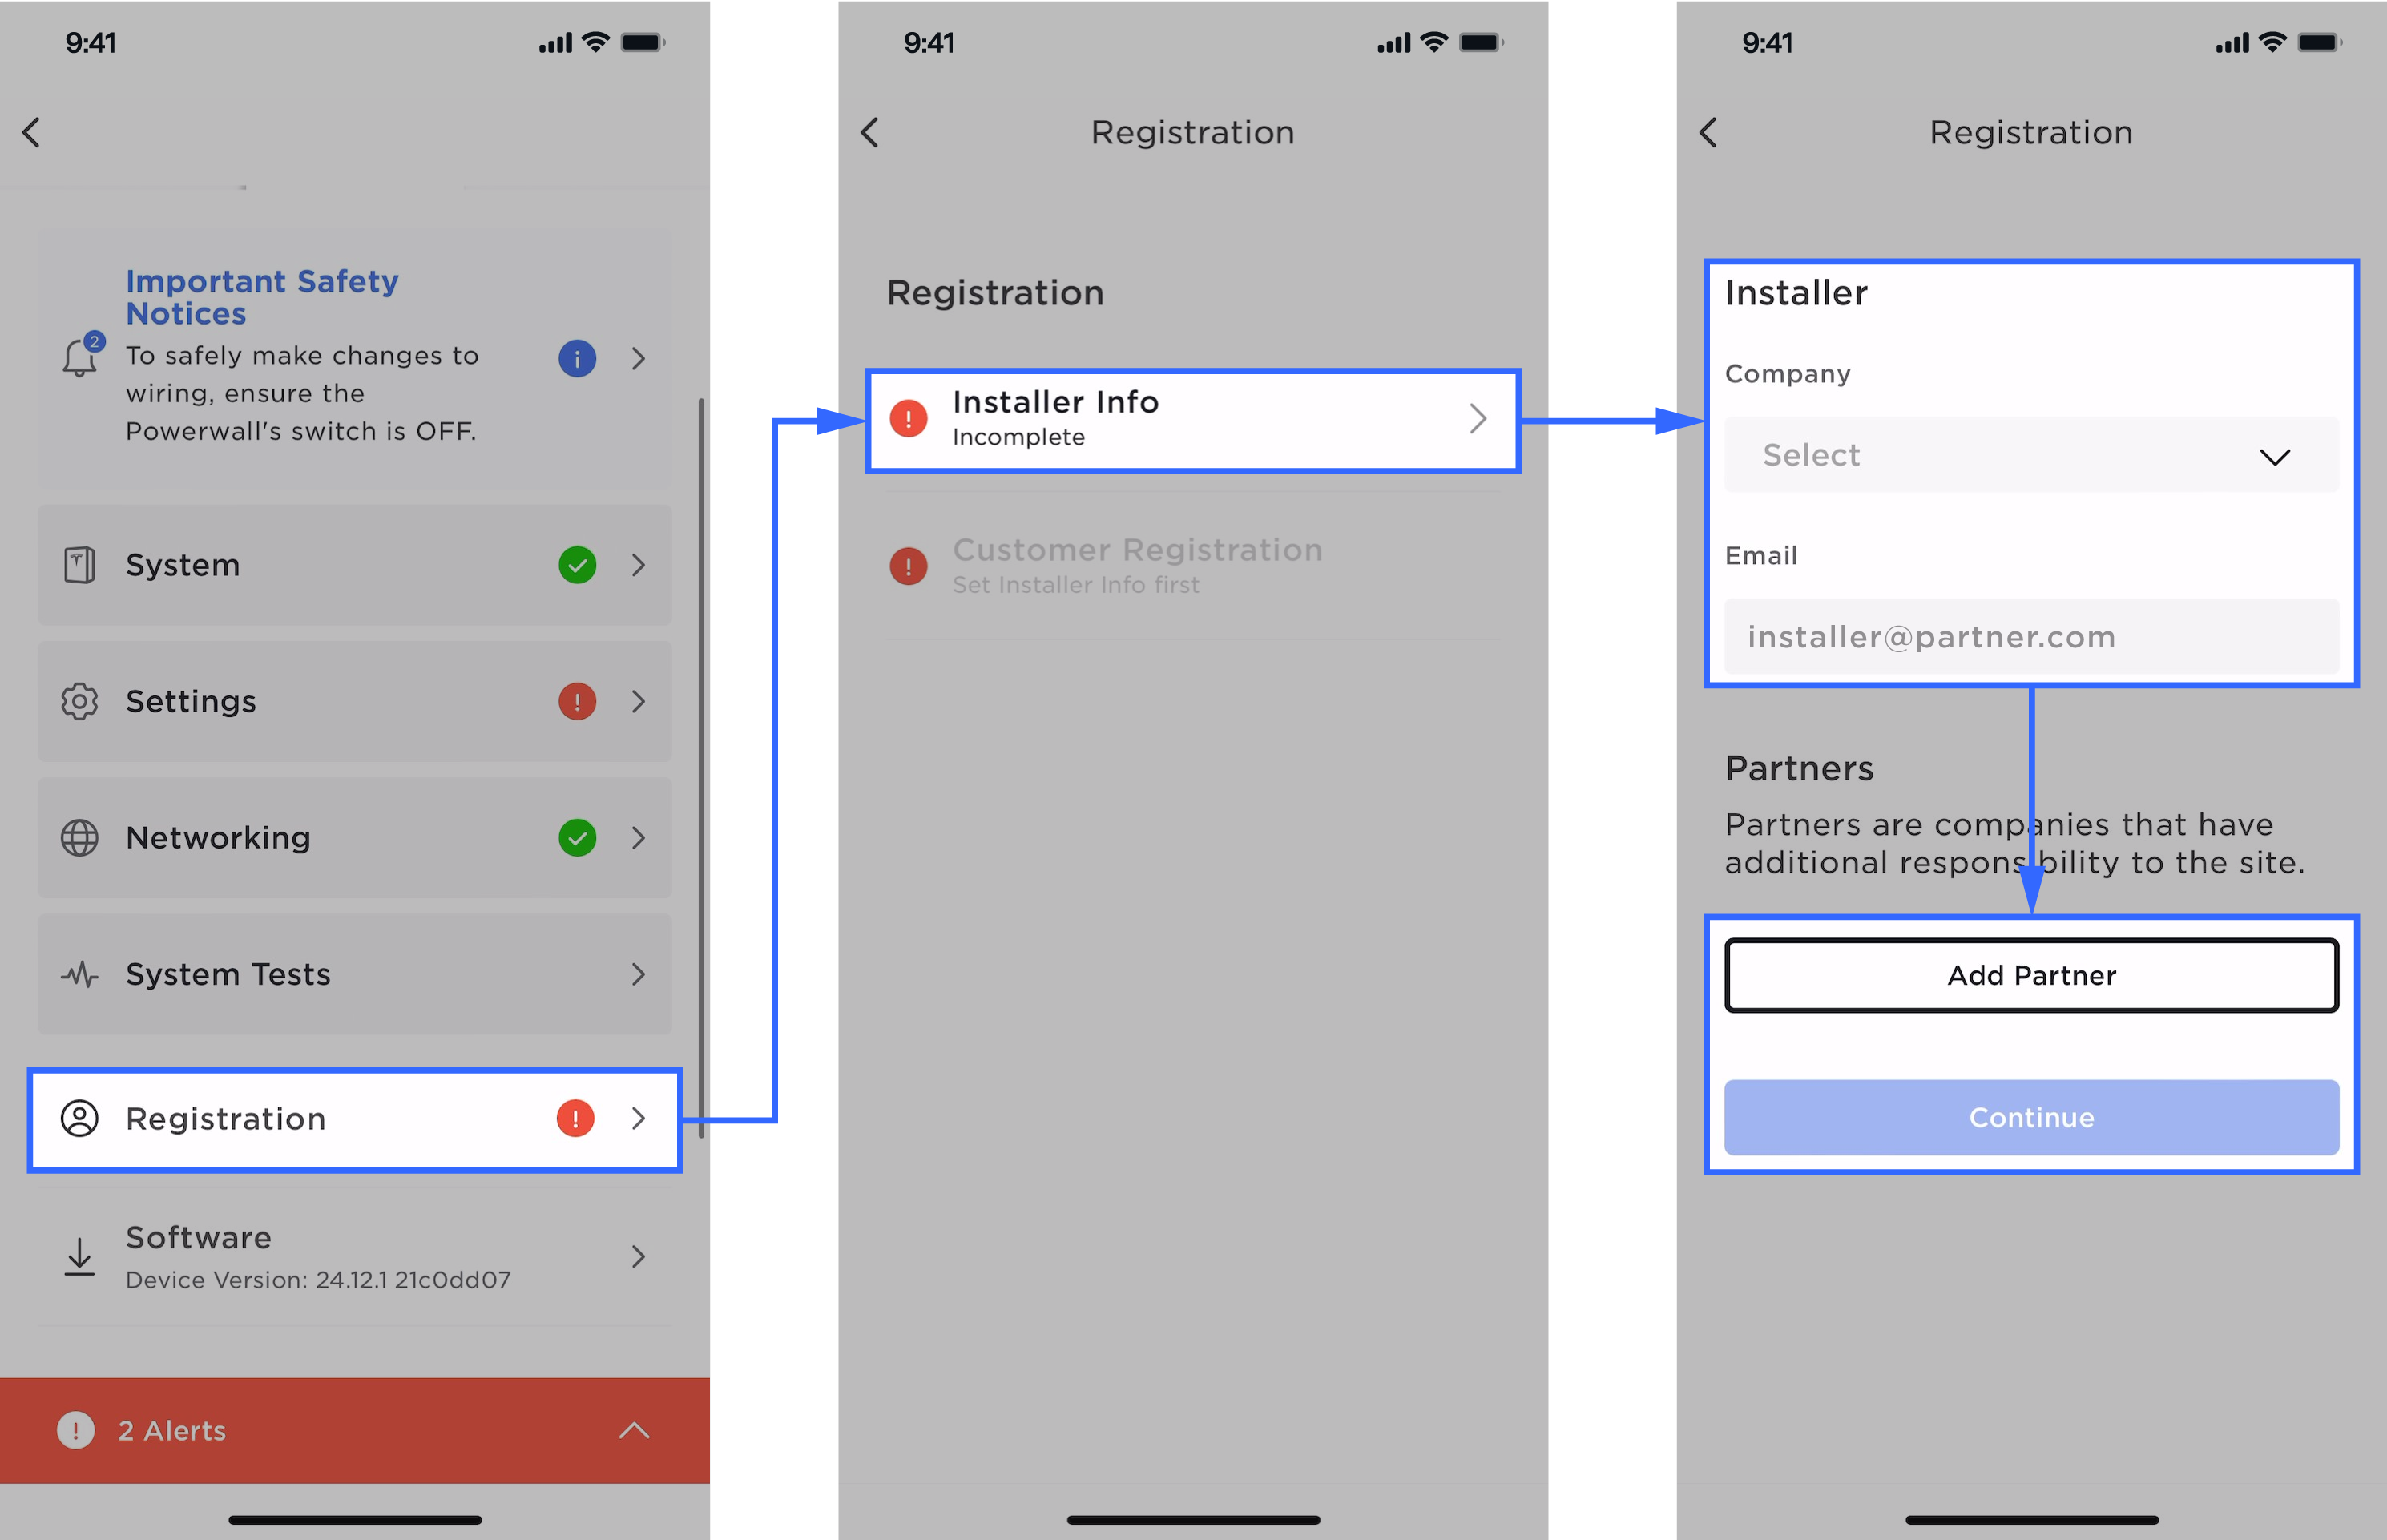
- Select Continue
to proceed to the customer registration. NoteCustomer registration will fail if the system is not running. Ensure the system is running before trying to register it.
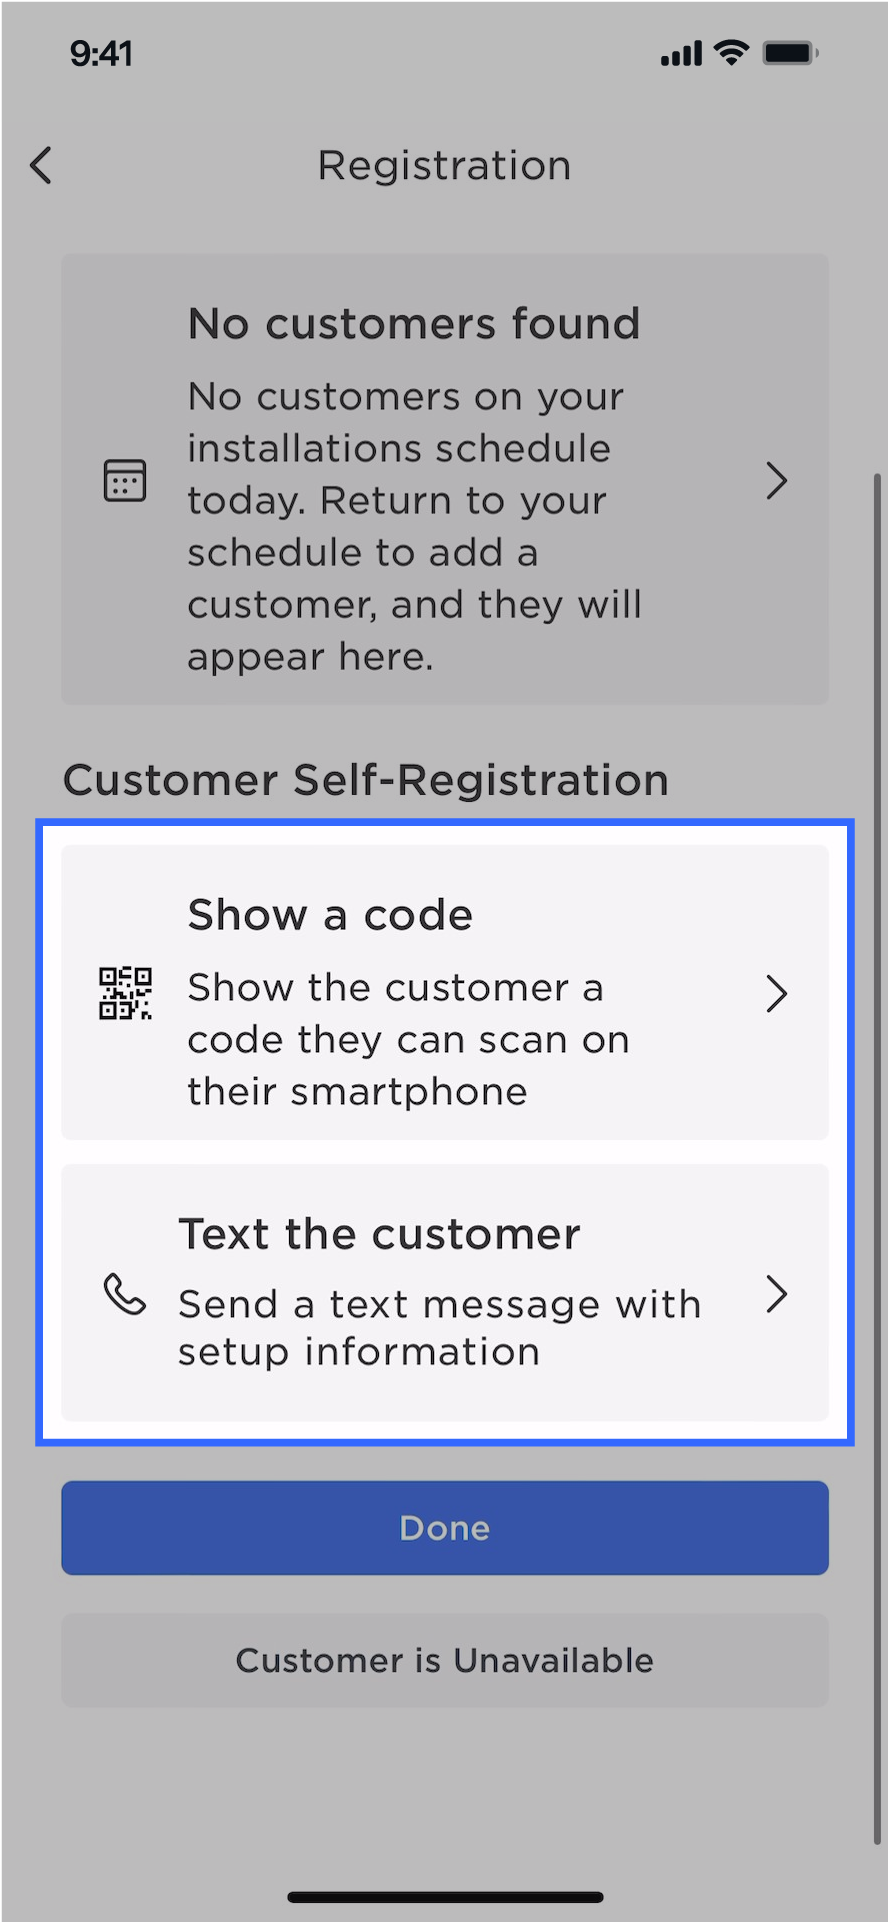
- If the customer is
available, select Show a
code or Text the
customer to allow the customer to enter their
information. Both of these methods open the Tesla app to the Add Products
page; the customer can also navigate to Add Products
manually. See Registering Your Powerwall
for
more information.
- If the customer is not
available, select Customer is
Unavailable and complete the registration form on their
behalf. NoteThe customer email address entered during registration is the link between the product and the customer's Tesla account. Please ensure that the email address is entered correctly and is the one used by the customer for their Tesla account.
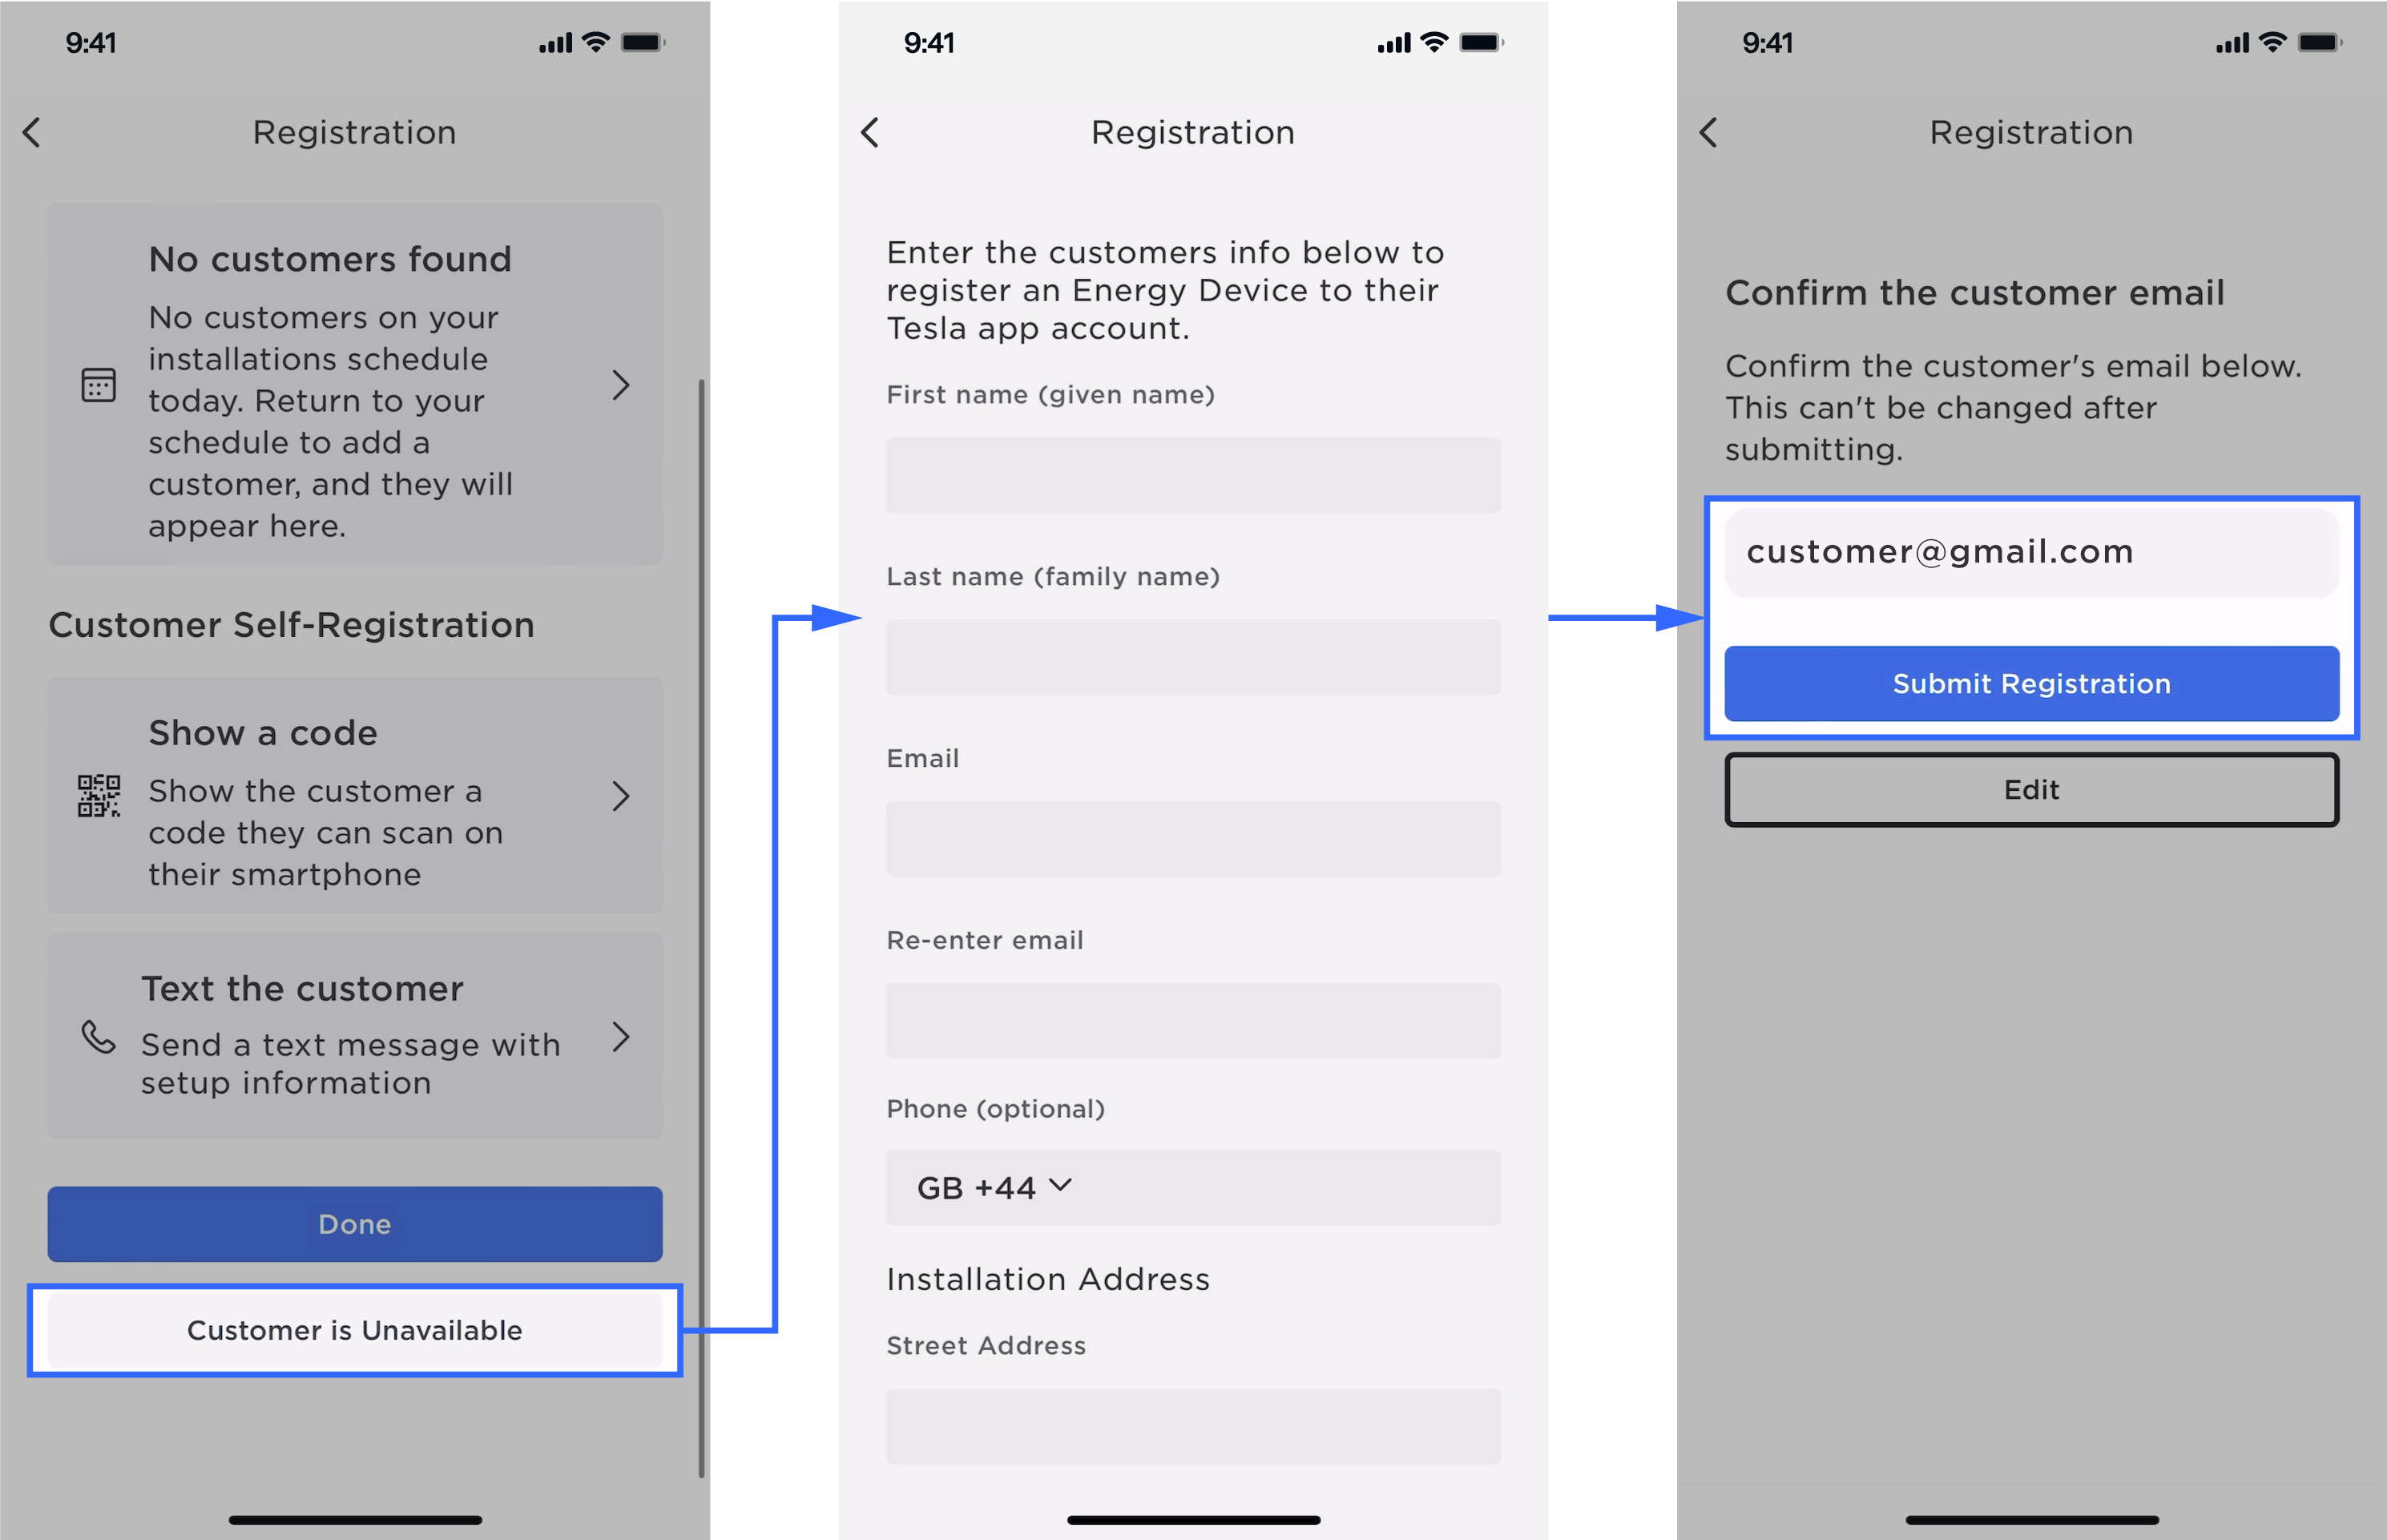
- Select Done to return to the landing page.
- Select and enter your contact information.
- Resolve any alerts displayed at
the bottom of the page.
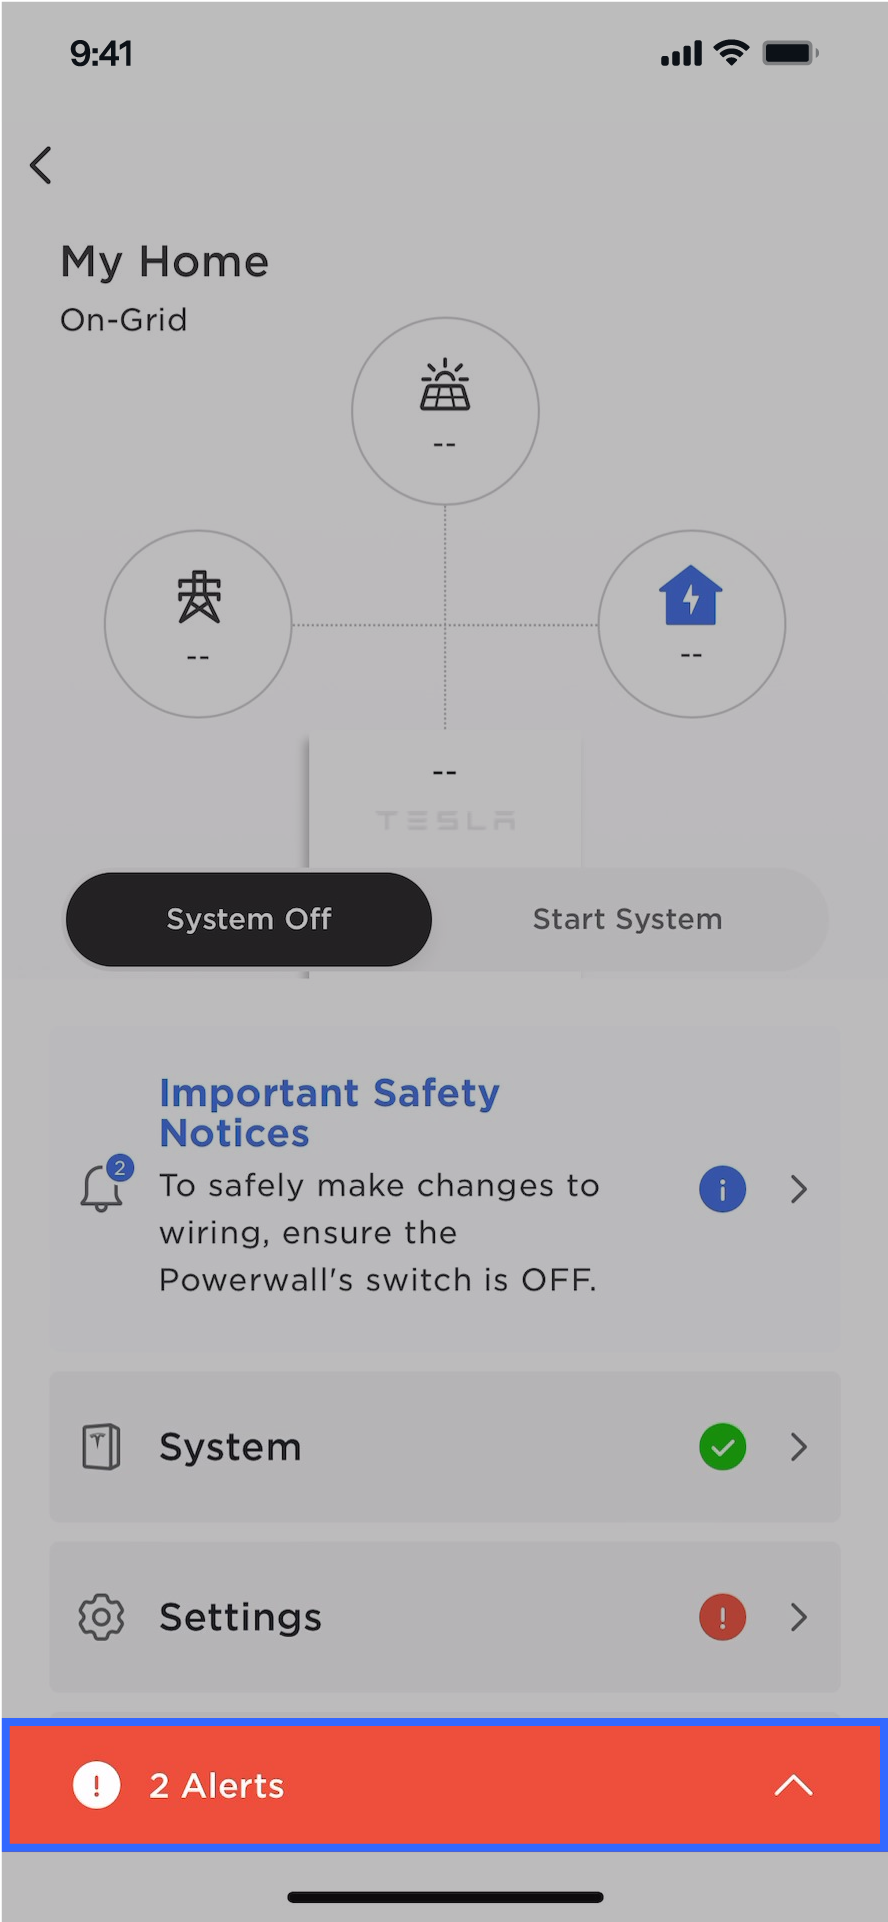 NoteSee Address Alerts for more information about resolving system alerts.
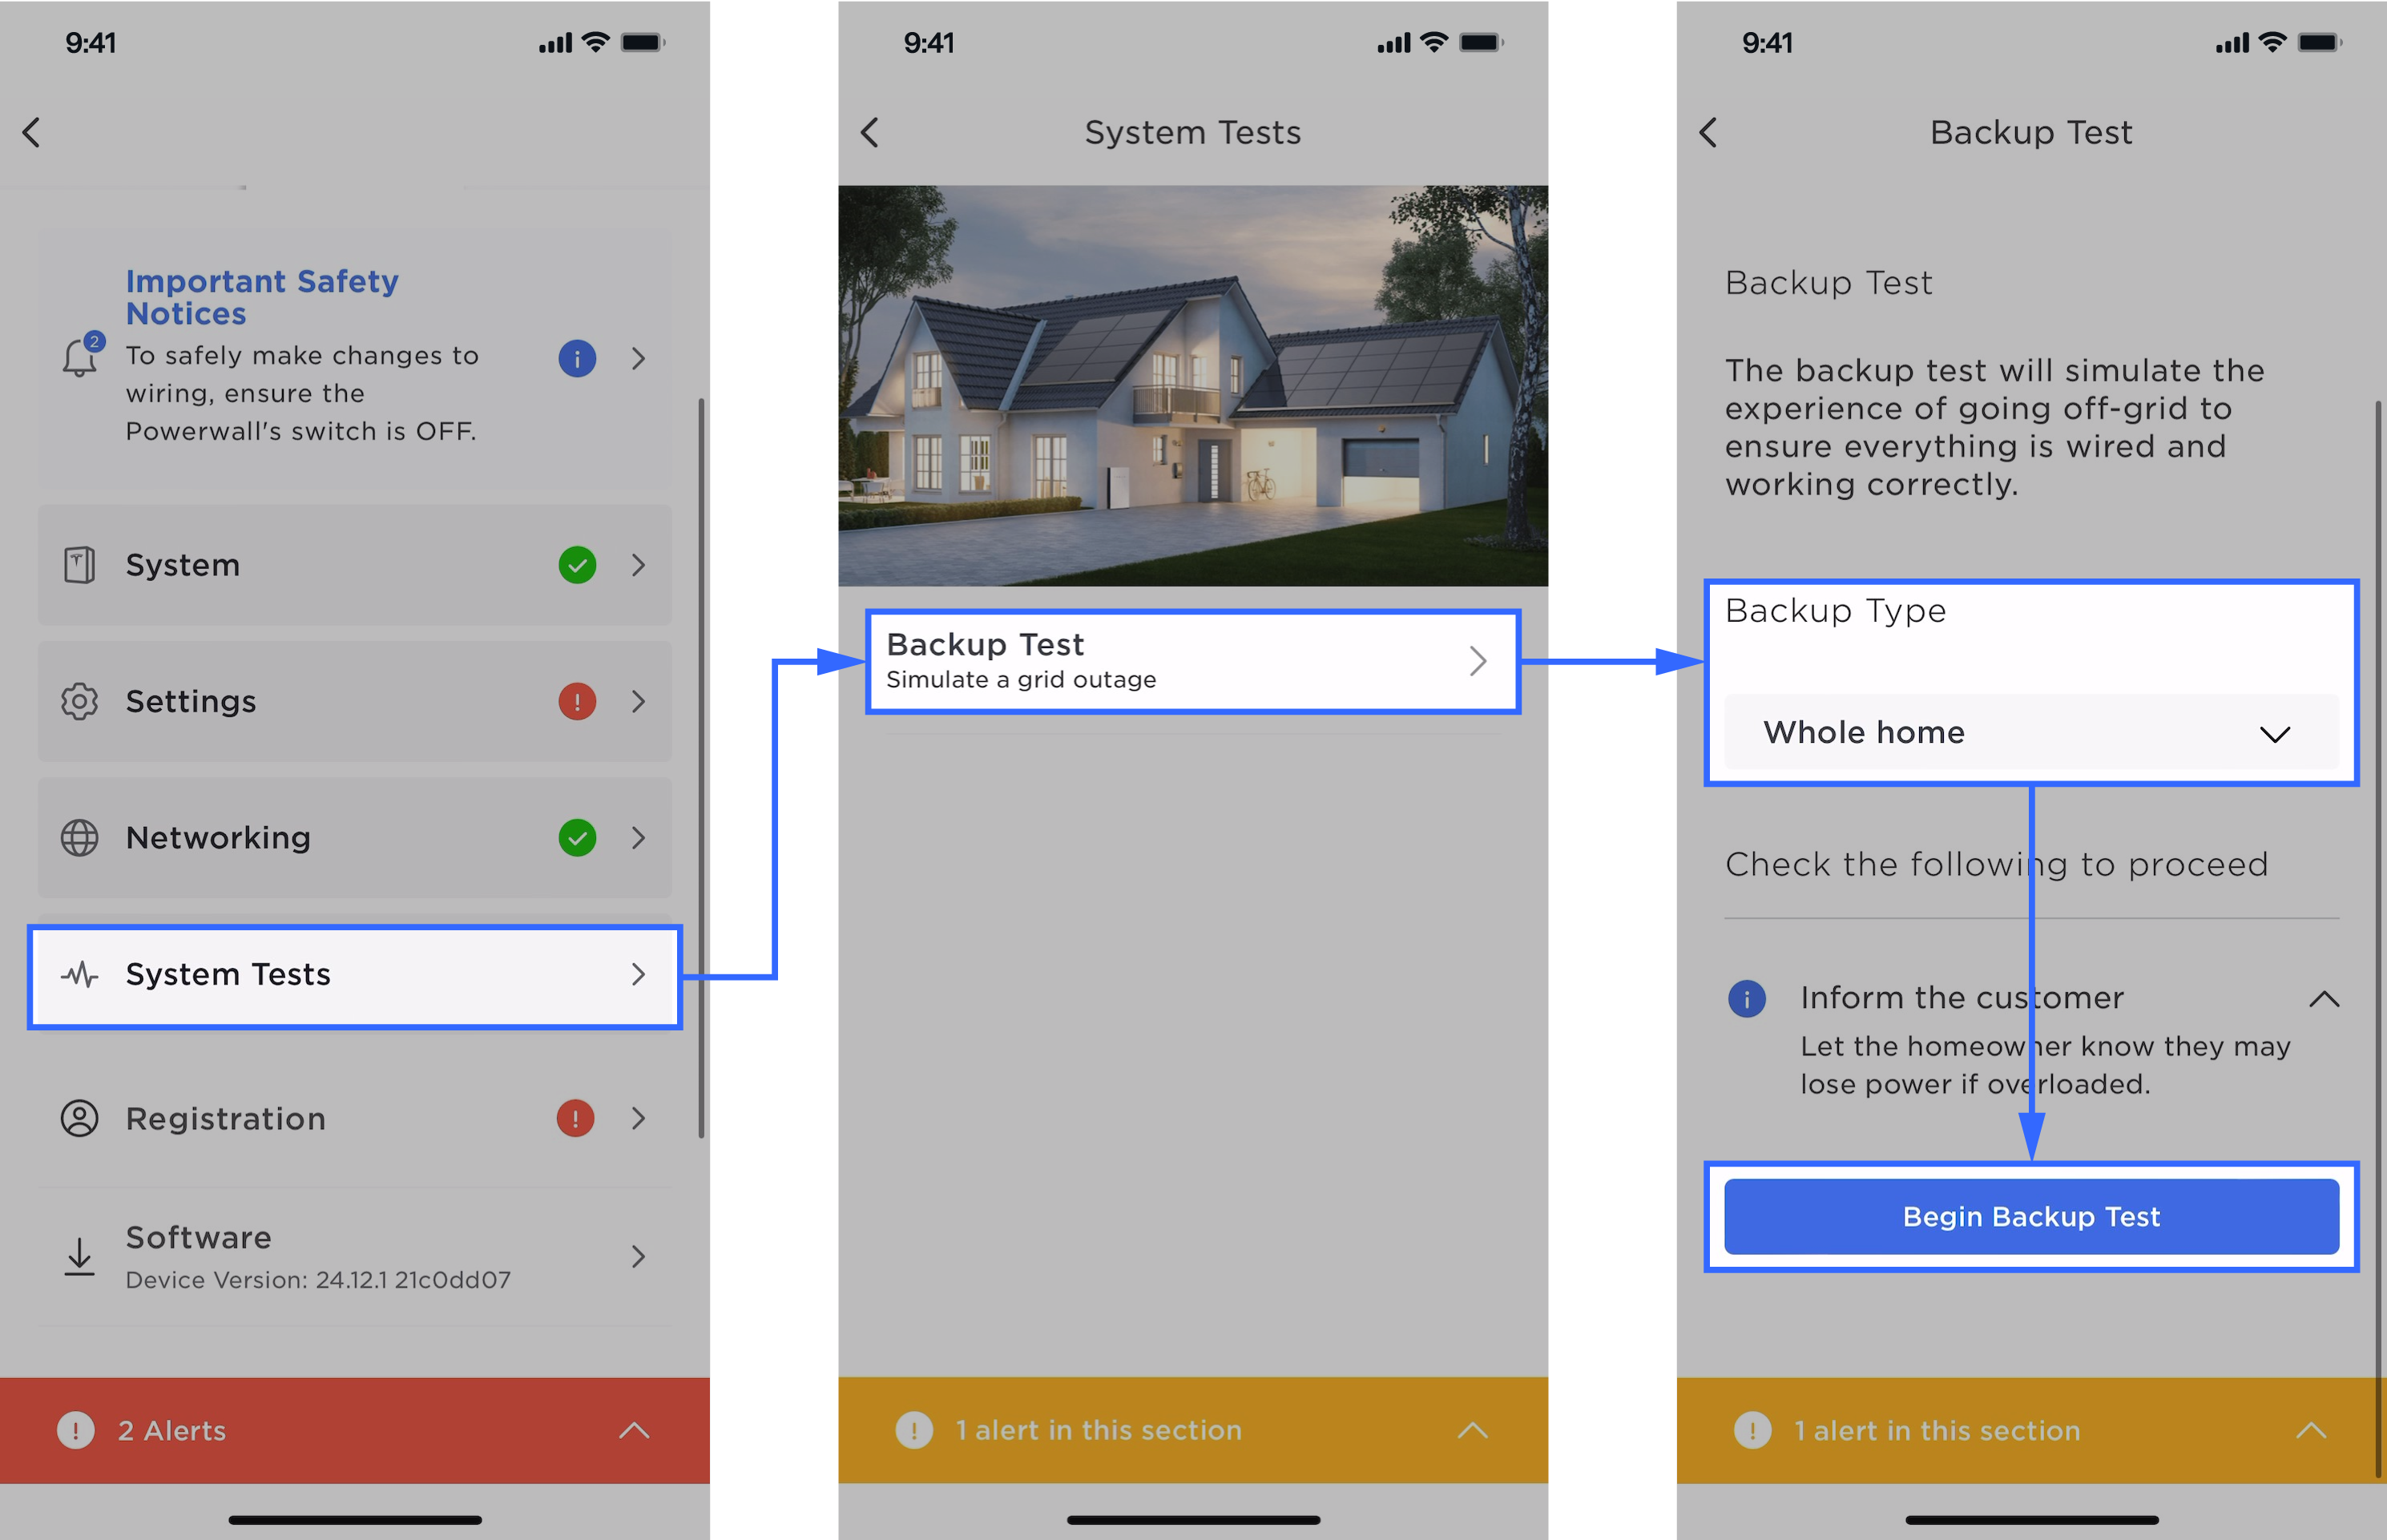
 - Perform backup test:
- Select , select the system configuration from the Backup
Type dropdown, and then select Begin Backup
Test.
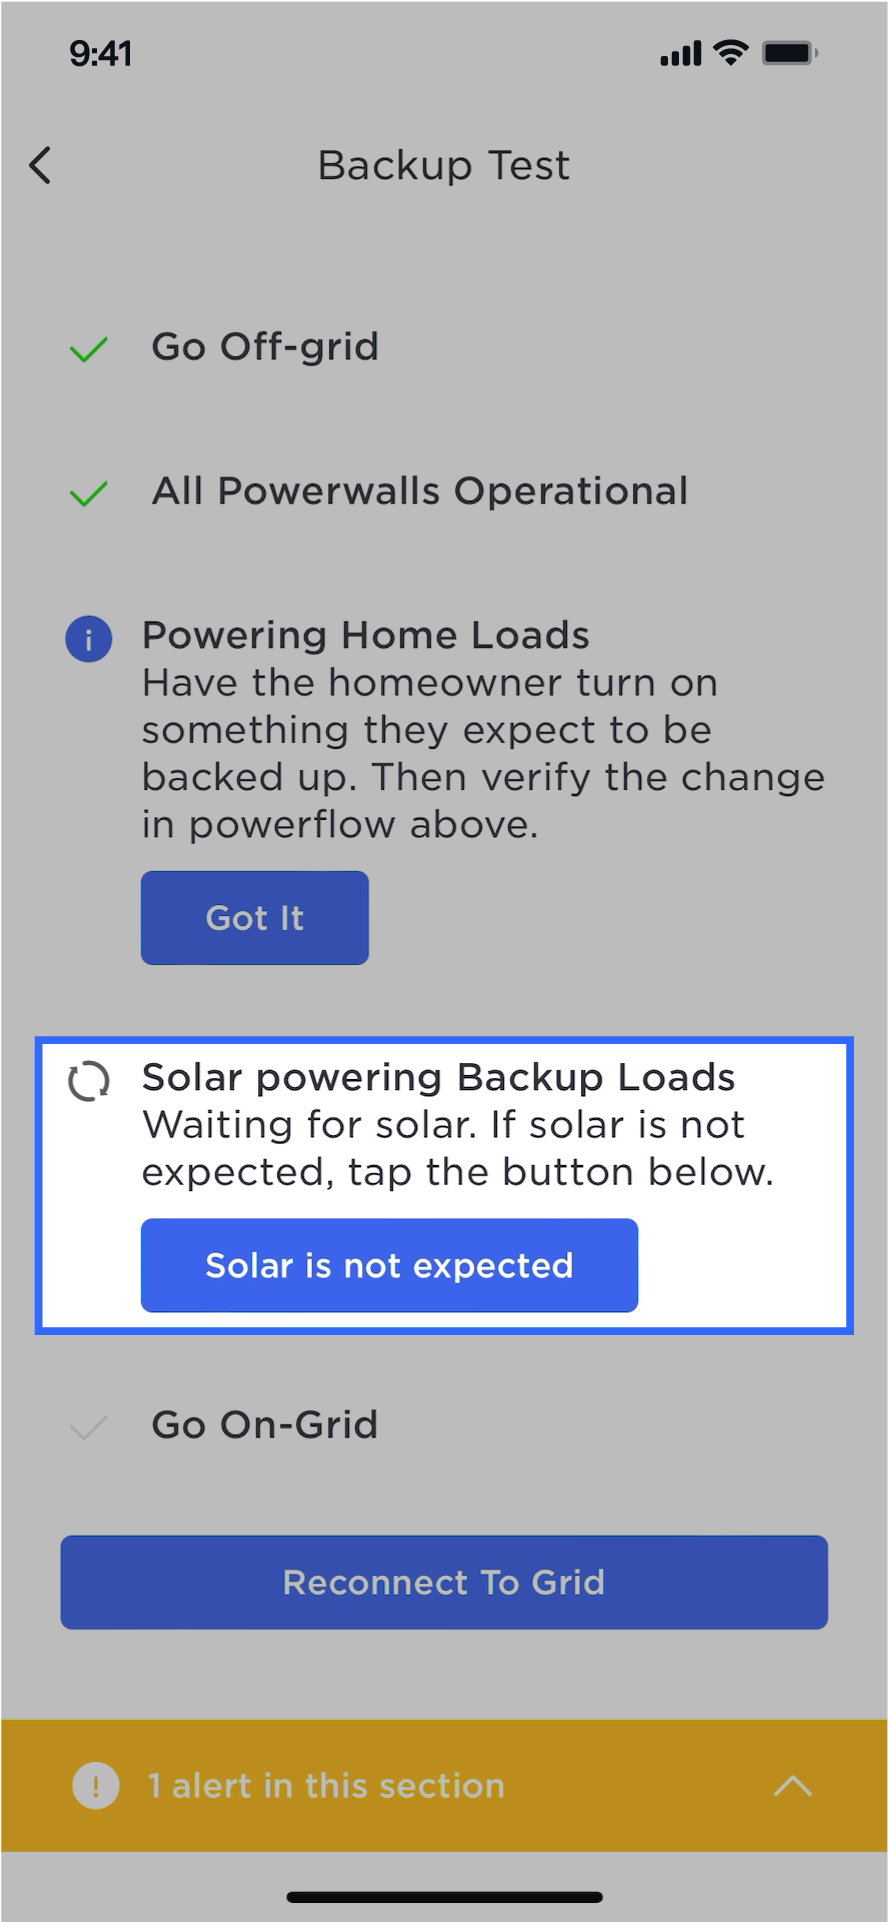
- Monitor the system as the backup test progresses. If the solar is not
installed and the integrated DC
isolator is in its Off position, select Solar is not
expected.
- If needed, select Reconnect To Grid
to end the test.
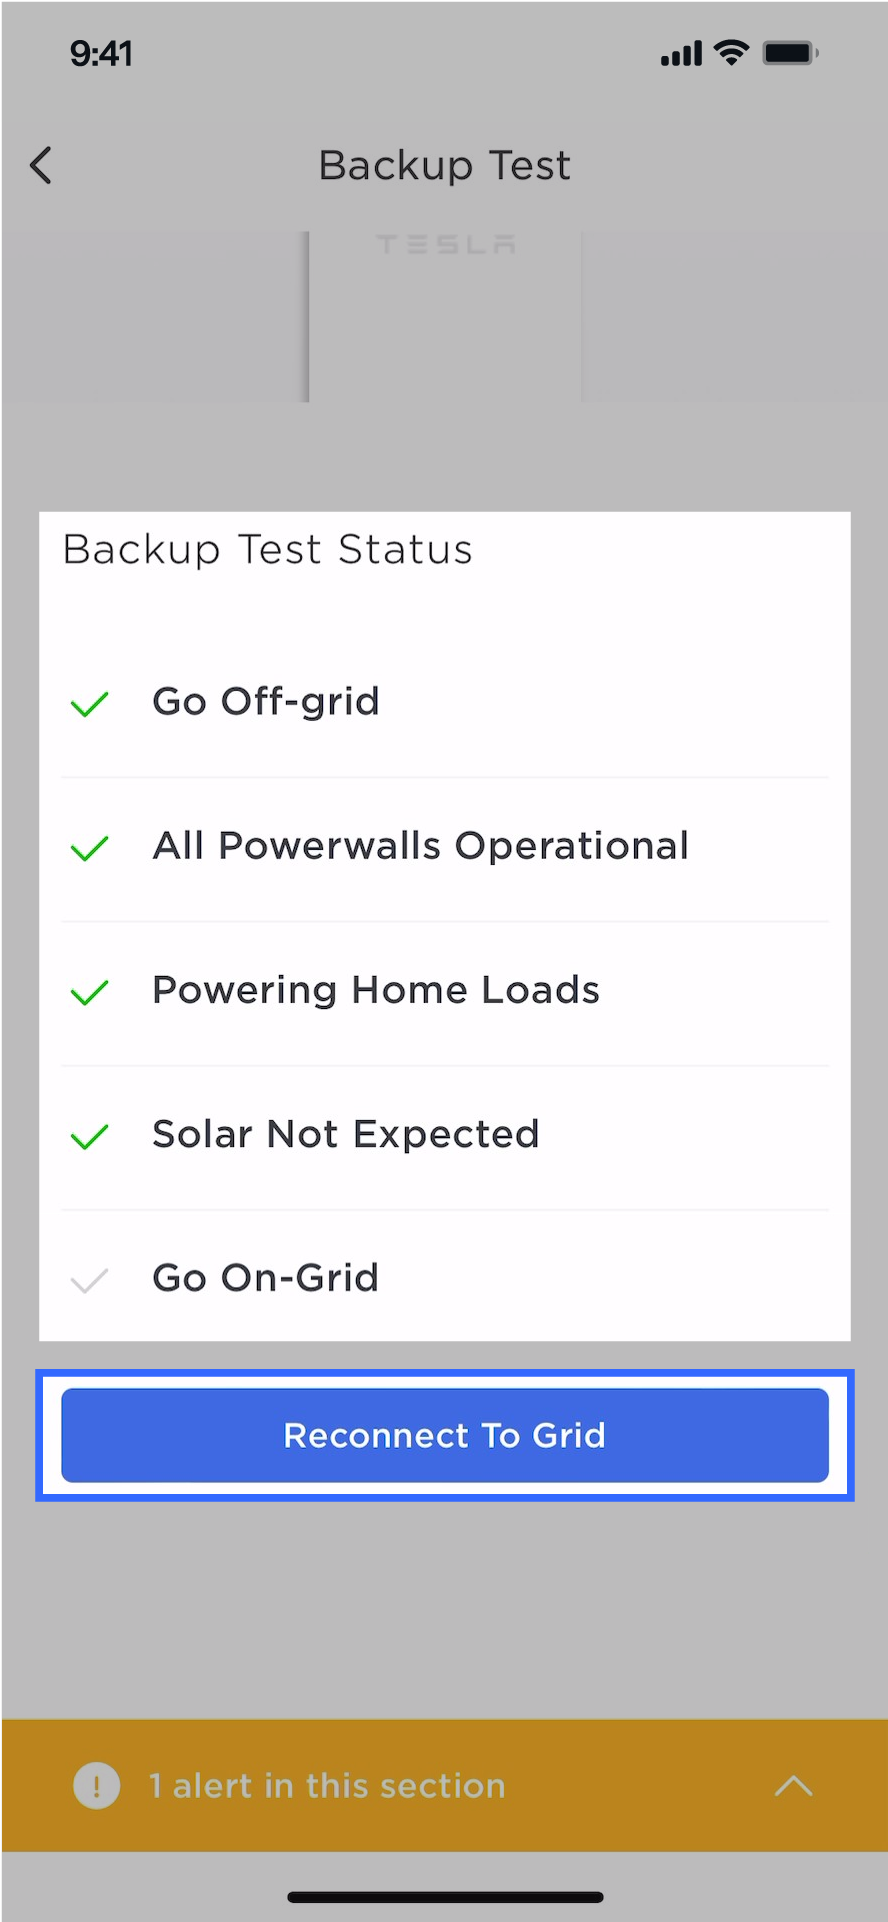
- Once the test has successfully completed, select Done to return to the landing page.
- Select , select the system configuration from the Backup
Type dropdown, and then select Begin Backup
Test.