Complete the Powerwall 3 Installation and Commission the System
Important Notes on Metering
- Site metering is performed by Backup Switch / Backup Gateway 2 / Gateway 3
- Powerwall 3 performs its own Solar metering
- Solar metering for AC-coupled solar is performed by Backup Gateway 2 Meter Y or Tesla Remote Energy Meter
- Neurio meters are not supported at this time. If additional metering is required, it must be performed by a Tesla 100A CT connected to Backup Gateway or a Tesla 200A CT connected to Tesla Remote Energy Meter
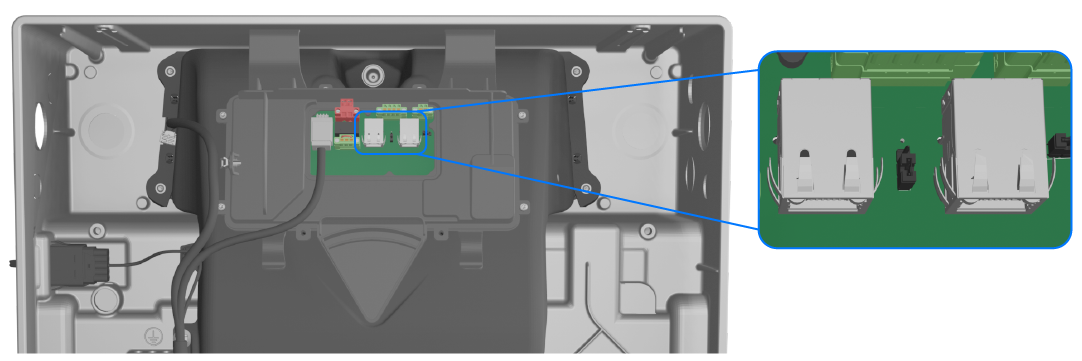
Connect Powerwall 3 to the Internet
Connect Powerwall 3 to the customer's internet router via either Ethernet or Wi-Fi.
Perform Device Setup in Tesla One
If needed, navigate to tesla.com/teslaone to install Tesla One, then enter Device Setup to commission the system. See the Powerwall 3 Device Setup commissioning guide for complete instructions.
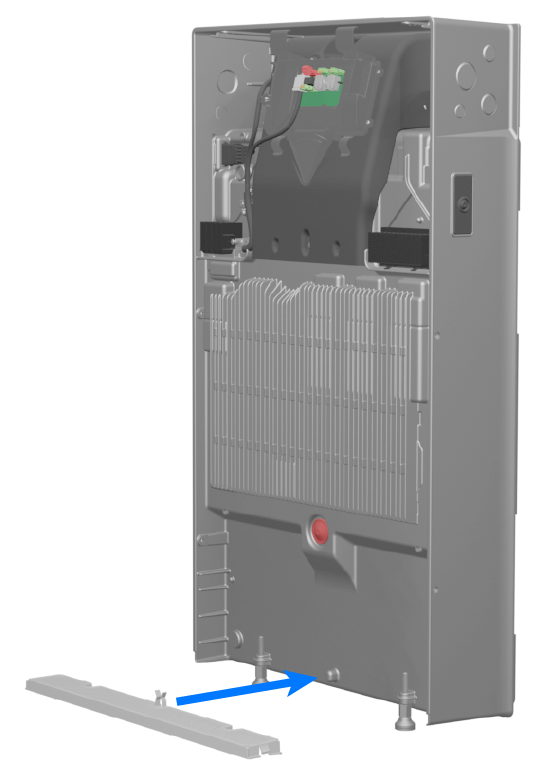
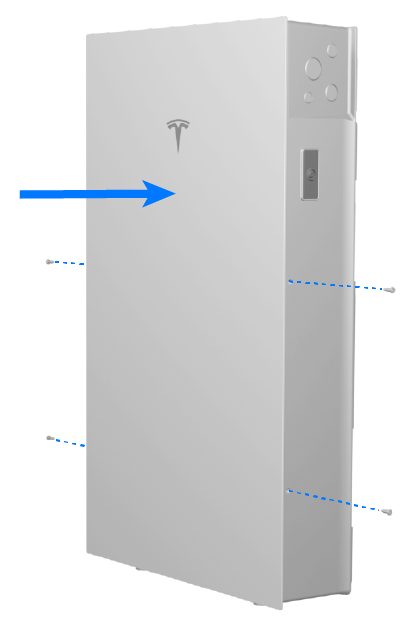
Install the Powerwall 3 Front Cover
- Install the air intake screen over the opening at the bottom of Powerwall 3, ensuring it snaps into place.
- Clean the front edge of the Powerwall 3 enclosure and the sealing gasket on the front cover.
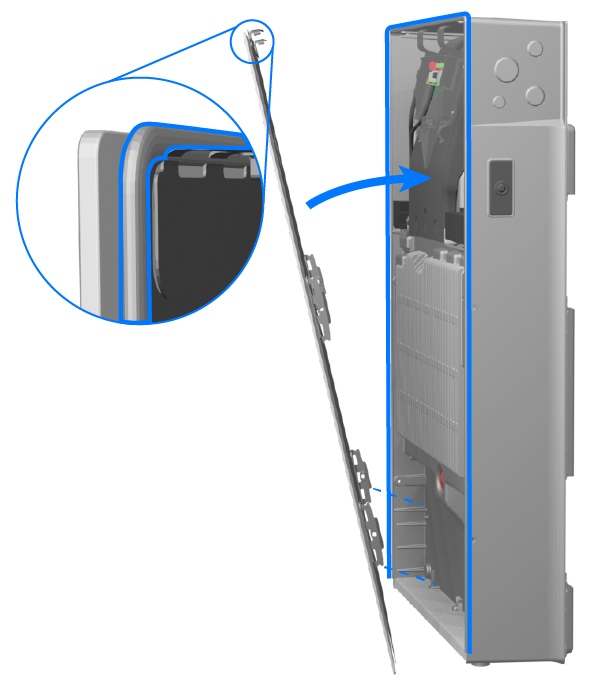
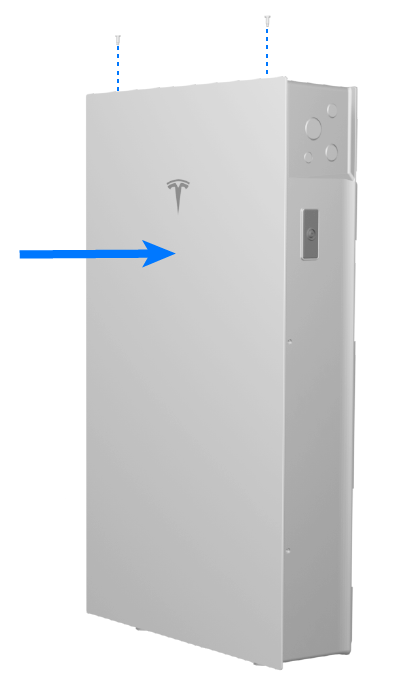
- Install the front cover, securing the top (2X) fasteners first, then following
with the (4X) side fasteners. Torque all fasteners to 25 in-lb with a Torx T20
bit. CAUTIONMaintain pressure to keep the sealing gasket compressed until all fasteners are installed and tightened. If the sealing gasket is not compressed, the fasteners may thread form in the enclosure, breaking the front cover mounting tabs.
How to Leave the System
Leave the Powerwall 3 Breaker CLOSED and Enable Switch ON:
| Powerwall Installation Complete? | Solar Installed? | Backup Switch Installed (if applicable)? | Does Utility / AHJ allow the system to run pre-PTO?* |
|---|---|---|---|
| Yes | Yes | Yes | Yes |
| Yes | N/A (applicable whether solar is installed or not) | No1 | Yes |
| Yes | No2 | Yes | N/A (system not ready to be turned on) |
1See Commission prior to Backup Switch installation.
2See the Powerwall 3 Installation Manual (with Backup Gateway 2, Backup Switch, or Gateway 3) for instructions to commission ahead of solar installation.
Leave the Powerwall 3 Breaker CLOSED and Enable Switch OFF:
| Powerwall Installation Complete? | Solar Installed? | Backup Switch Installed (if applicable)? | Does Utility / AHJ allow the system to run pre-PTO?* |
|---|---|---|---|
| Yes | Yes | Yes | No |
| Yes | N/A (applicable whether solar is installed or not) | No, and commissioning could not be completed as defined above3 | N/A (system not ready to be turned on) |
| Yes, but commissioning could not be completed (could not resolve errors with troubleshooting)3 | N/A (applicable whether solar is installed or not) | Yes | N/A (system not ready to be turned on) |
Leave the Powerwall 3 Breaker OPEN and Enable Switch OFF:
| Powerwall Installation Complete? | Solar Installed? | Backup Switch Installed (if applicable)? | Does Utility / AHJ allow the system to run pre-PTO?* |
|---|---|---|---|
| No (no AC service, install crew unable to complete, etc.)3 | No | No | N/A (system not yet installed) |
3Commissioning cannot be completed at this time (schedule a second site visit to complete).