Using Dolly with Powerwall 2 / Powerwall+
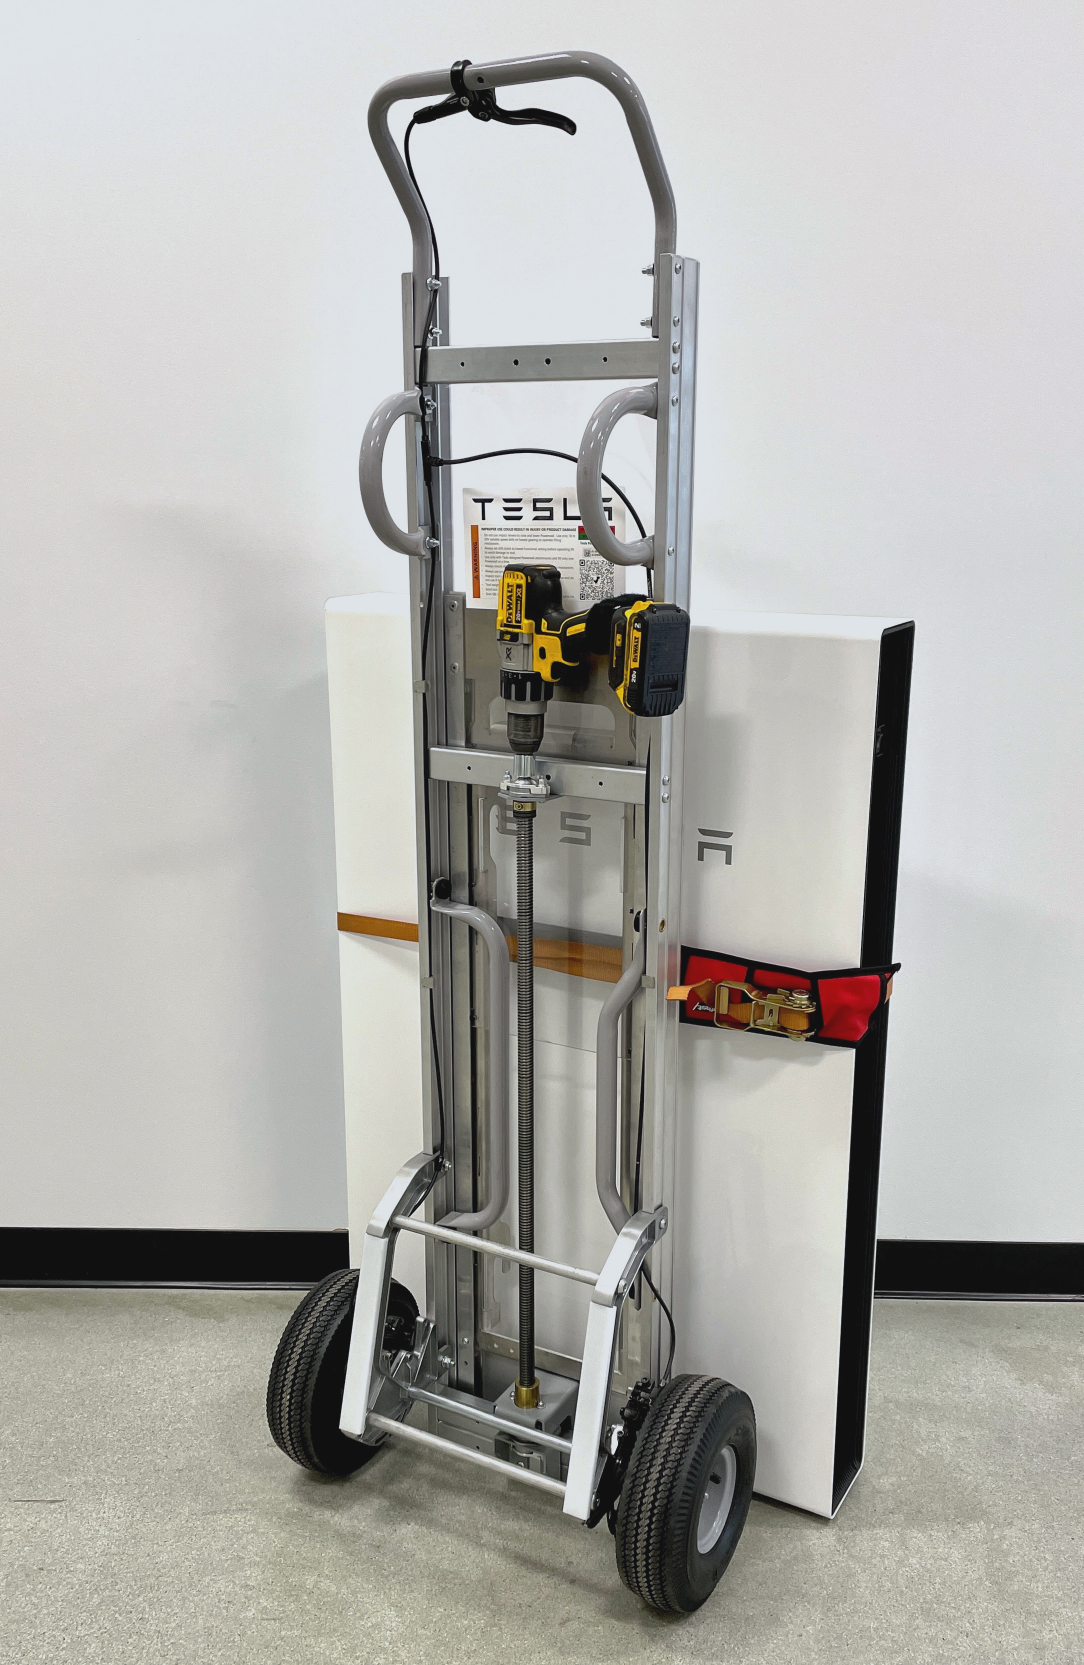
Watch the video below for instructions on mounting Powerwall 2/+ using the Powerwall dolly.
Preparing to Use Dolly
Before operating the dolly or handling Powerwall, wear all required PPE (personal protective equipment):
- Safety glasses
- Cut-resistant gloves
- Protective footwear
Warning
Do not use the dolly
to transport or mount Powerwall without PPE, especially protective footwear. Failure
to do so could result in serious injury.
Secure Powerwall to the Dolly
- Place the protector sleeve on the
ratchet strap, with the ratchet positioned in the center of the protector sleeve.
Figure 1. Ratchet Strap in Protector Sleeve 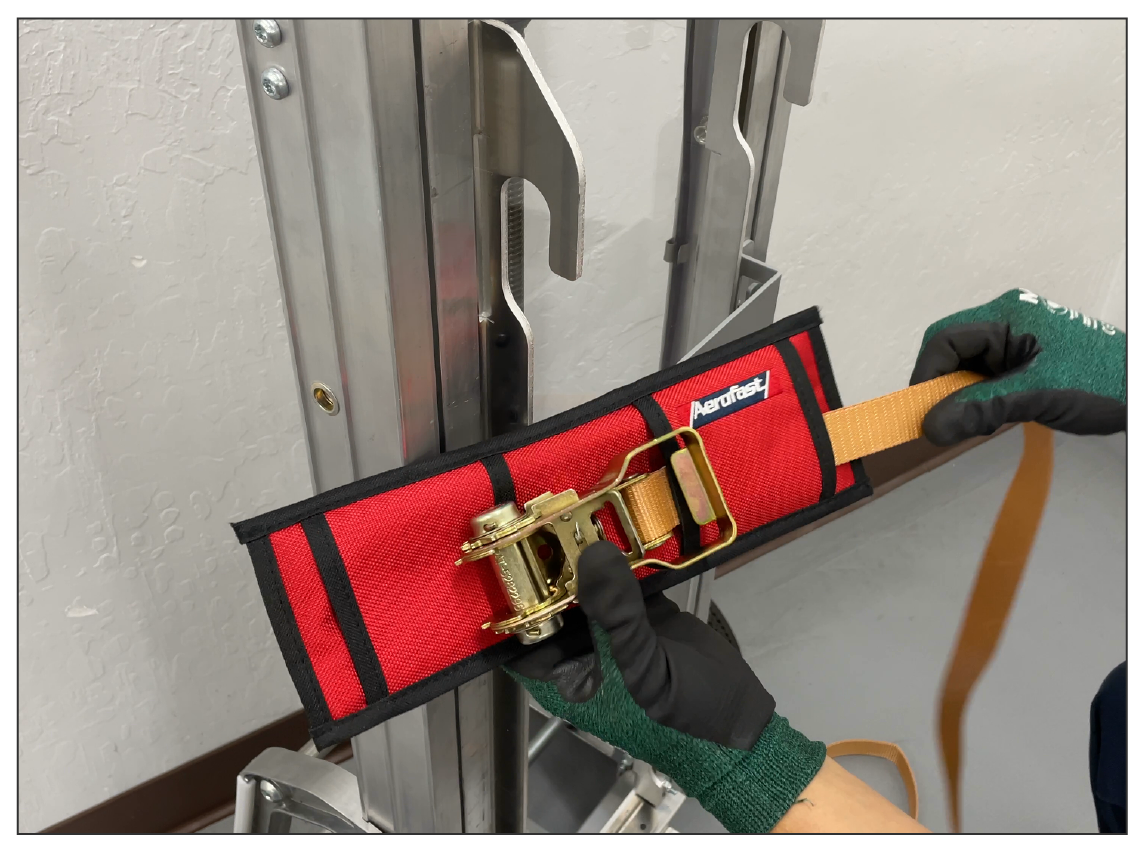
- Install the ratchet strap on the
dolly:
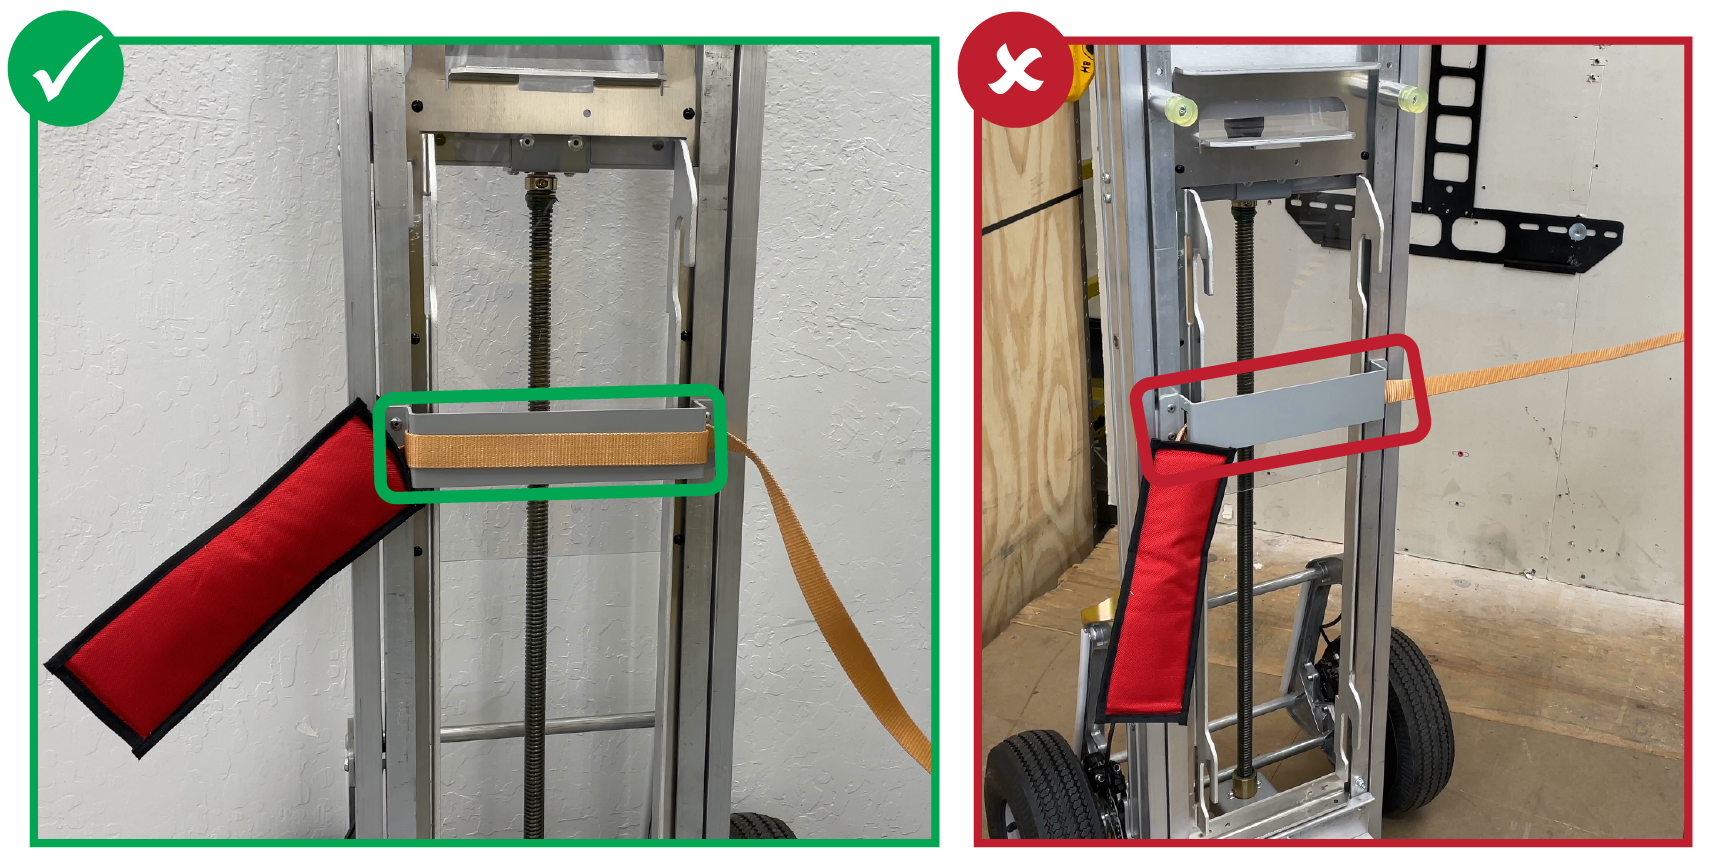
- Run the ratchet strap through the dedicated slots on the dolly.
- Wrap the ratchet strap around the support and run it through the slots a second time.
- Position the dolly in front of Powerwall, sliding the base plate underneath Powerwall.
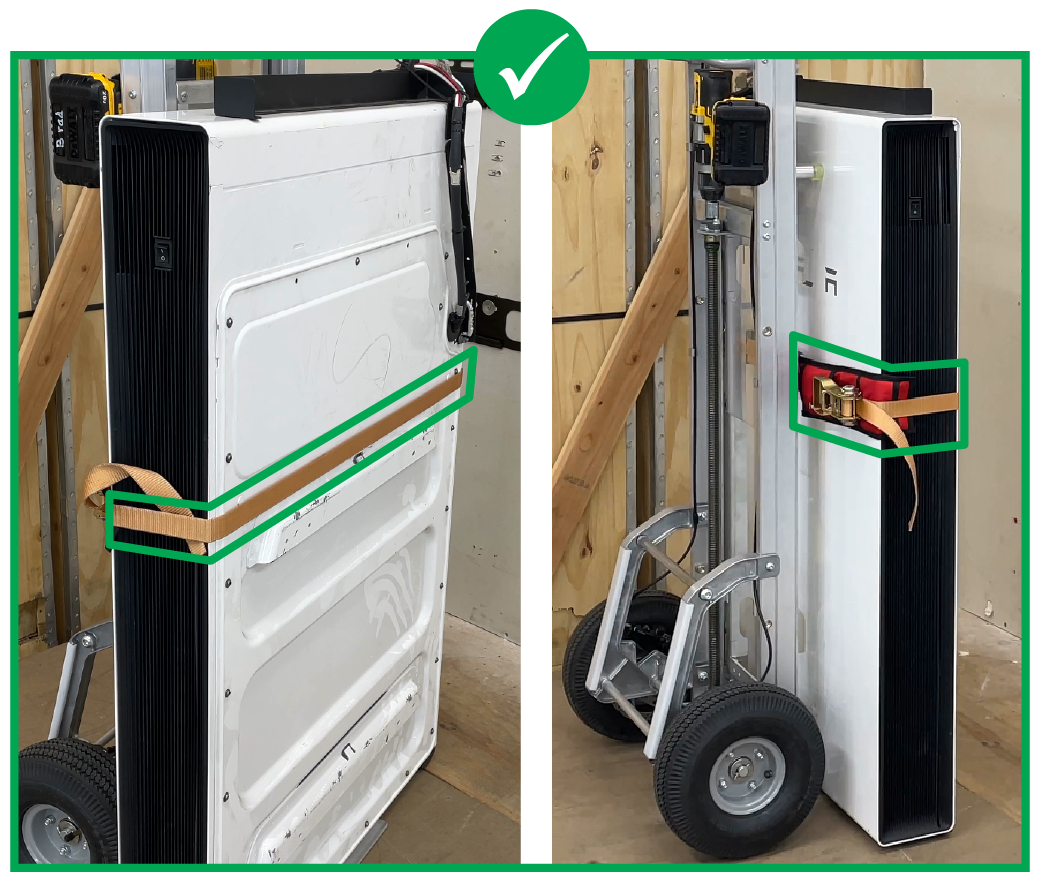
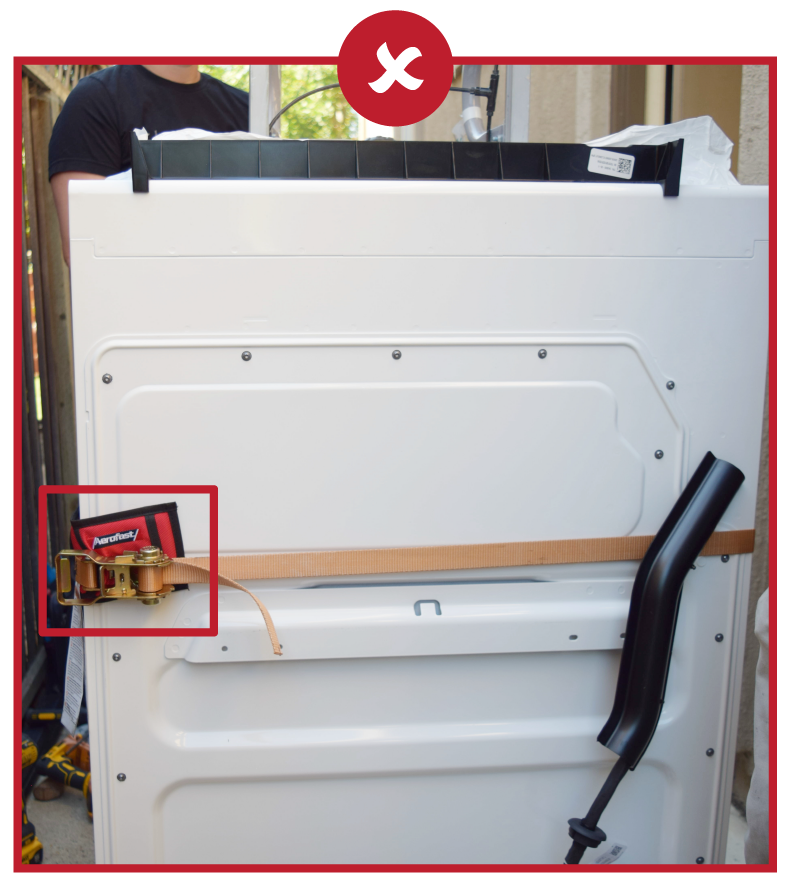
- Wrap the end of the strap around Powerwall and insert it in the ratchet:
- Tighten the ratchet strap.
Prepare the Drill
- Install the ¾ inch socket.
- Tighten the drill chuck.
- Lock the drill chuck (turn it clockwise until it clicks once).
- Set the clutch one level below the maximum setting.
- Set the drill to low gear.
- Mount the drill to the lifting screw.
- Secure the drill with the
included drill strap.WarningNot strapping the drill may result in injury.
- Drill forward to raise the base plate.
- Drill in reverse to lower the base plate.
Transport Powerwall
Before tilting back the dolly, squeeze the hand brake. Use the brake to control the dolly when Powerwall is raised, or when the dolly is moving.
Warning
Always have one hand
ready to operate the brake during Powerwall transport.
Mount Powerwall
Warning
Never release the
brake lever while mounting Powerwall. If adjustments are needed during mounting, be
sure-footed and keep both hands on the dolly, with one hand on the brakes at all
times.
- Position Powerwall and align with the wall bracket.
- Hold the hand brake when lifting or adjusting Powerwall.
- Tilt the dolly back and drill
forward to raise Powerwall until the mounting cleats are positioned above the
flanges on the bracket.
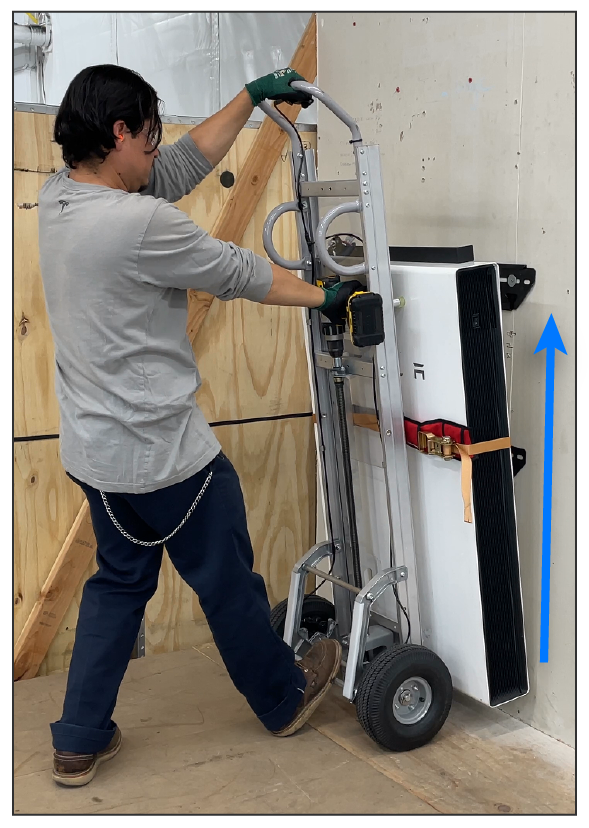
- Confirm Powerwall is aligned with the bracket.
- Tilt the dolly forward and drill
in reverse to lower Powerwall until the mounting cleats engage the bracket flanges.
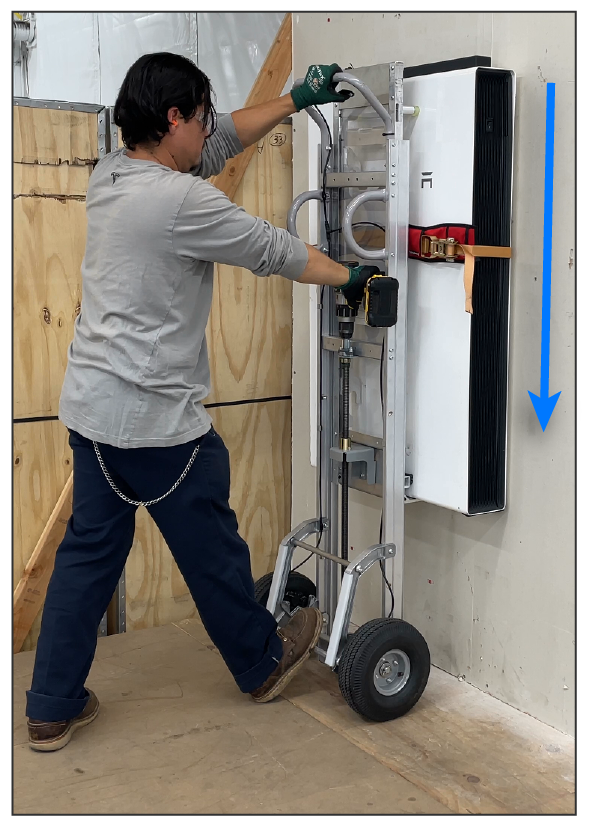
- Ensure Powerwall is properly seated on the bracket. Use visual checks and confirmations to confirm alignment.
- Remove the ratchet strap and drill in reverse until Powerwall is fully secured.
