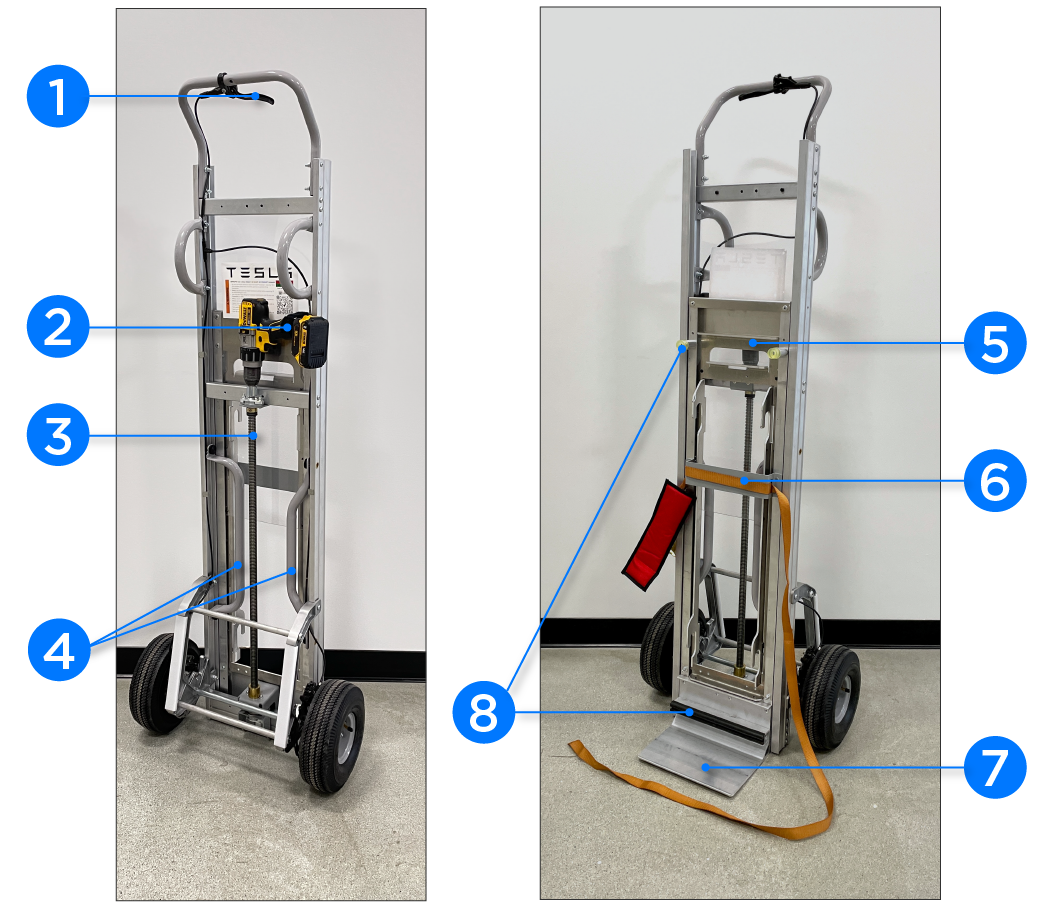
| 1 |
Hand
Brake
|
Use the hand brake to maintain control of the unit during
transportation and mounting |
| 2 |
Drill
Strap
|
Holds the drill in place |
| 3 |
Lifting
Screw
|
Requires a 3/4 in (19
mm)
socket, attached to a standard drill. Operate the drill to raise and
lower the base plate. |
| 4 |
Lift
Handles
(Powerwall 3
Only)
|
Two lift handles are removed from the dolly and temporarily
secured to Powerwall 3 for transport and mounting. Once mounted on
Powerwall 3, the lift handles engage with the locking plate,
securing Powerwall to the dolly. |
| 5 |
Locking
Plate
(Powerwall 3
Only)
|
This is the attachment point between the transport tool and
Powerwall 3 unit. It is spring loaded to stay in the lower position
and can be lifted to engage the lift handles on Powerwall 3. |
| 6 |
Ratchet Strap
and Protector Sleeve
(Powerwall 2/+
Only)
|
Used to secure Powerwall 2/+ to the
dolly for transport and mounting |
| 7 |
Lifting
Plate
|
The lifting plate holds the weight of Powerwall during
transportation and mounting. The lifting plate can be raised and
lowered with a lifting screw on the back of the tool. |
| 8 |
Bumpers
(Powerwall 2/+
Only)
|
The yellow top bumpers and black bottom bumper help stabilize
Powerwall 2/+, holding
the unit in place while the dolly is in motion |
