2025-08-19
STEP 2: Remove Powerwall 3 from Packaging and Transport Using the Powerwall Dolly
Warning
Do not move Powerwall 3 in its packaging while the
packaging is standing upright. In this position, the Powerwall 3 unit can shift within the
packaging, which may result in Powerwall 3 falling over.
-
Open the Powerwall
packaging:
NotePlease return the Powerwall 3 packaging to the warehouse that originally shipped the unit(s). See Powerwall 3 Transportation & Storage Guidelines for instructions.
-
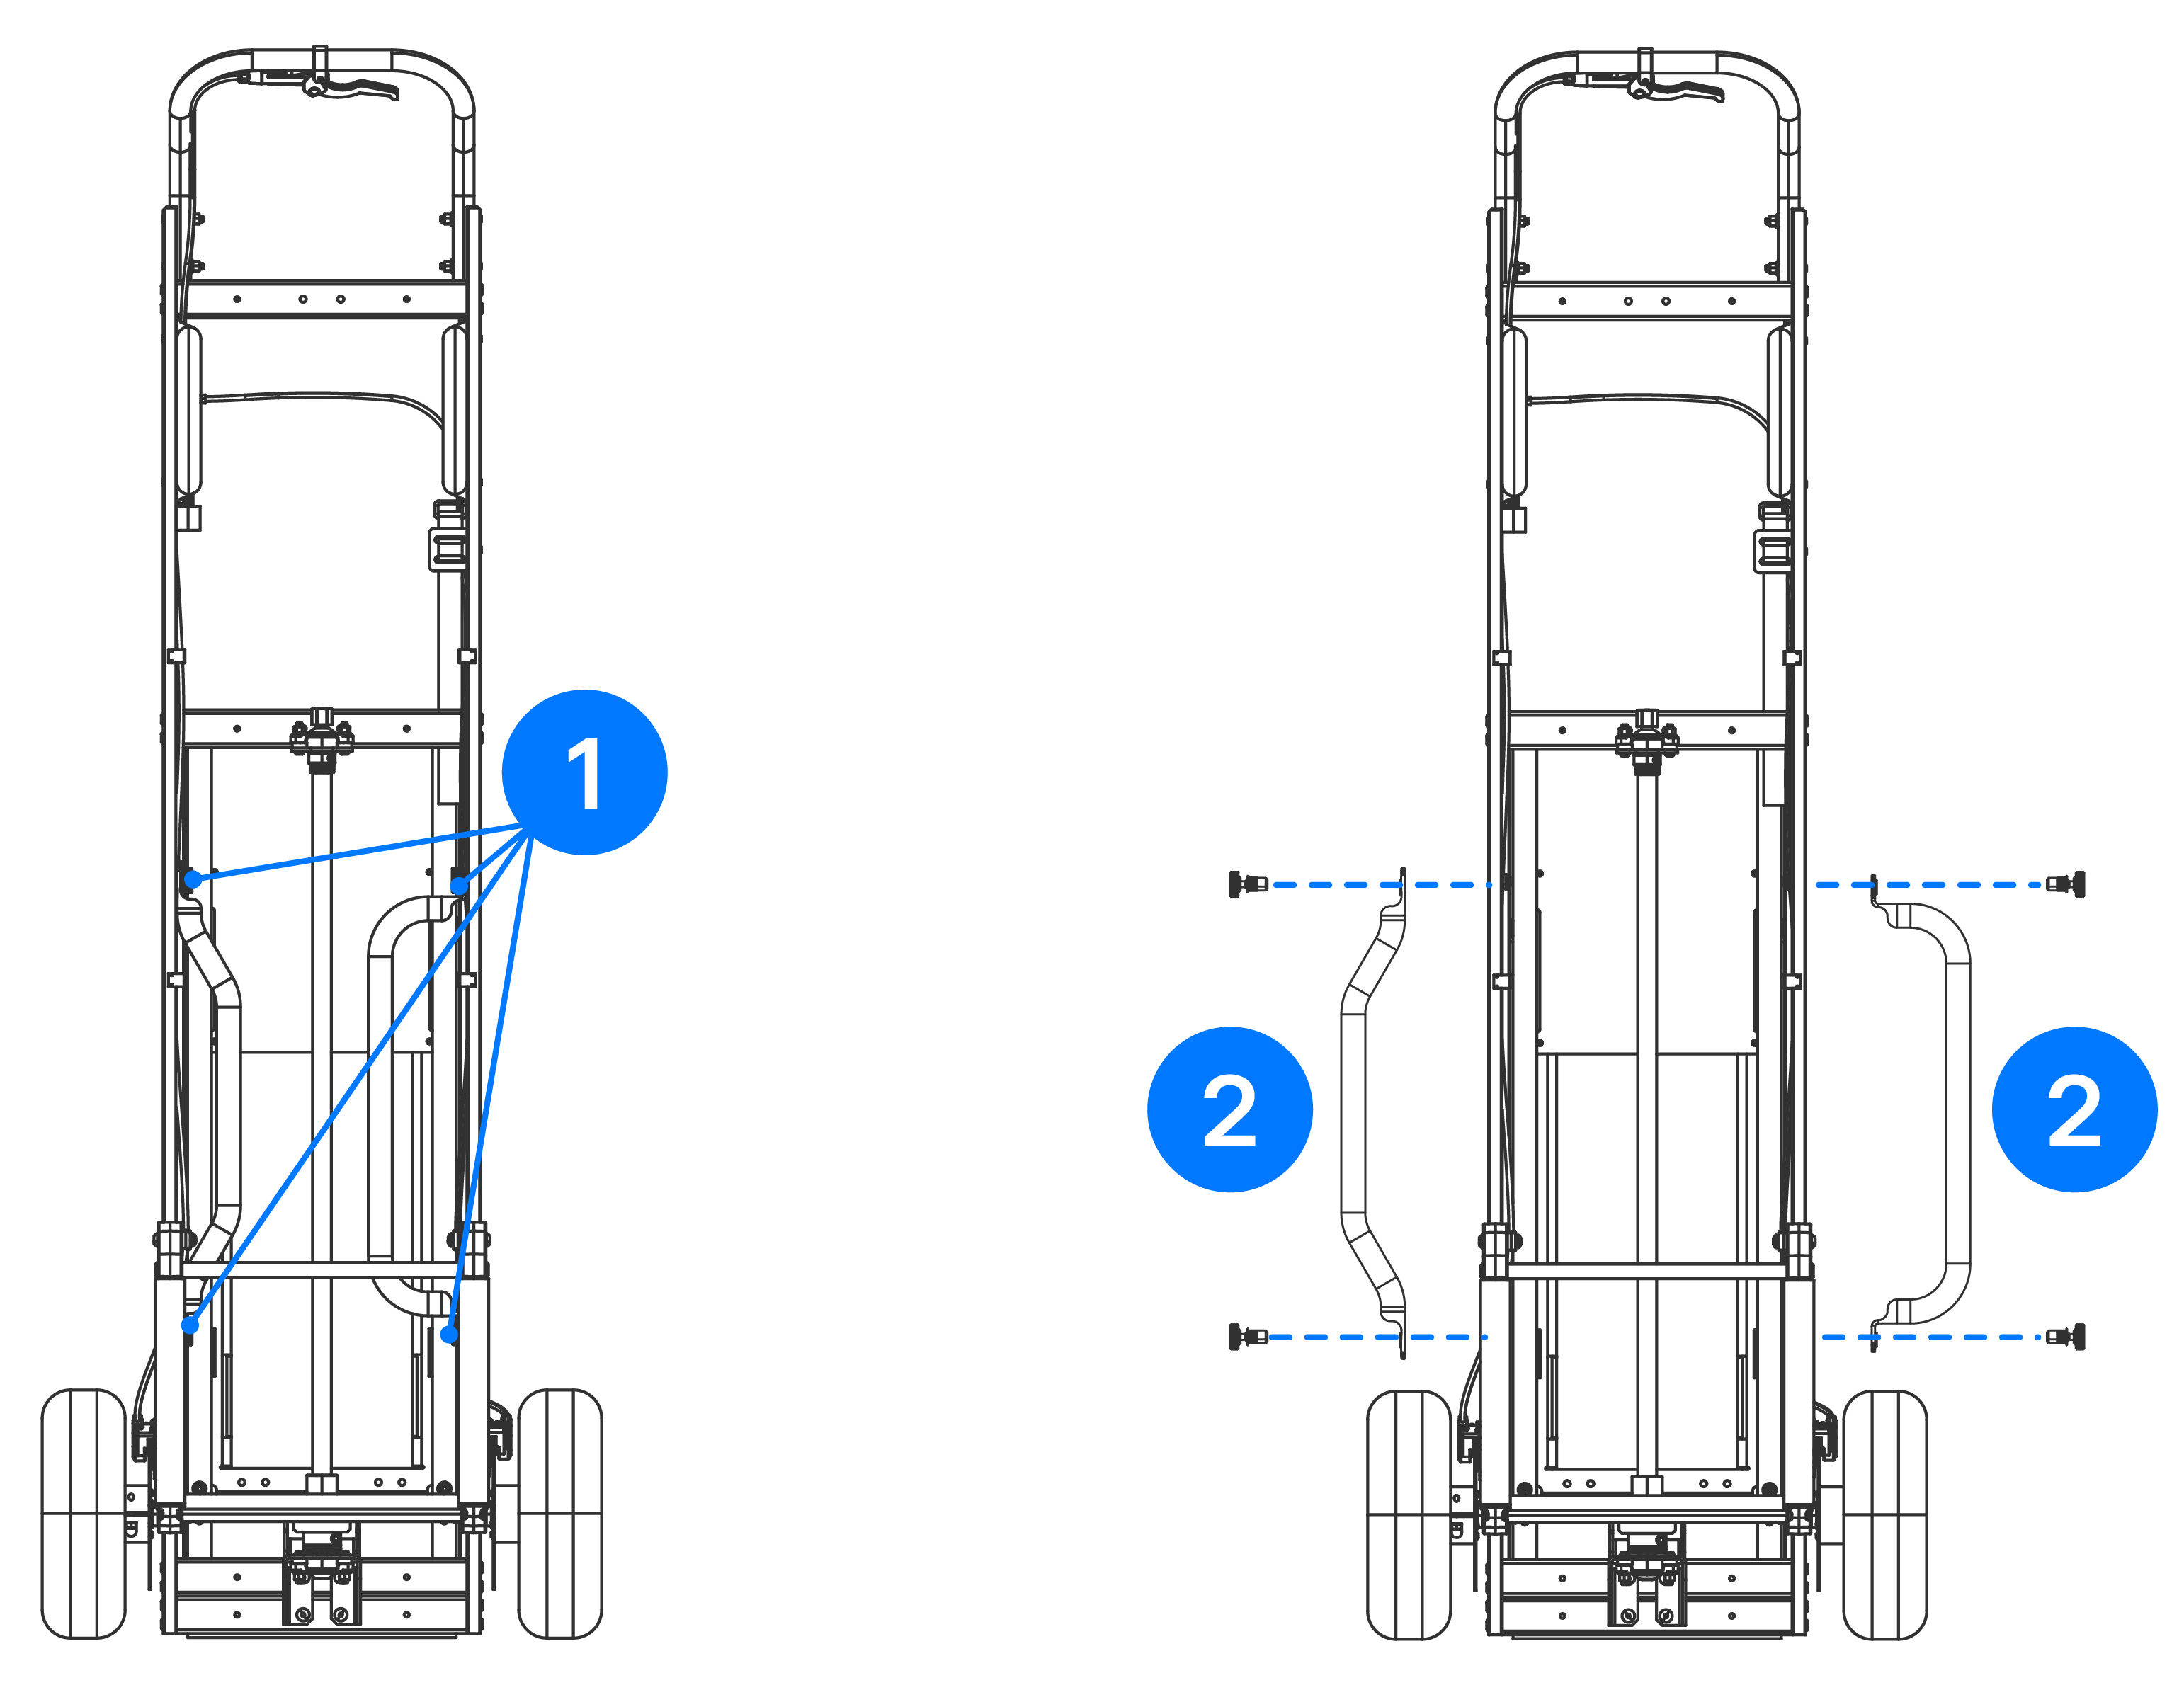
To lift Powerwall 3 using the Powerwall dolly,
loosen the (2X) fasteners holding each lift handle in place (1), then
detach the handles (2).
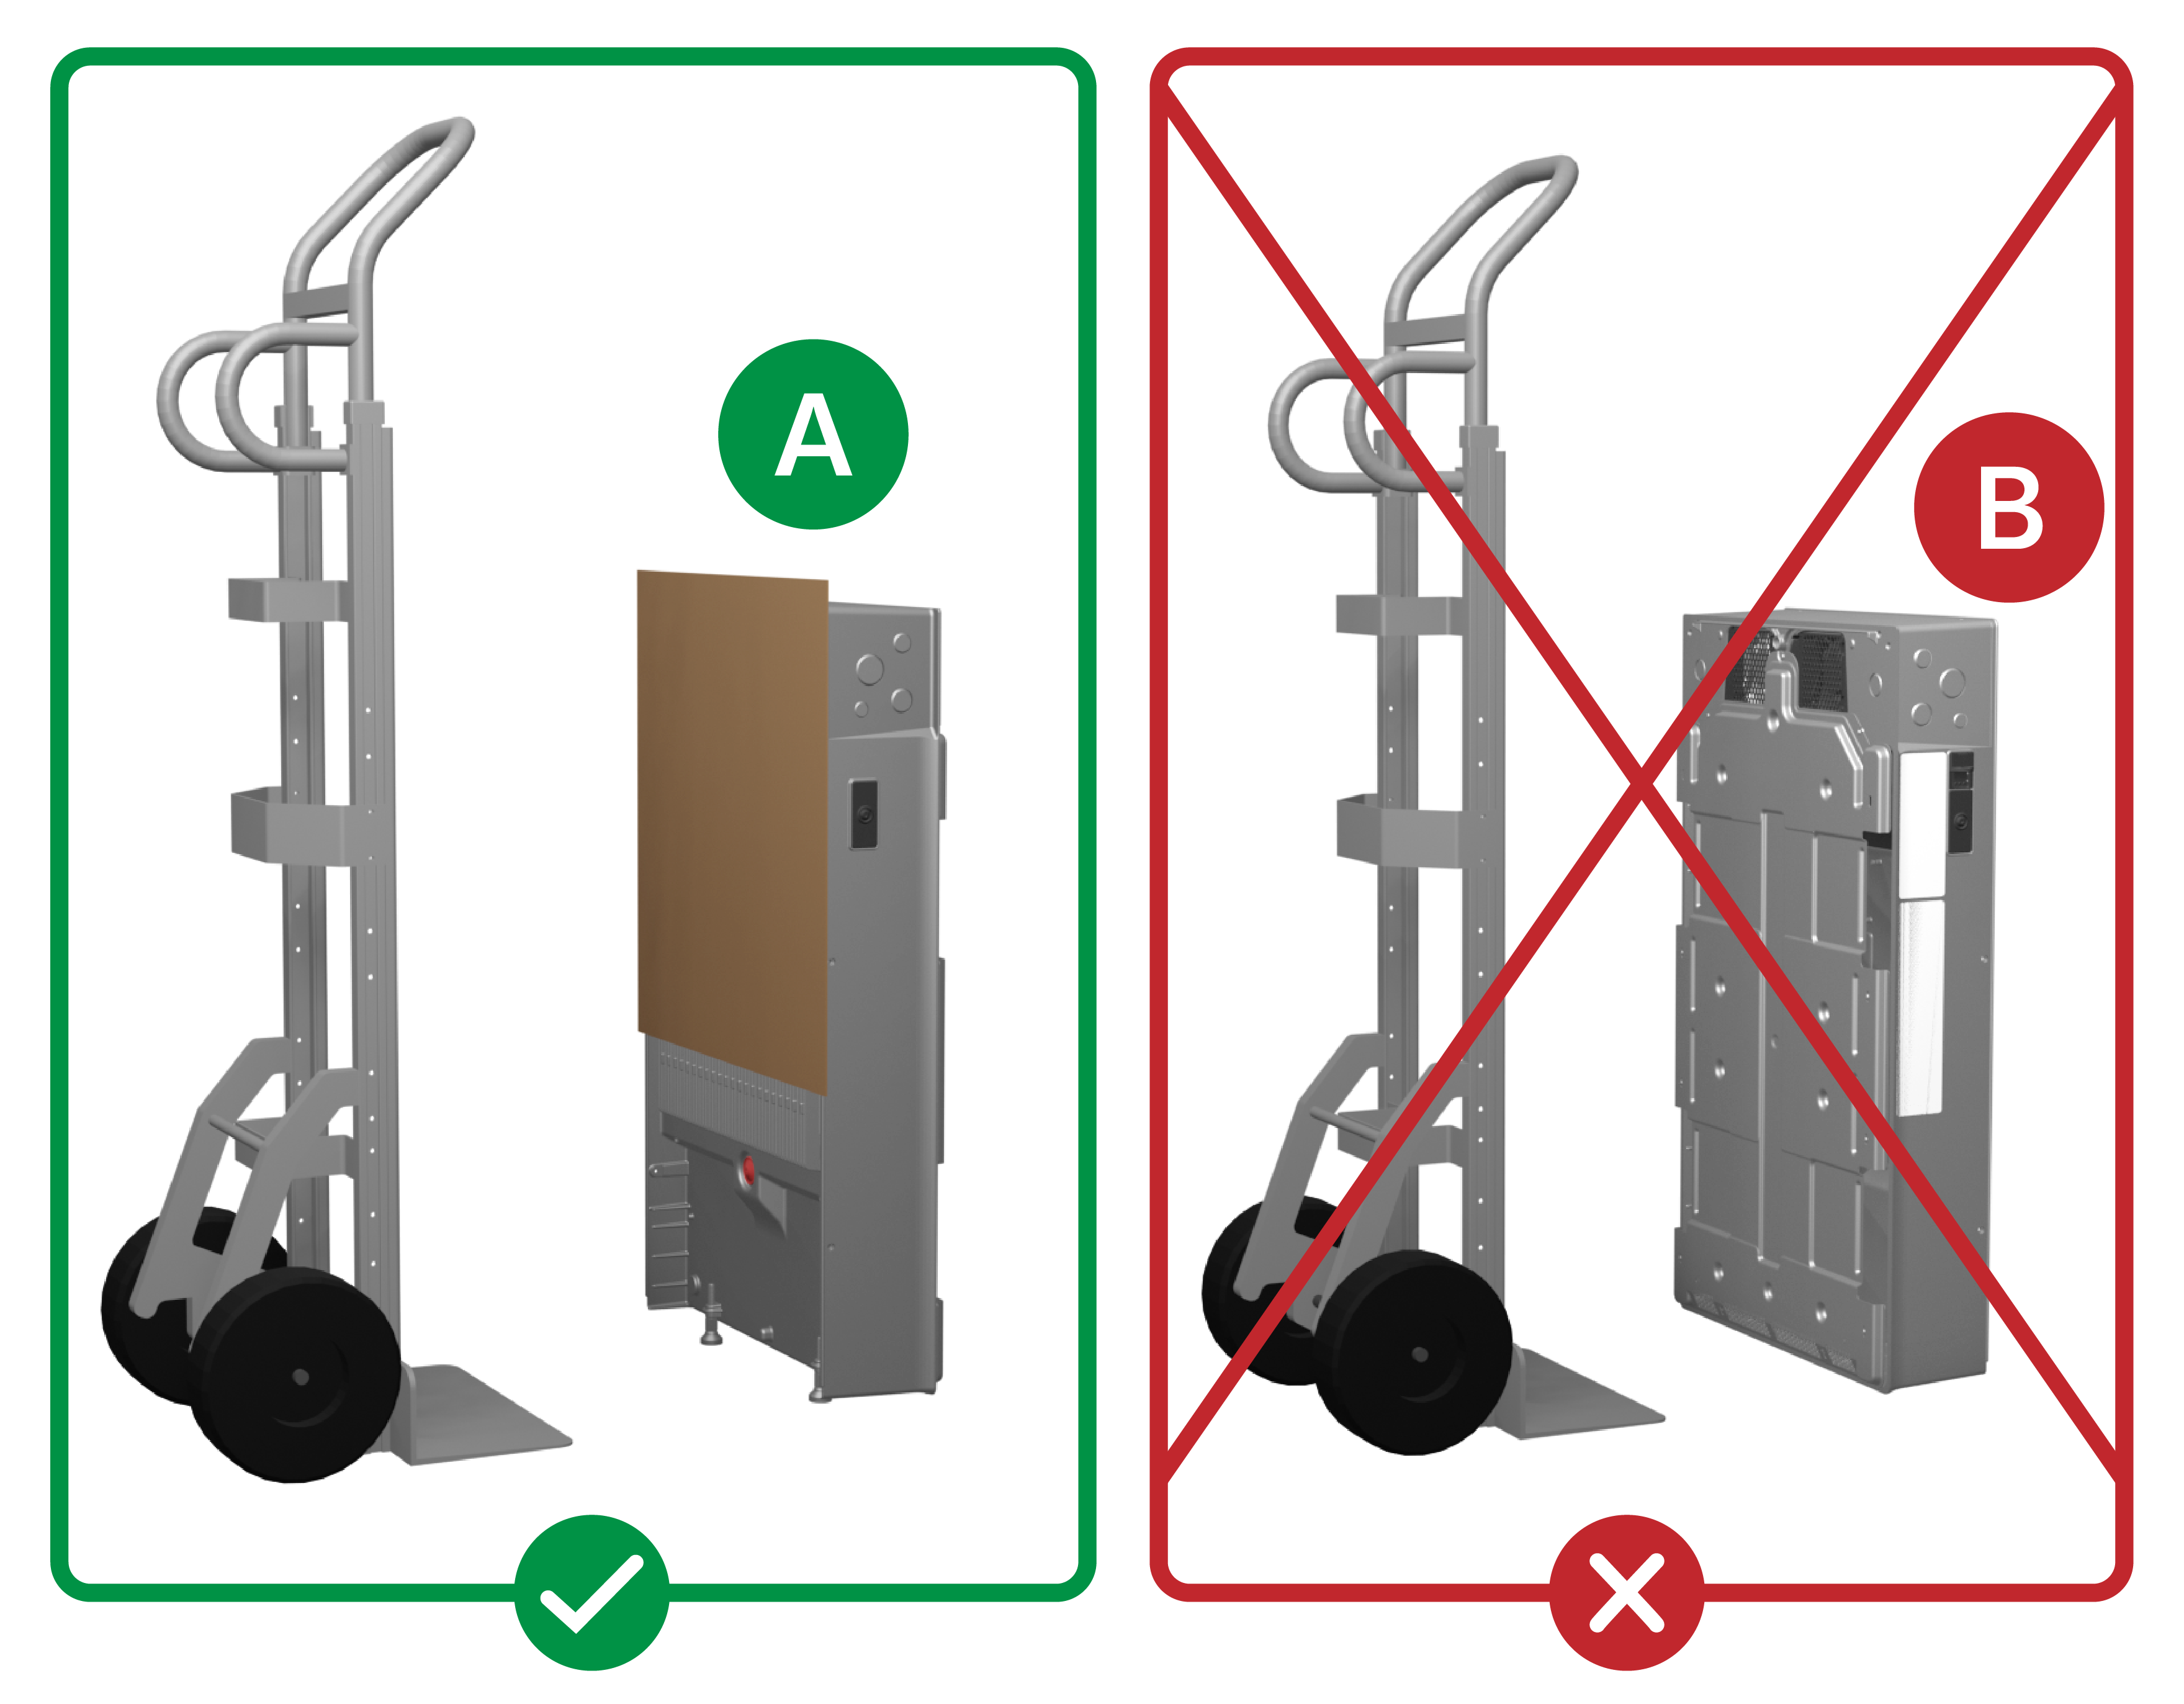
NoteRefer to the Powerwall Dolly User Manual for instructions on mounting Powerwall 3 using the Powerwall dolly.CAUTIONThe Powerwall dolly is the recommended tool for transporting Powerwall 3. If using another dolly:
- Ensure Powerwall 3 is facing toward the dolly and the front of the unit is protected by a piece of cardboard (for instance the cardboard box the bracket ships in) or a similar material. Use a strap to secure Powerwall to the dolly.
- Do not position Powerwall so that it faces away from the dolly.
-
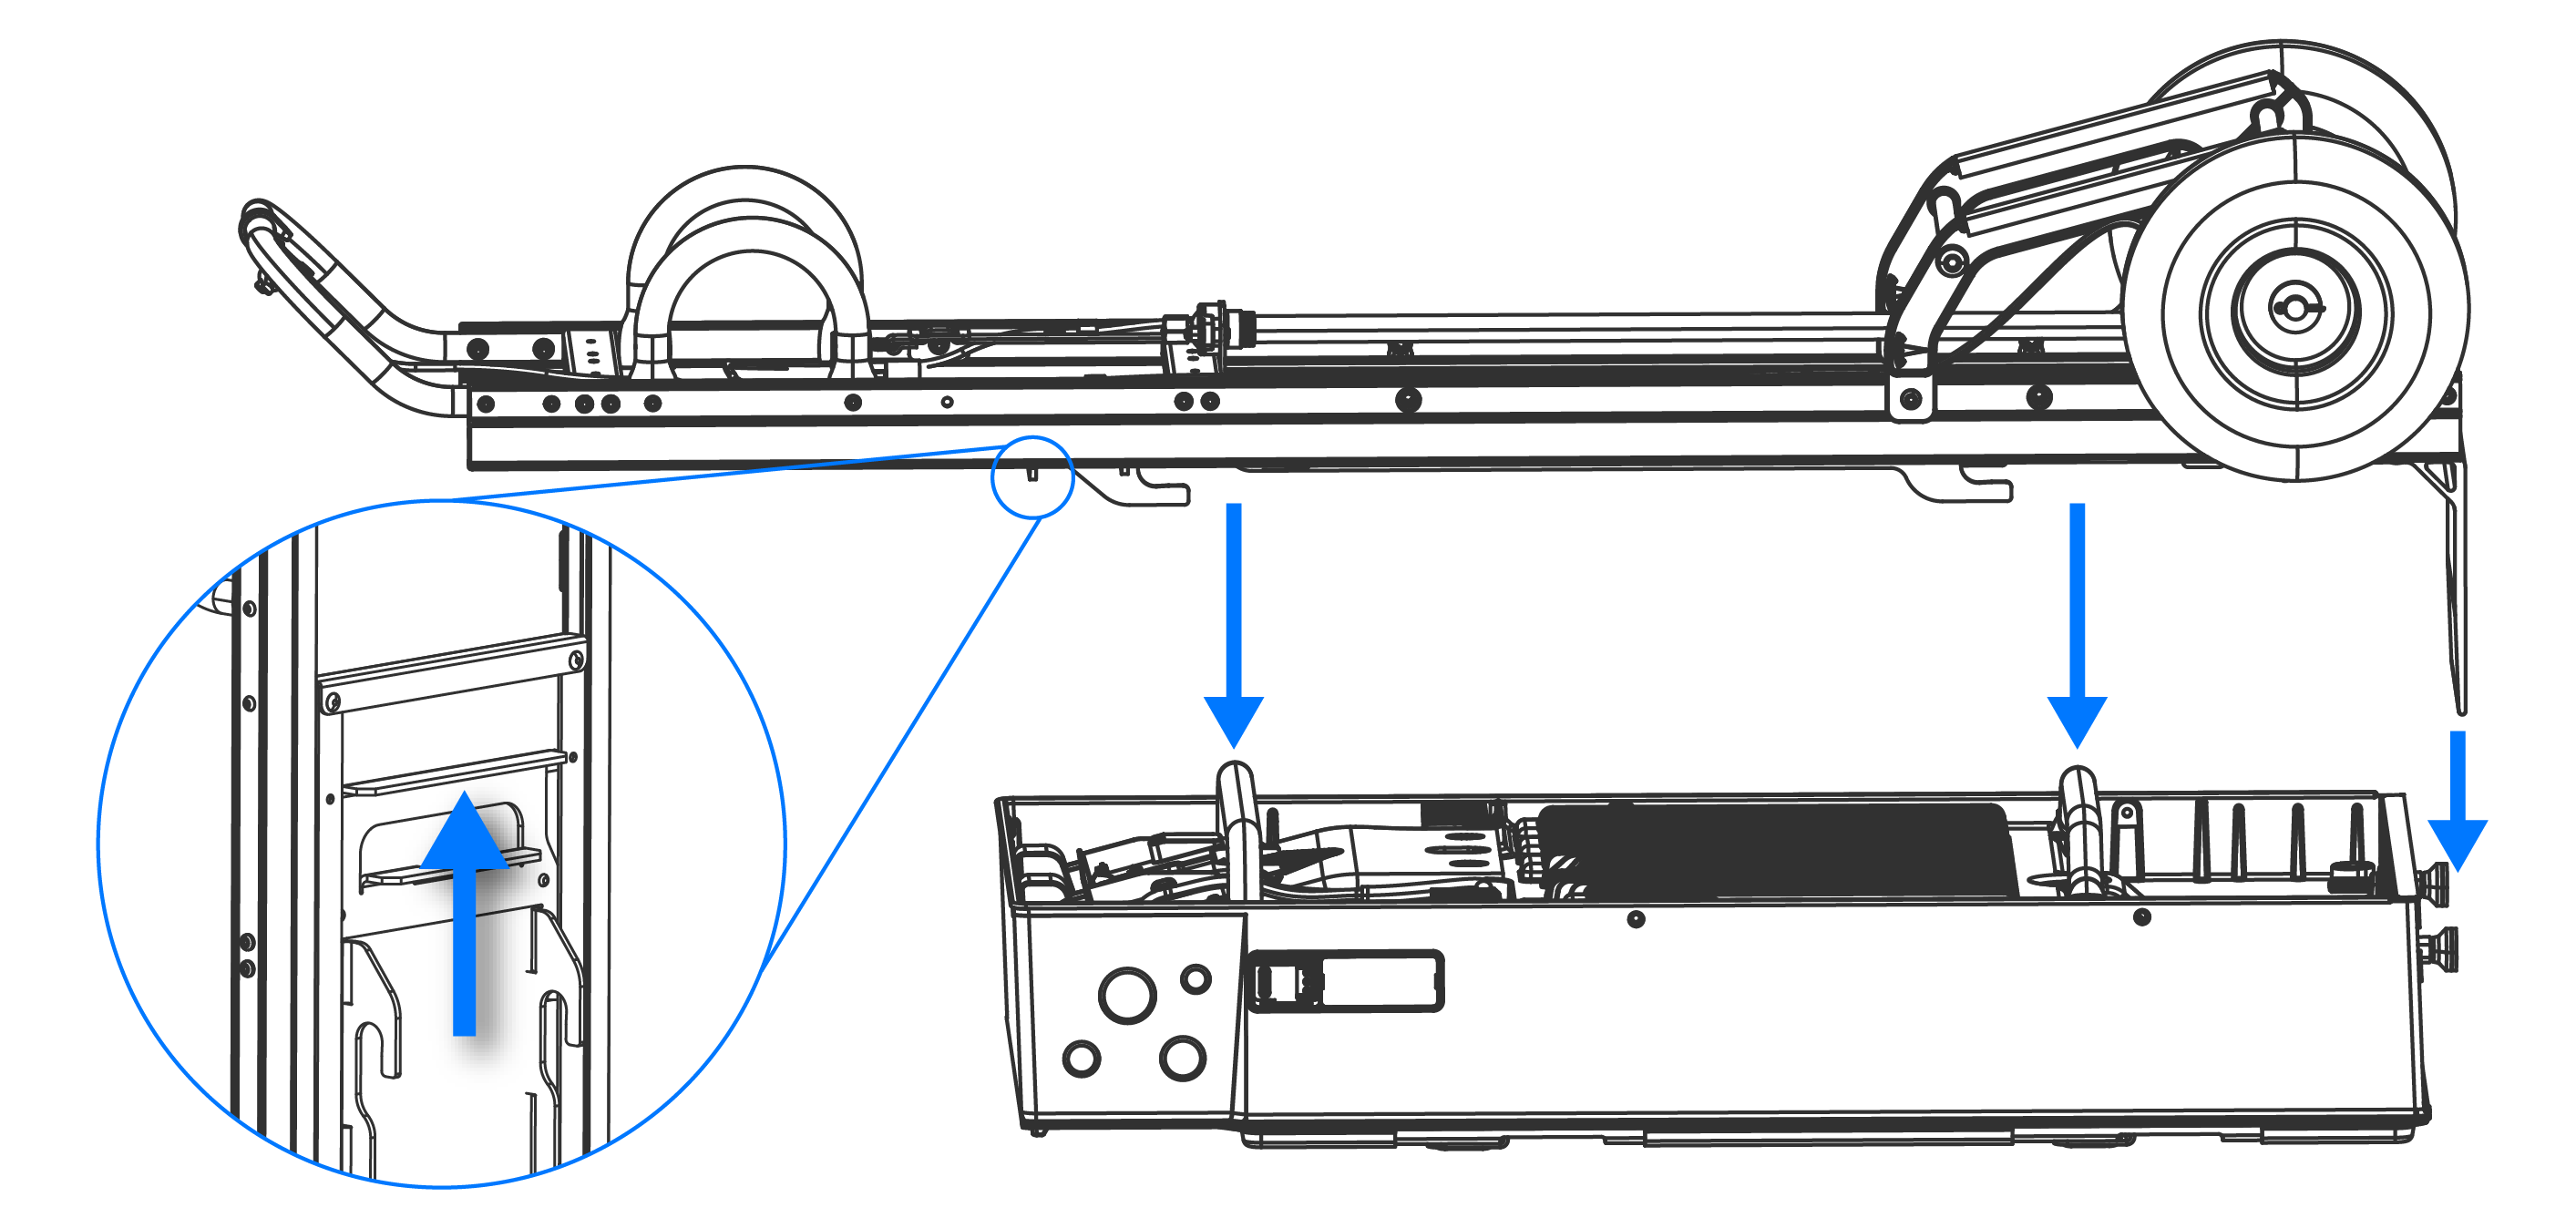
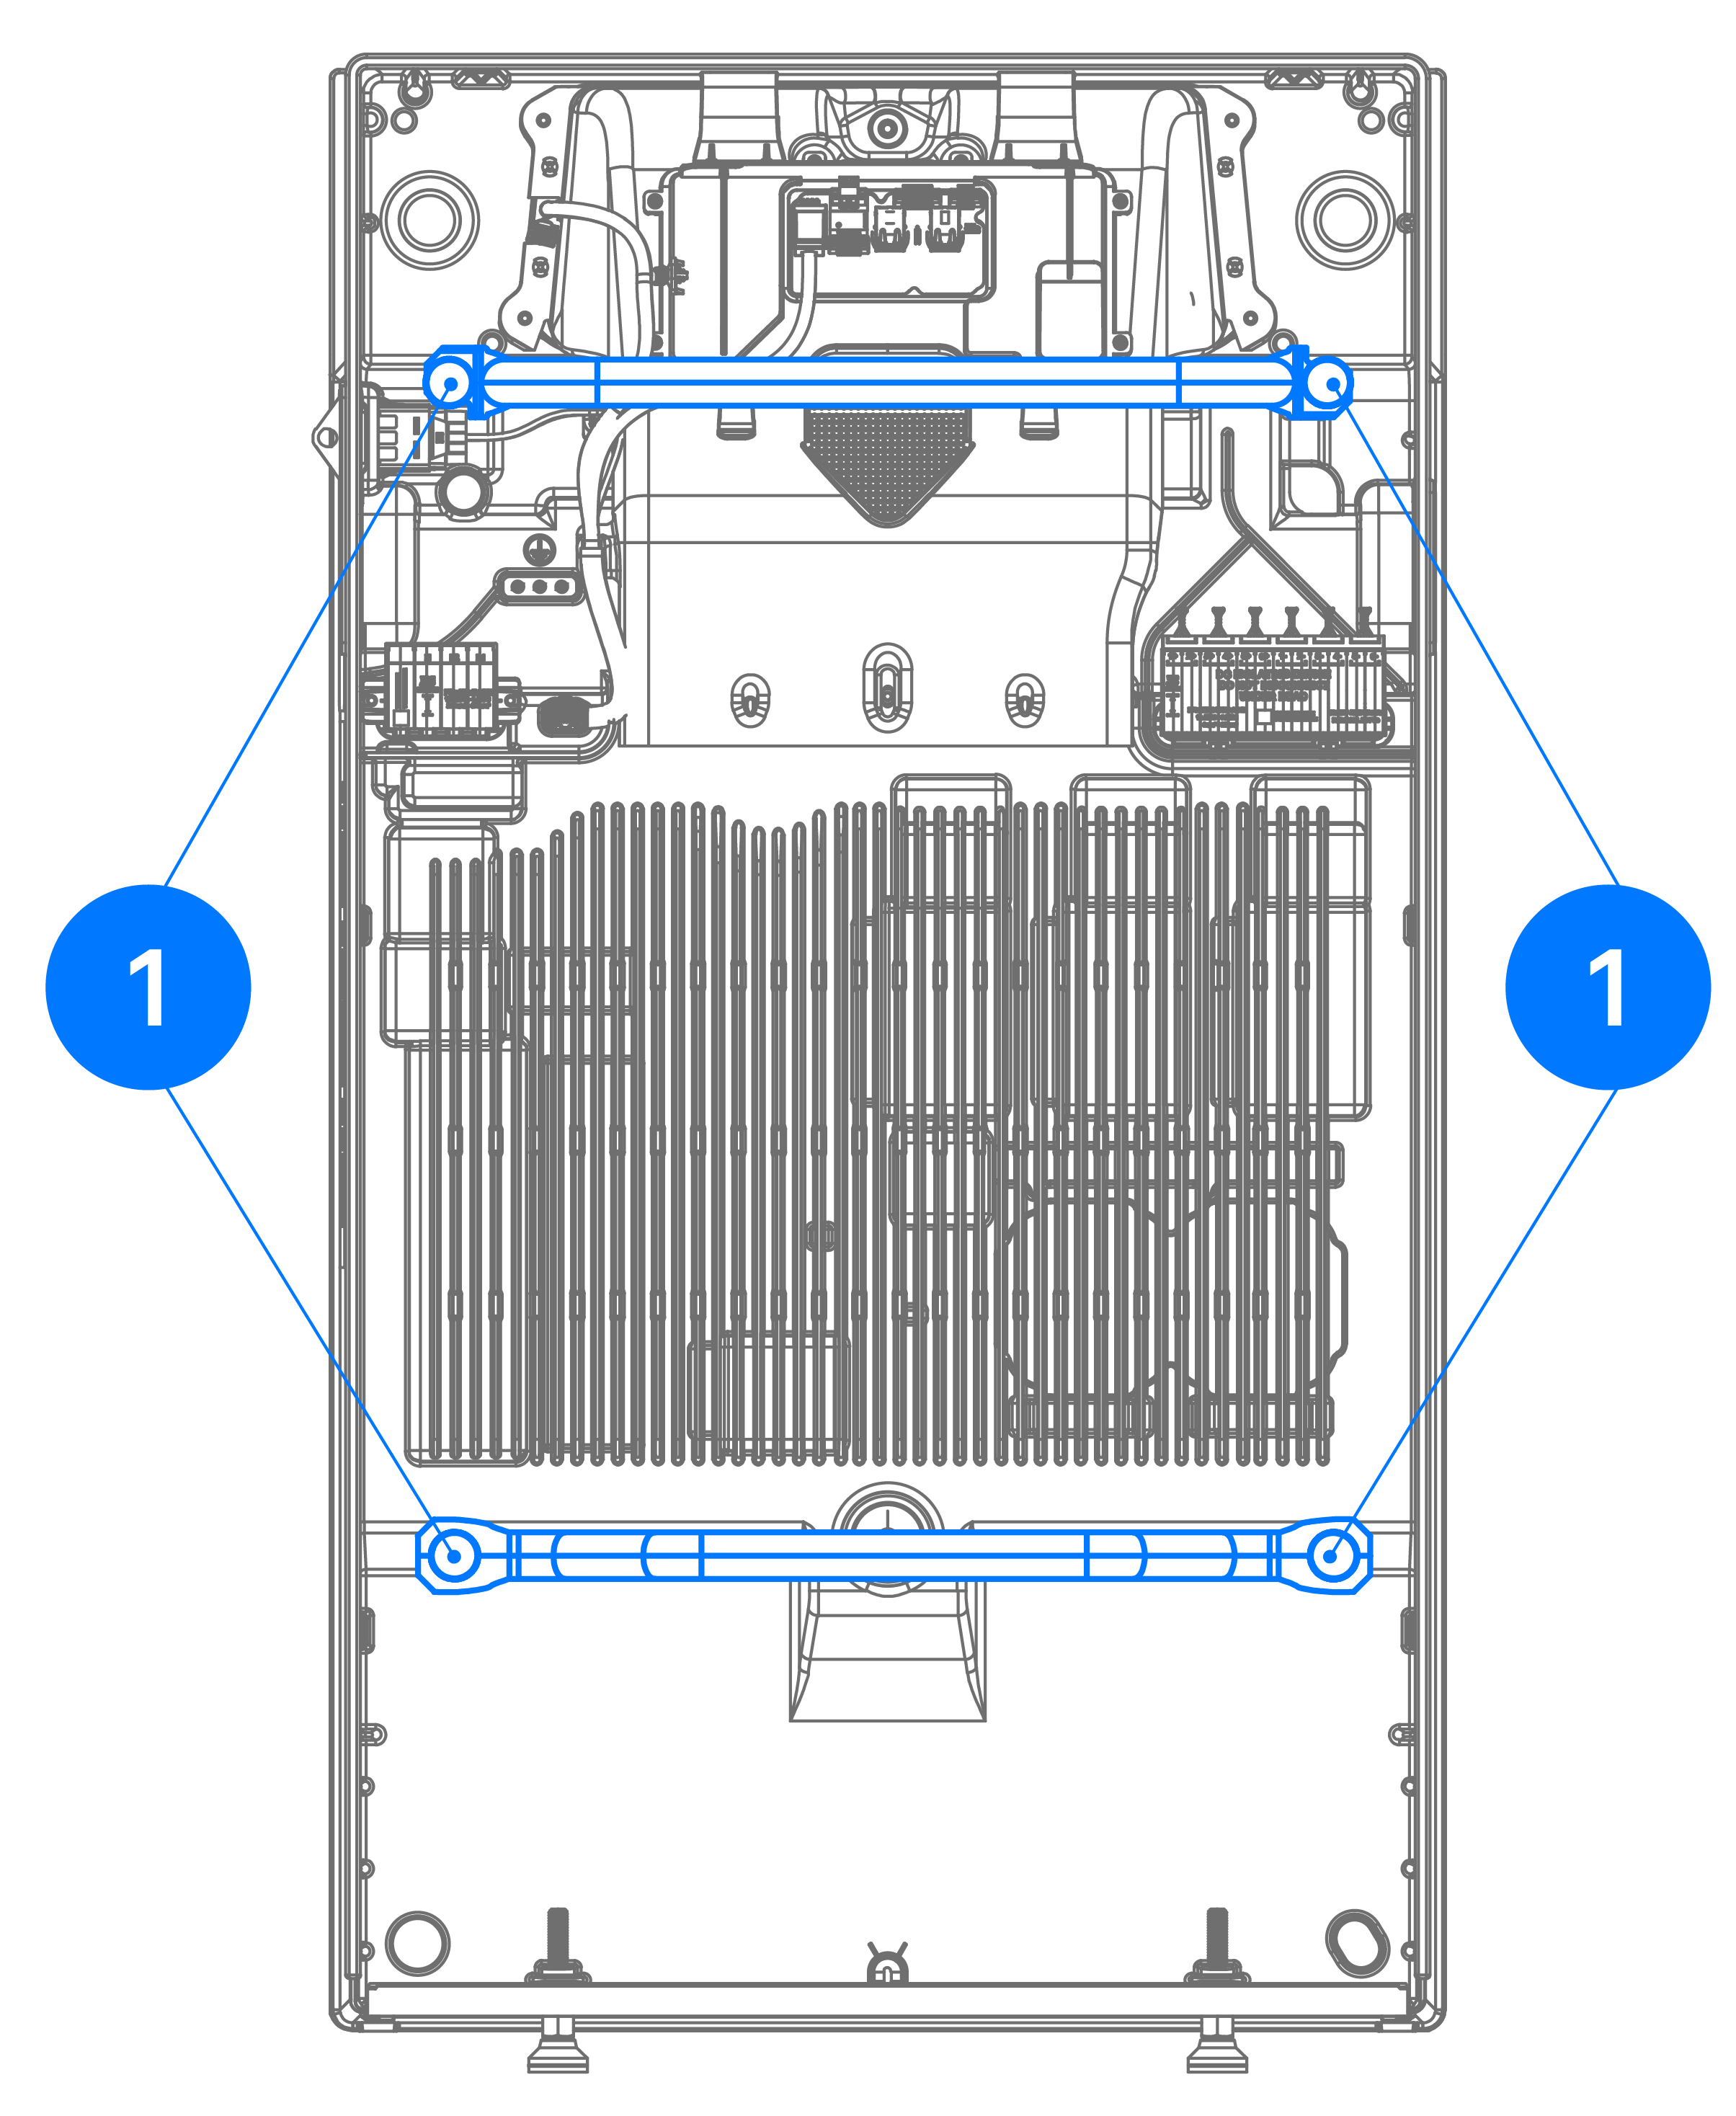
With Powerwall 3 still in the packaging,
place the two lift handles on the Powerwall and tighten the (2X) fasteners on
each handle to hold them in place (1). Note that upper handle is the
larger, more rounded handle, and the lower handle is the smaller, more angular
handle, and they attach to existing threaded mounting points. Perform a pull
test to confirm the handles are secure before proceeding.
WarningDo not use the handles to manually lift Powerwall 3. These handles are designed to interface with the dolly; they are not designed to be load bearing, and attempting to lift Powerwall 3 with them could result in dropping and damaging the unit.NotePowerwall dolly with Tesla P/N 1856187-xx-G or greater has updated handles with T40 fasteners to facilitate easier installation of Powerwall 3; these handles can be tightened using a T40 driver.
-
Confirm the leveling feet are
screwed all the way in to the Powerwall.
CAUTIONThe leveling feet must remain installed on Powerwall 3, regardless of whether it is wall-mounted. The leveling feet ensure the required clearance is maintained between Powerwall 3 and any surface below it.
-
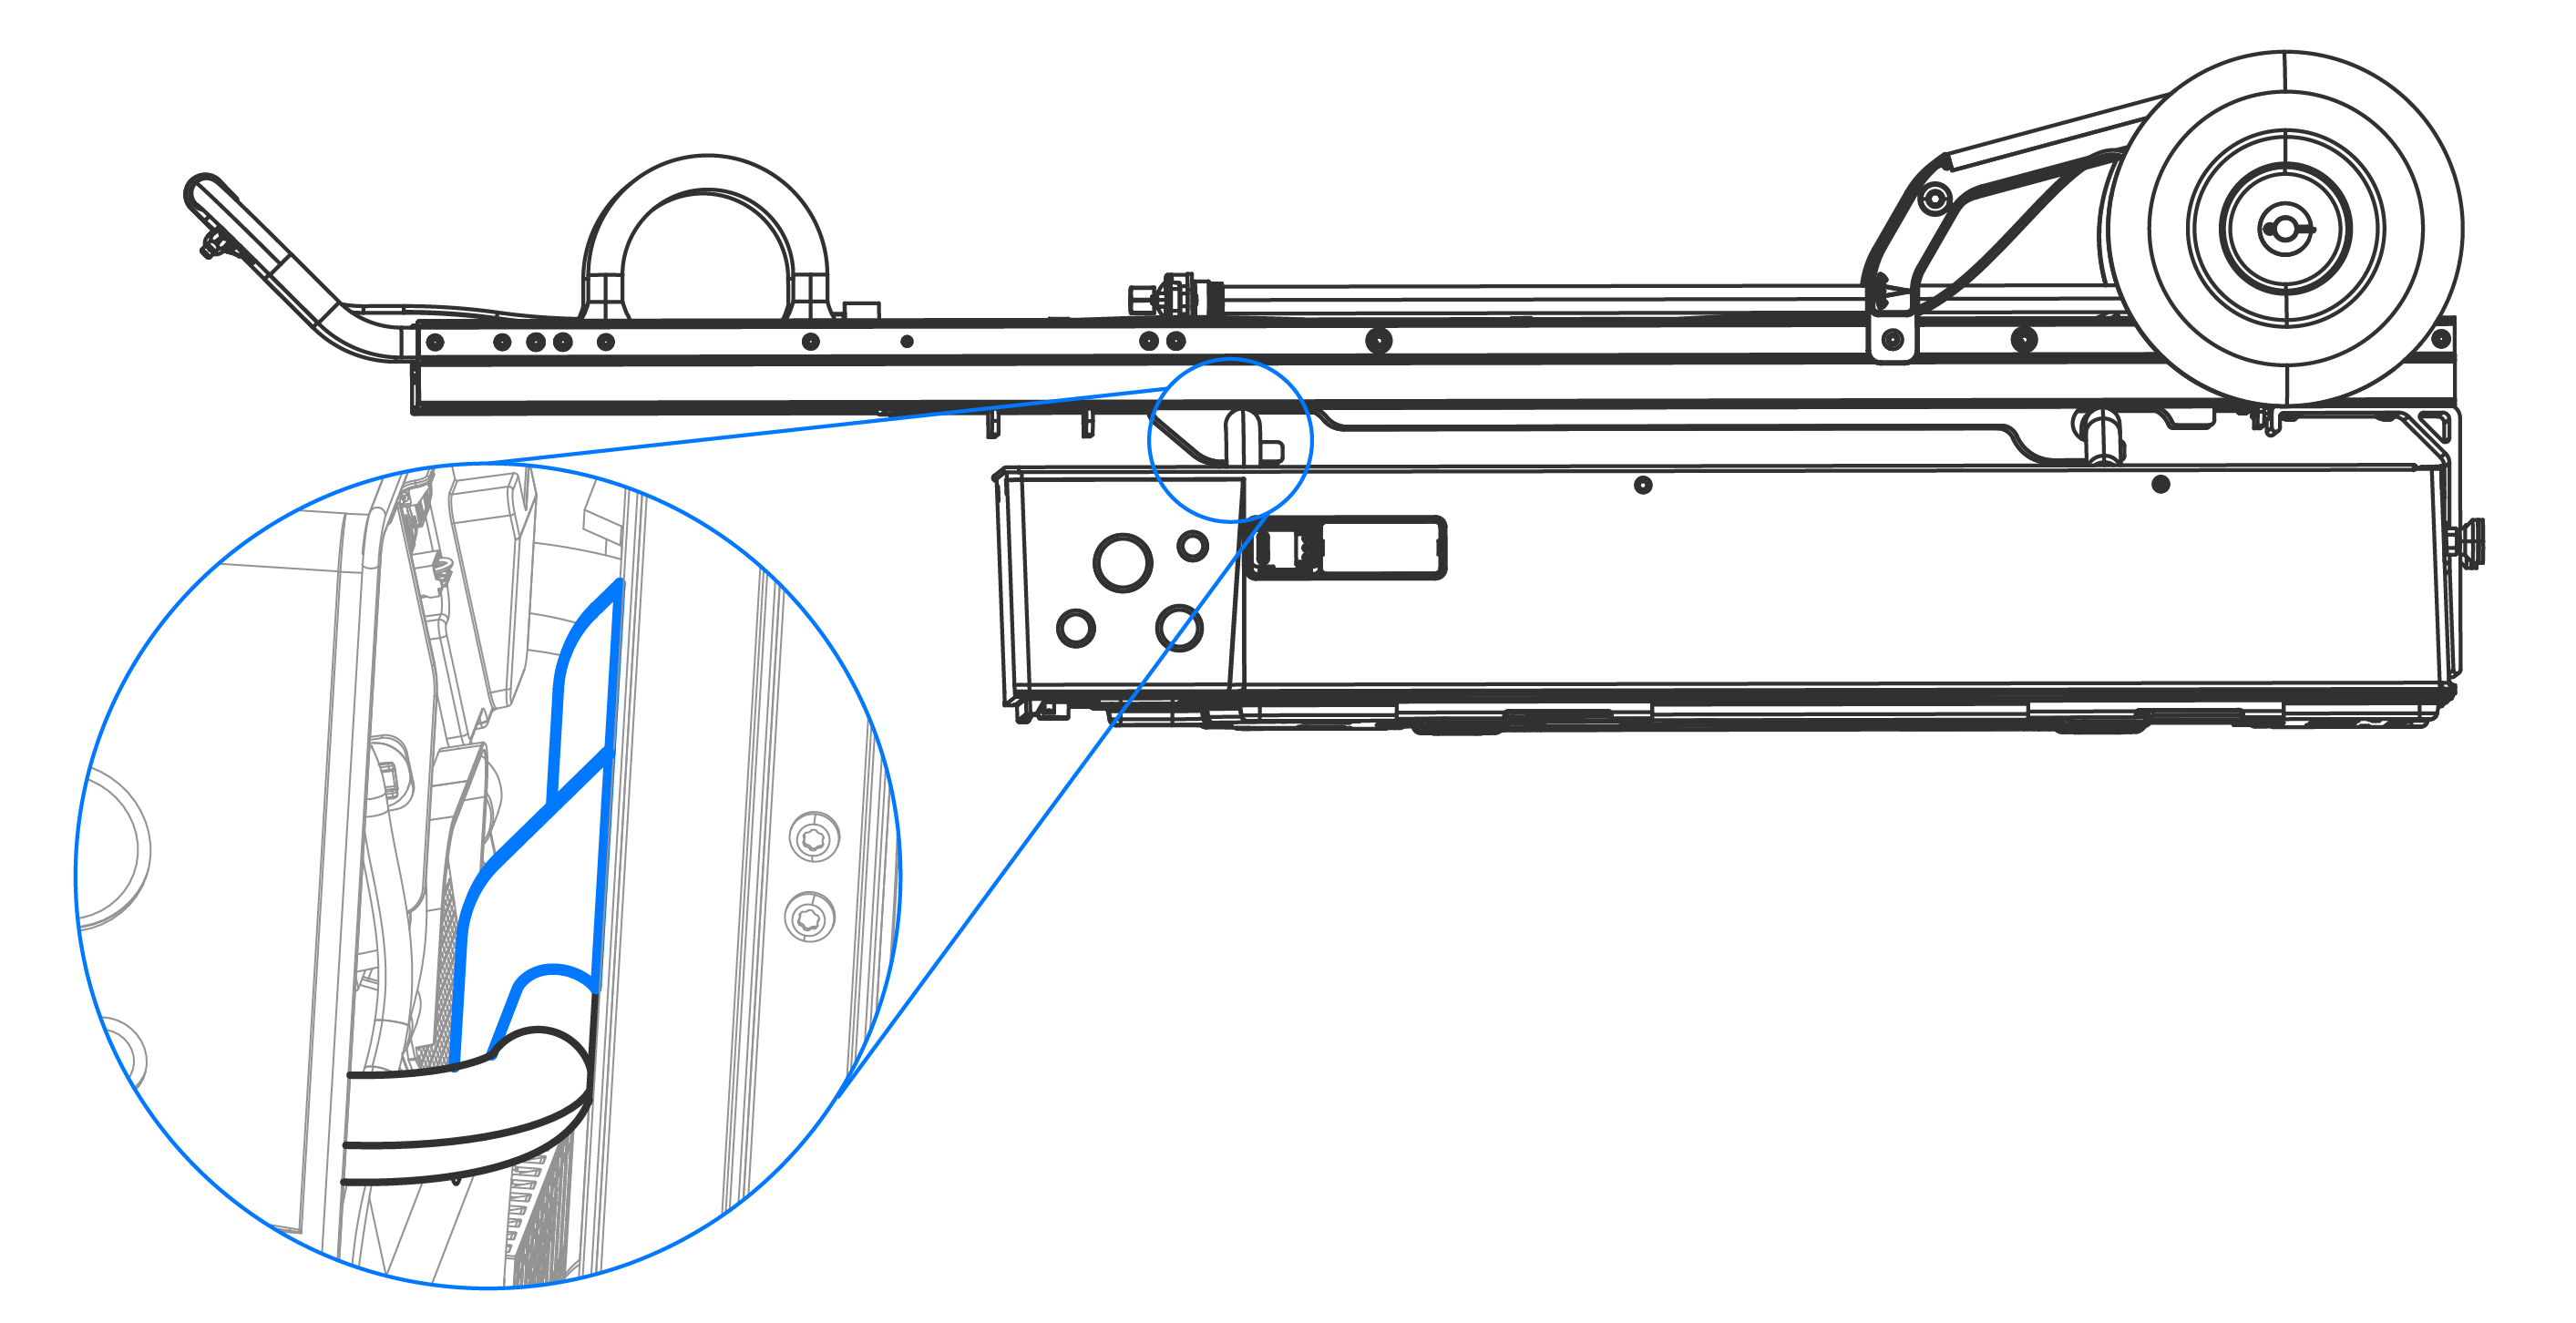
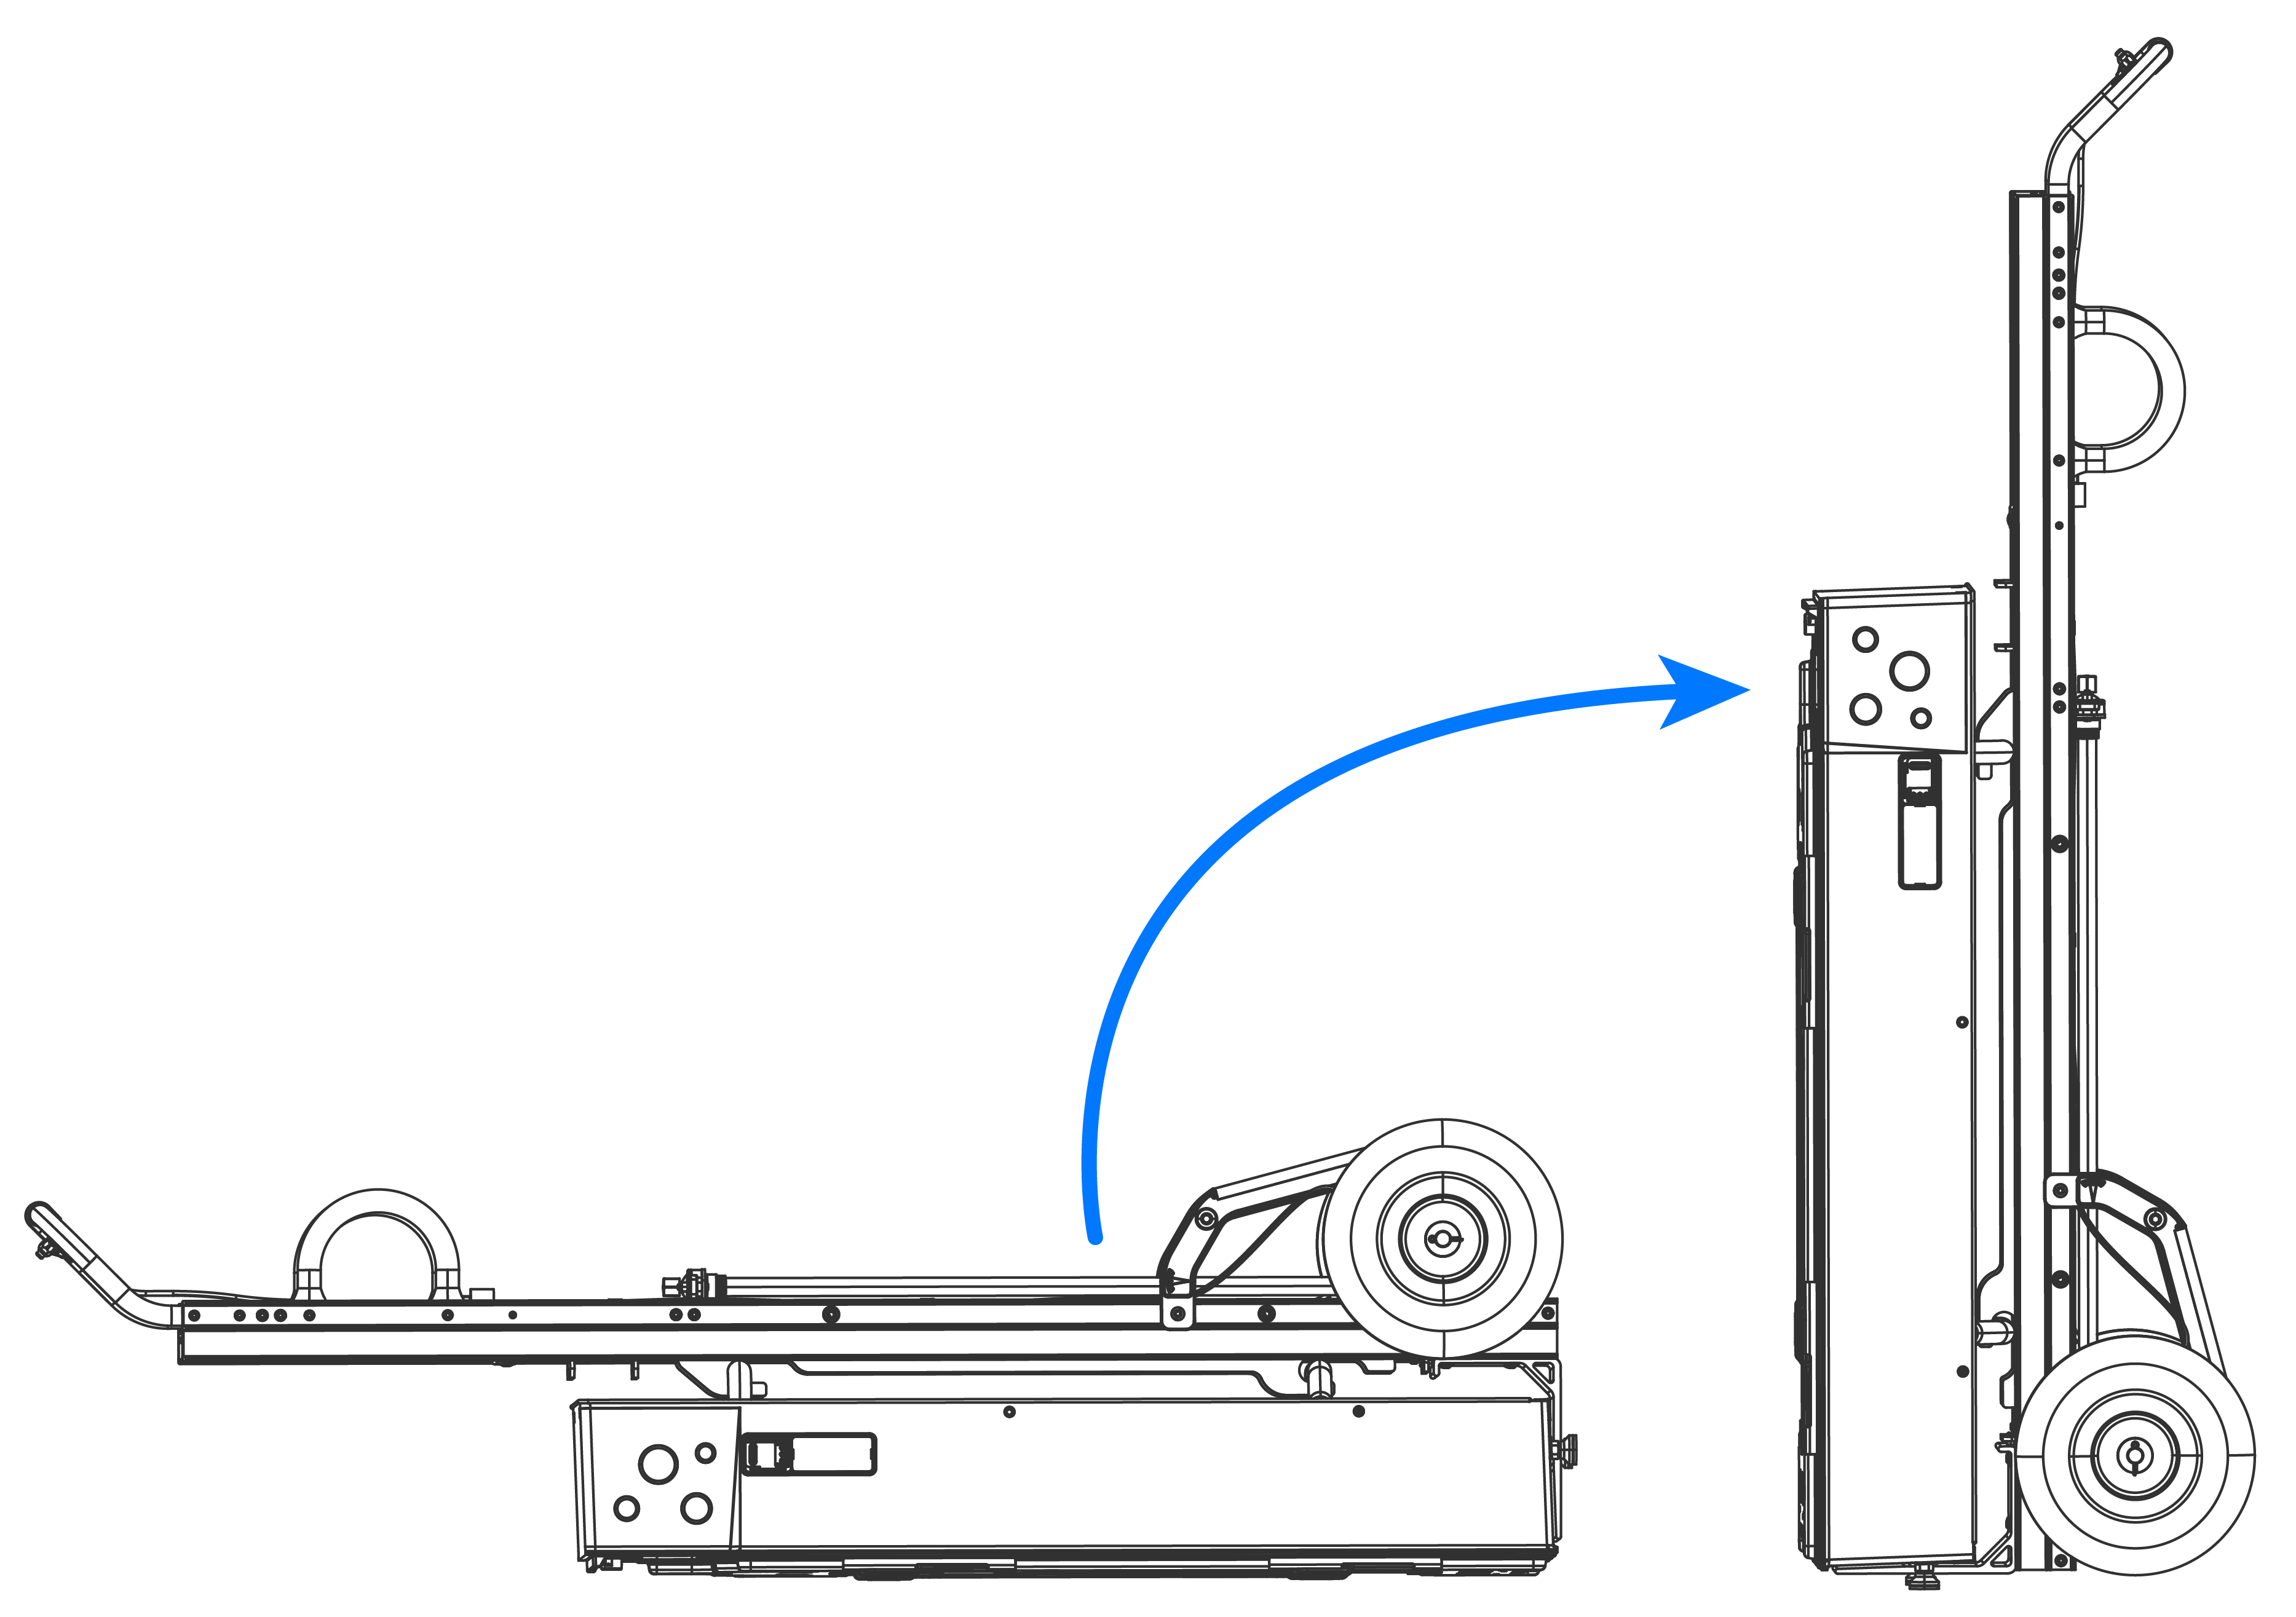
Engage the Powerwall dolly with
the lift handles:
- Place one foot on the Powerwall packaging as a pivot point, then lift Powerwall and the dolly to a standing position.
- Remove the packaging and set it aside.
-
Position Powerwall at the
mounting wall.
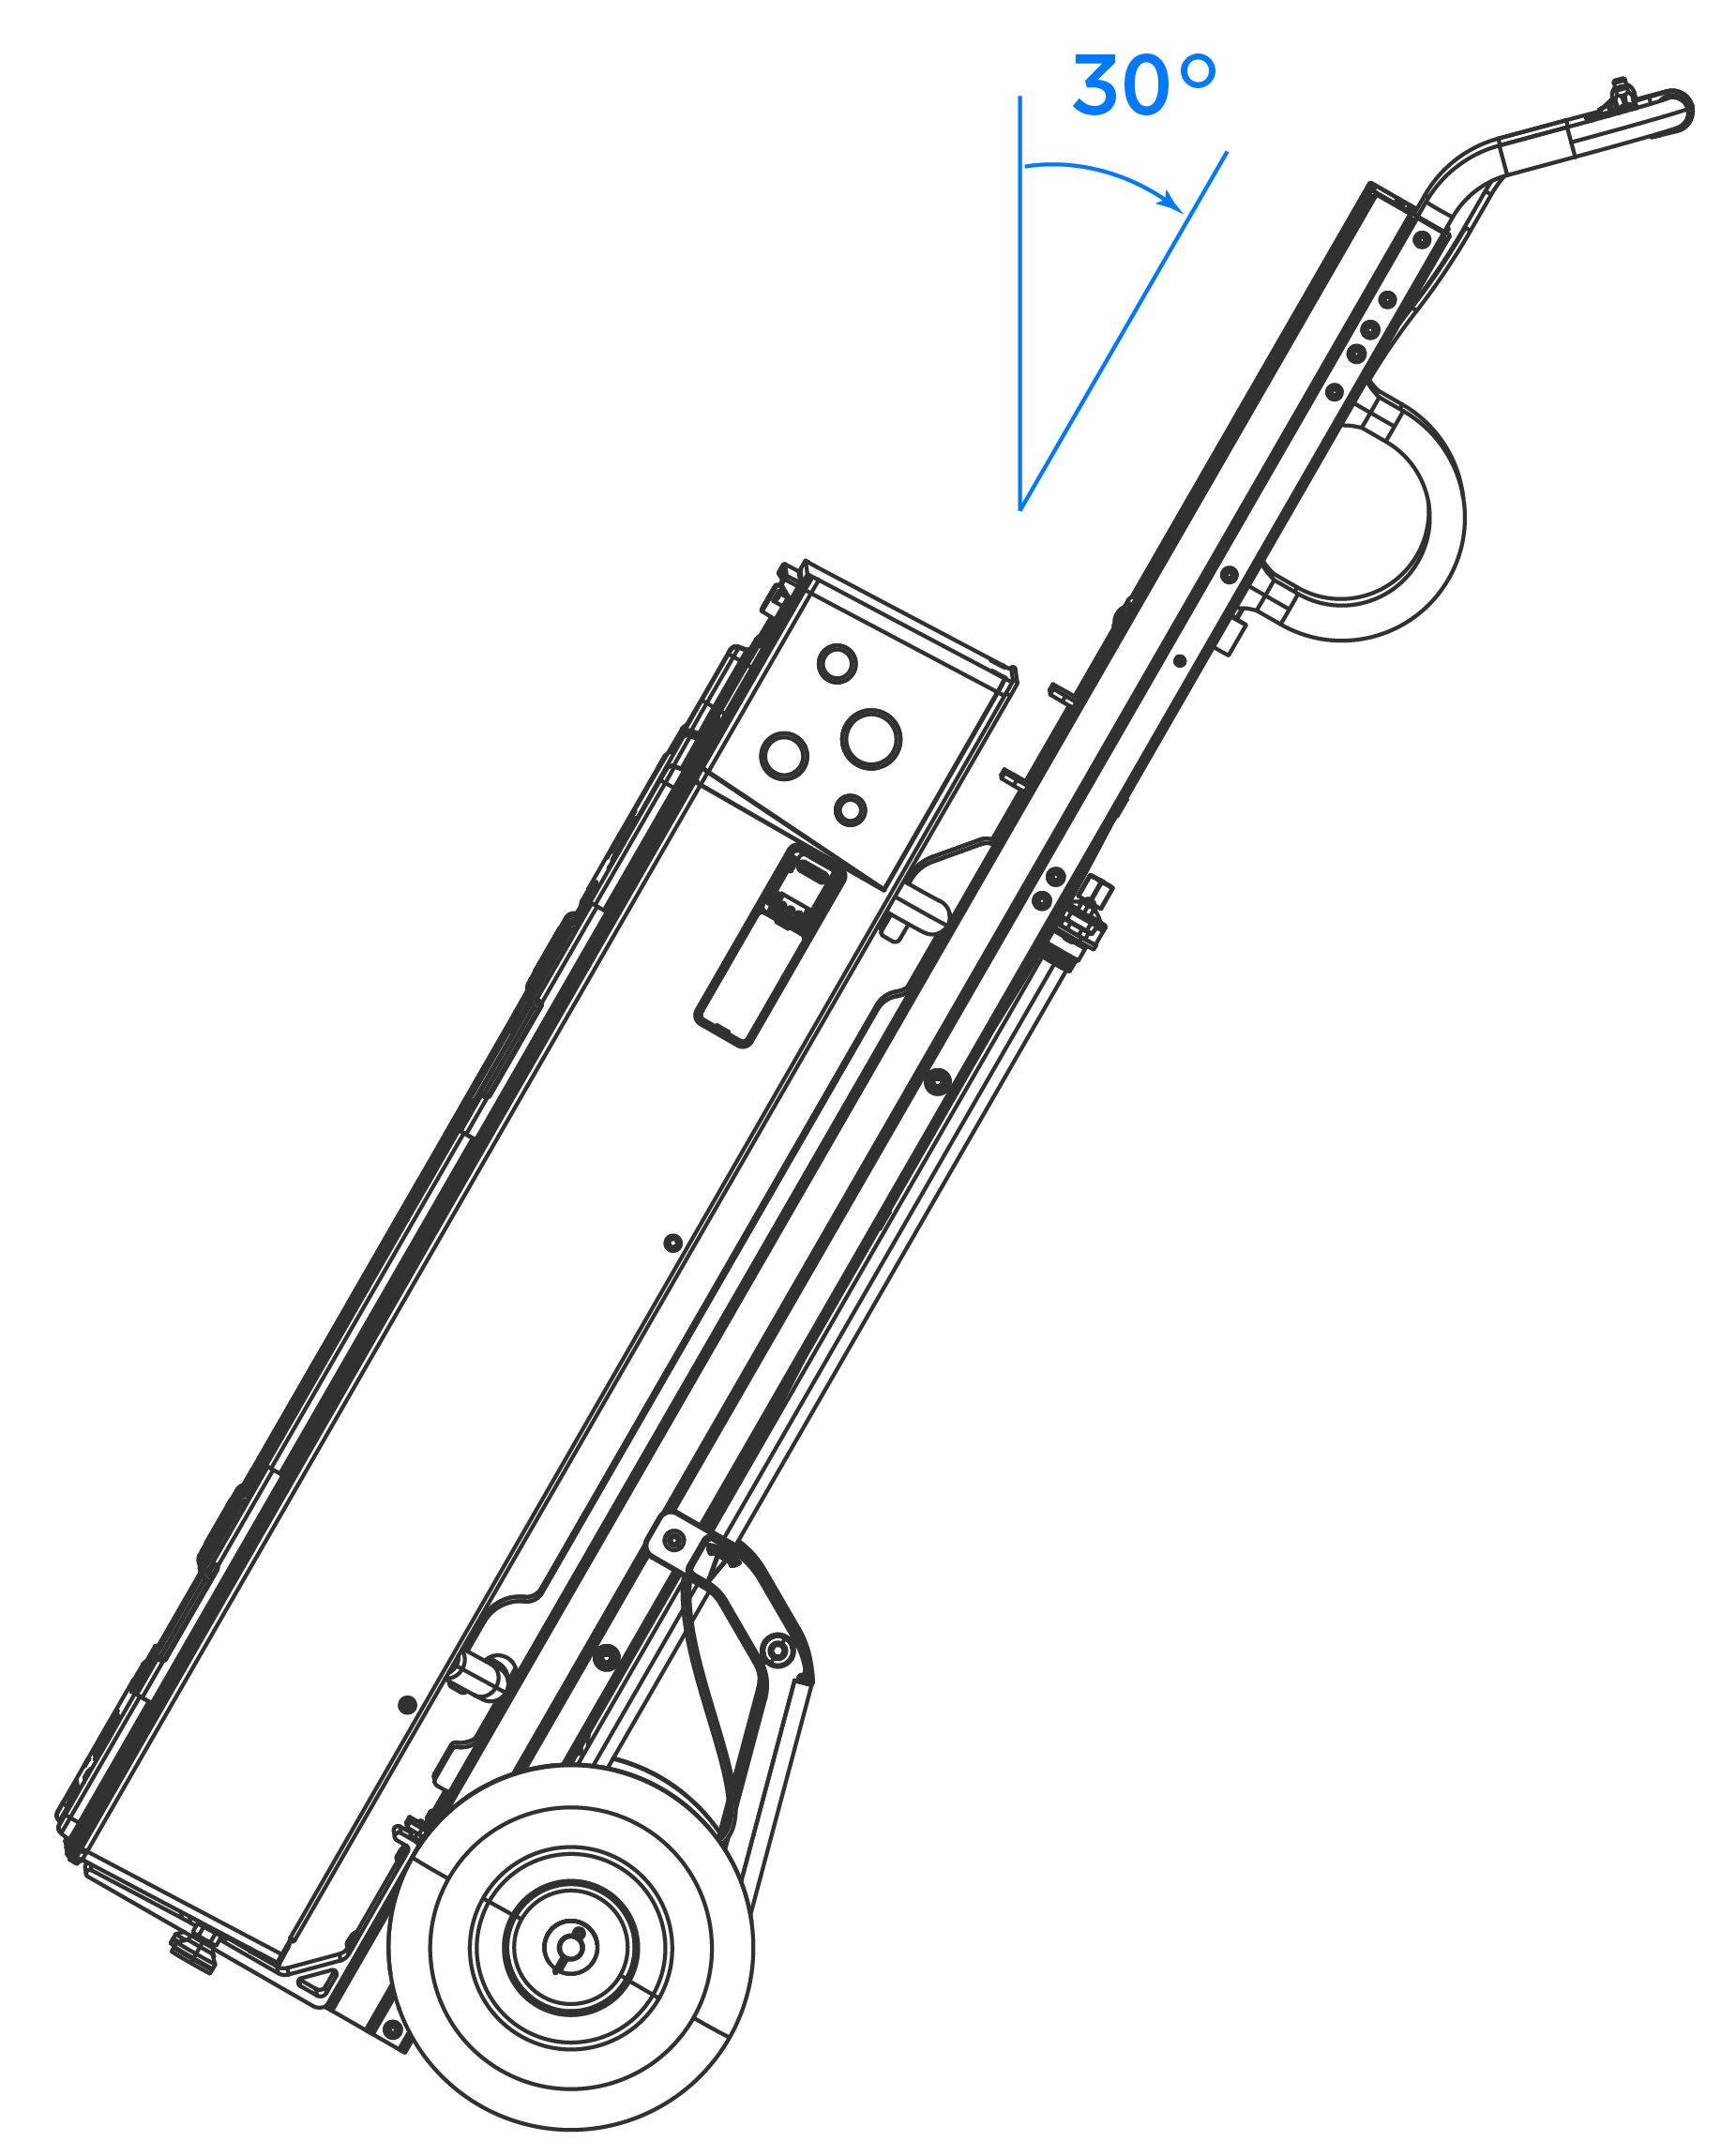
WarningUse extreme caution if using the dolly on uneven terrain, such as grass, mud, or loose gravel, or if using on a steep incline.CAUTIONAlways lower the lifting plate to its lowest position before moving the dolly with Powerwall 3 attached.
-
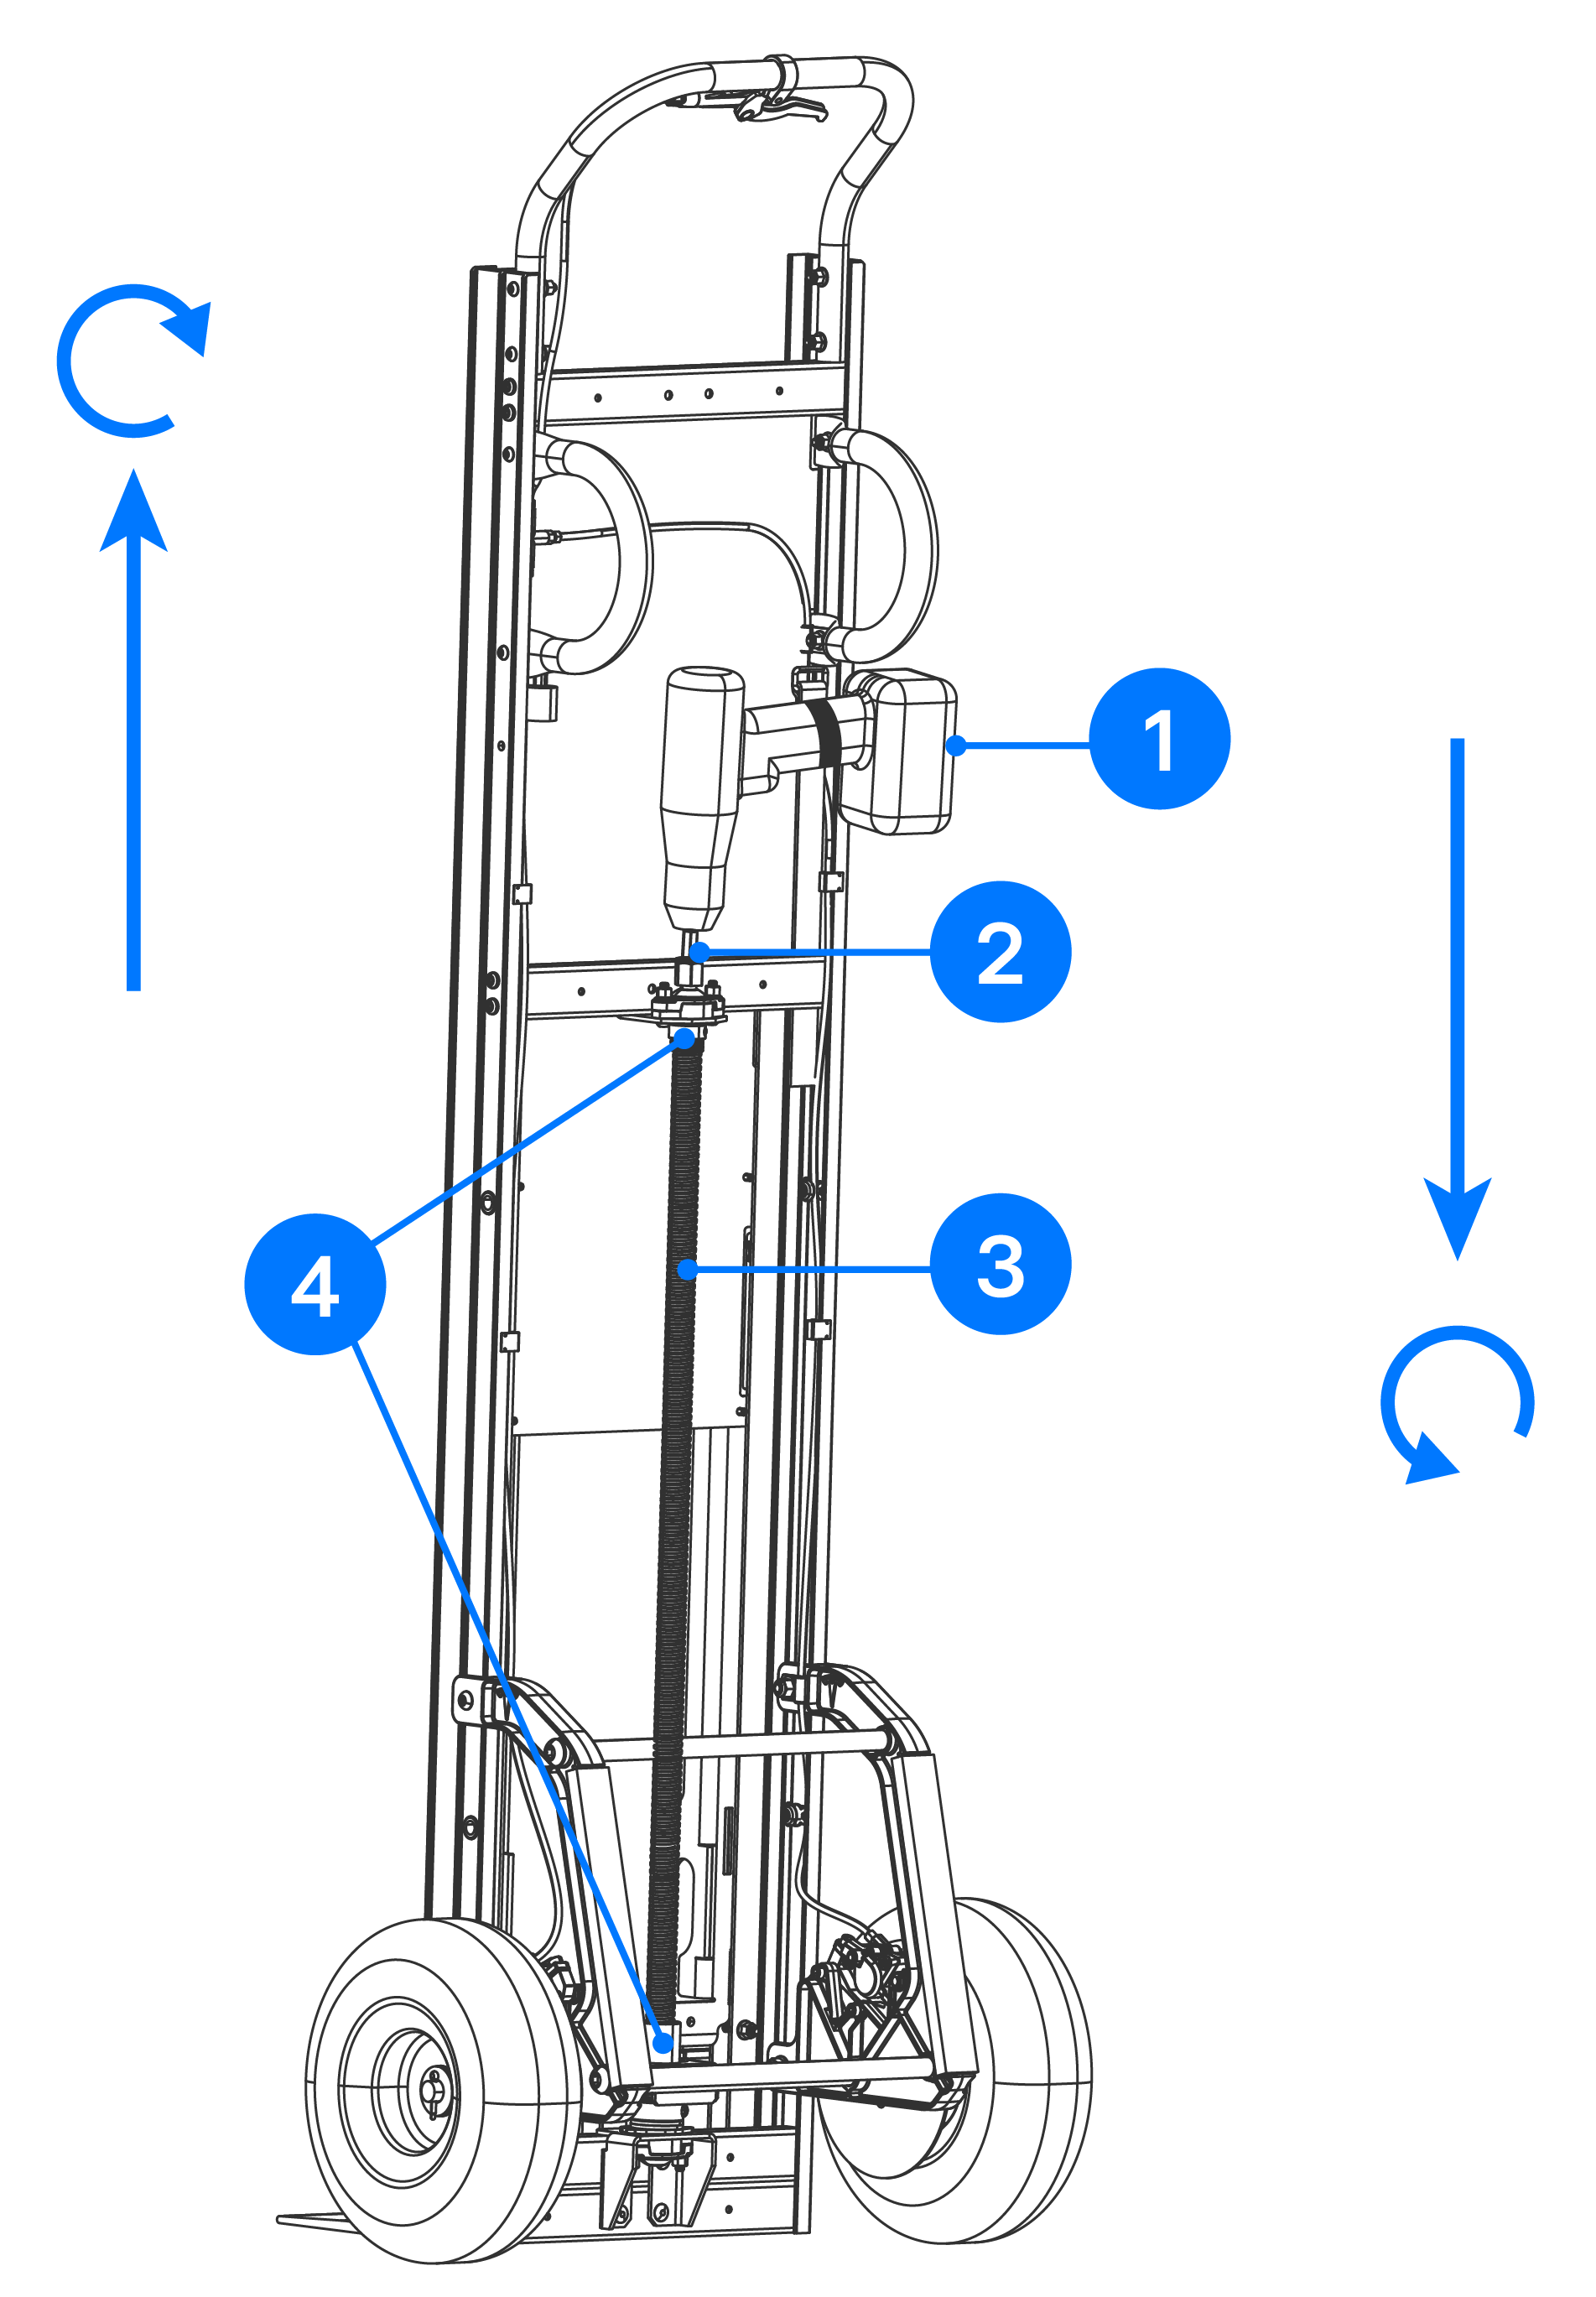
To raise or lower Powerwall 3:
-
To disengage the dolly from Powerwall 3:
- Raise the lifting attachment to disengage the dolly from the handles.
- Move the dolly away from Powerwall 3.
- Using the drill, lower the lifting platform to its lowest position.
- Remove the two lifting handles and reattach them to the dolly.
