2025-07-29
STEP 3: Wall-Mount Powerwall 3 Using Wall Bracket
Warning
Powerwall 3 must be mounted using the wall bracket at all times to
secure the unit to the supporting structure.
-
Using a drill and level, mount
the Powerwall bracket to a wall capable of supporting the full weight of Powerwall 3. See Powerwall 3 Wall Bracket Anchoring Details for Wall-mounting or Ground-mounting on Approved Foundation for additional details on the type and number
of fasteners to use.
Figure 1. Bracket Measurements Relative to Powerwall and Floor 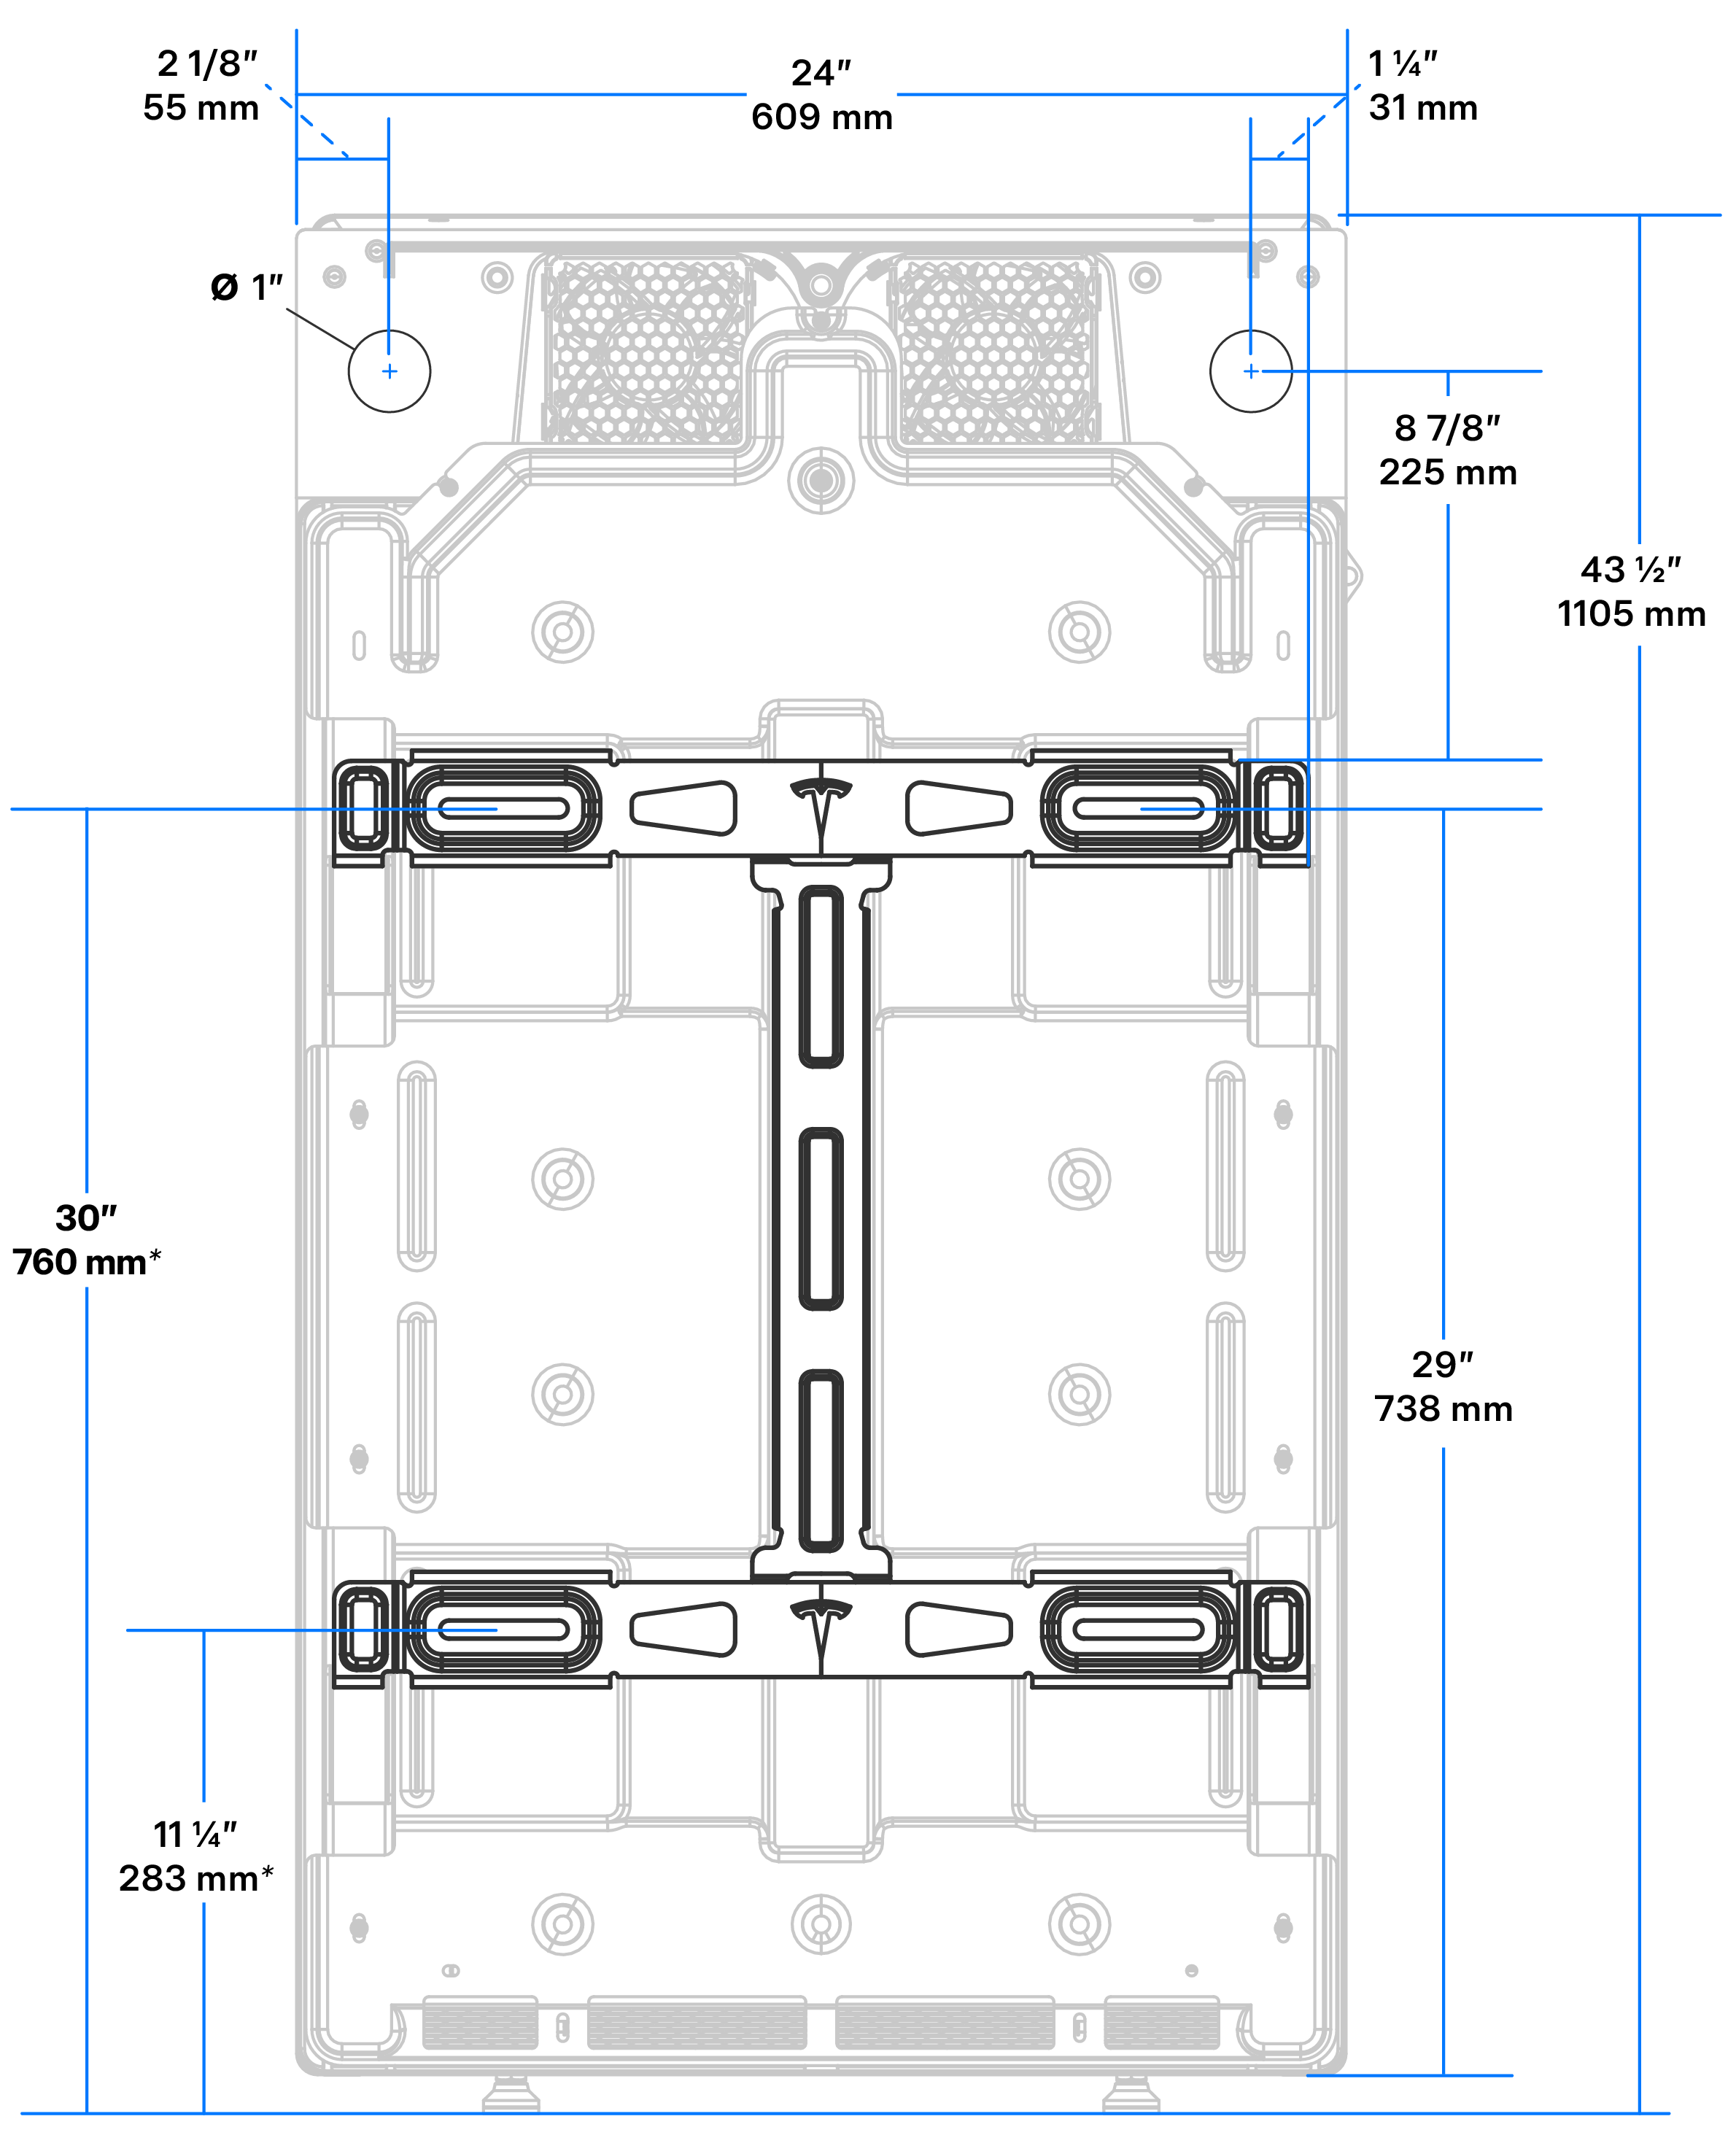 *Measurement is to floor. If the Powerwall 3 On/Off switch must be less than 6 ft 7 in from the floor, mount the bracket such that:
- The distance from the center of the lower bracket segment to the floor is less than 56 in (1429 mm)
- The distance from the center of the upper bracket segment to the floor is less than 75 in (1905 mm)
WarningOnly install fasteners in the (4) slots on the horizontal bracket segments. Do not install fasteners on the vertical (center) segment, as these are not structural mounting holes. NoteThe following diagram provides measurements for positioning rear conduit entry holes relative to the Powerwall 3 bracket (the measurements are the same for both knockouts).
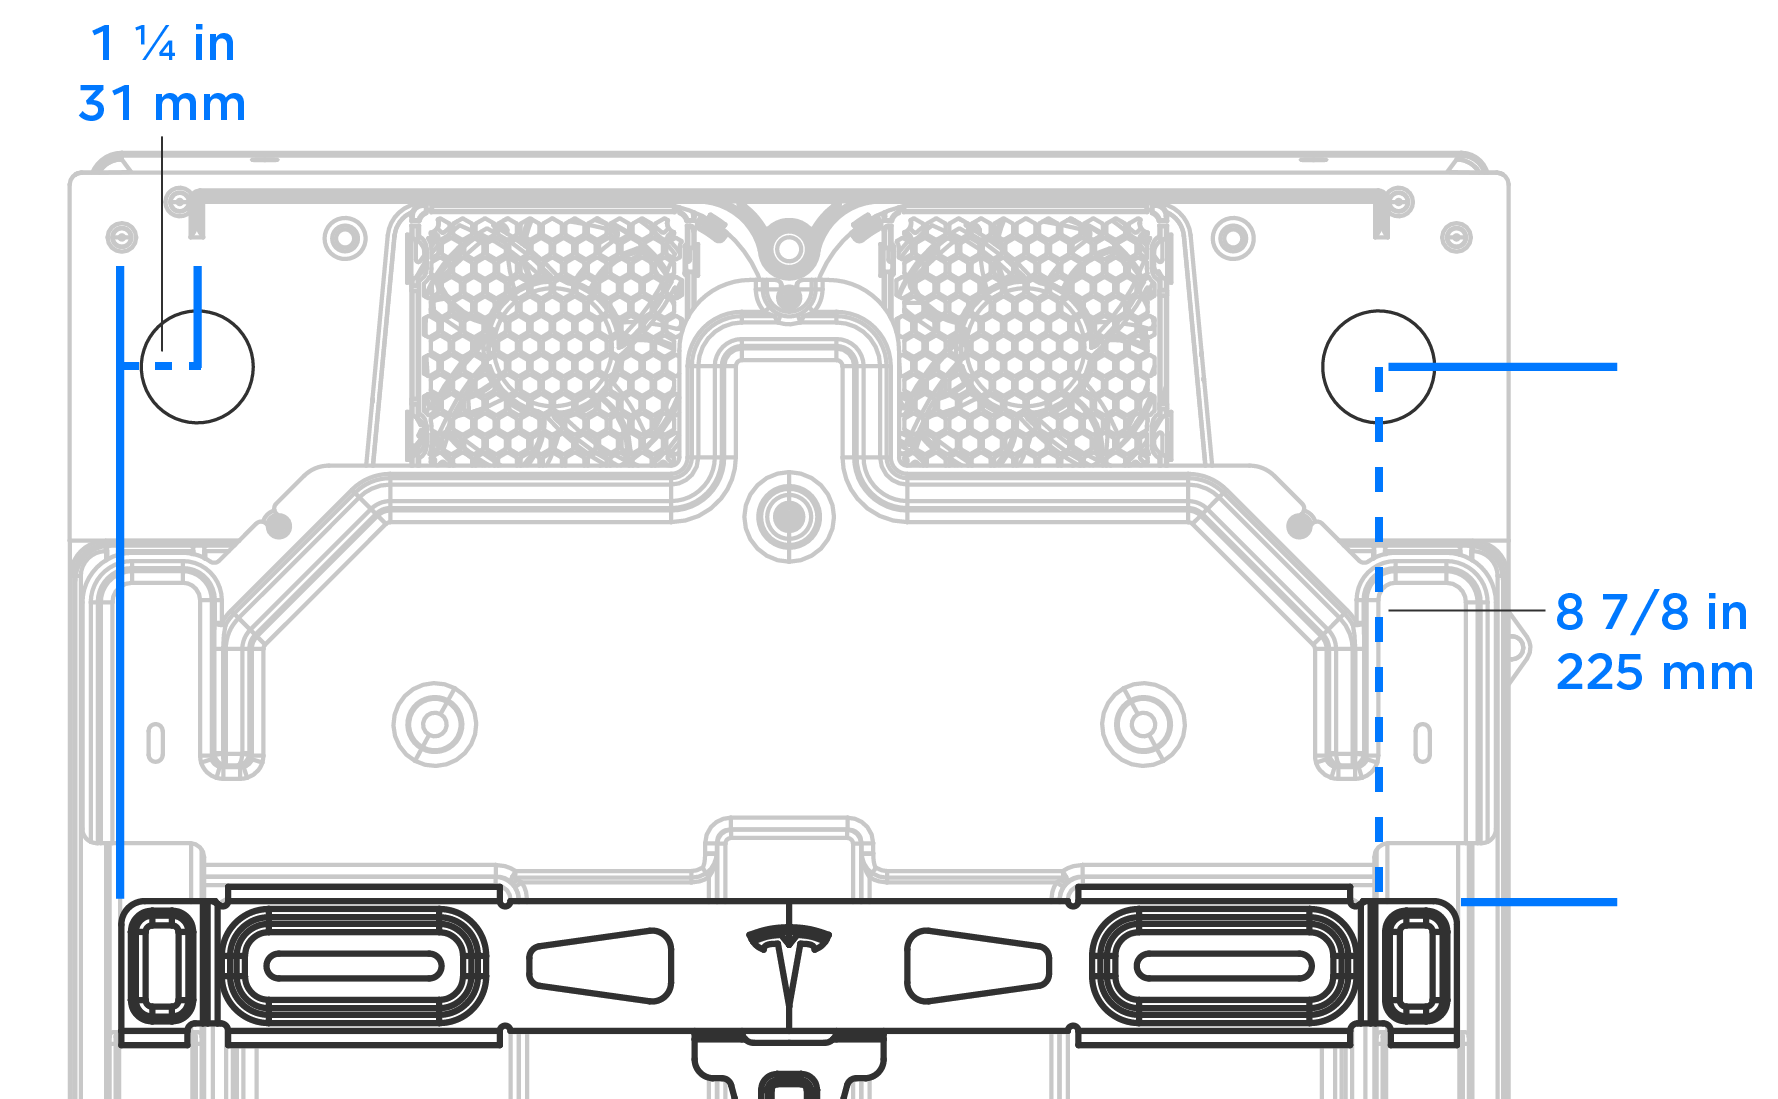
-
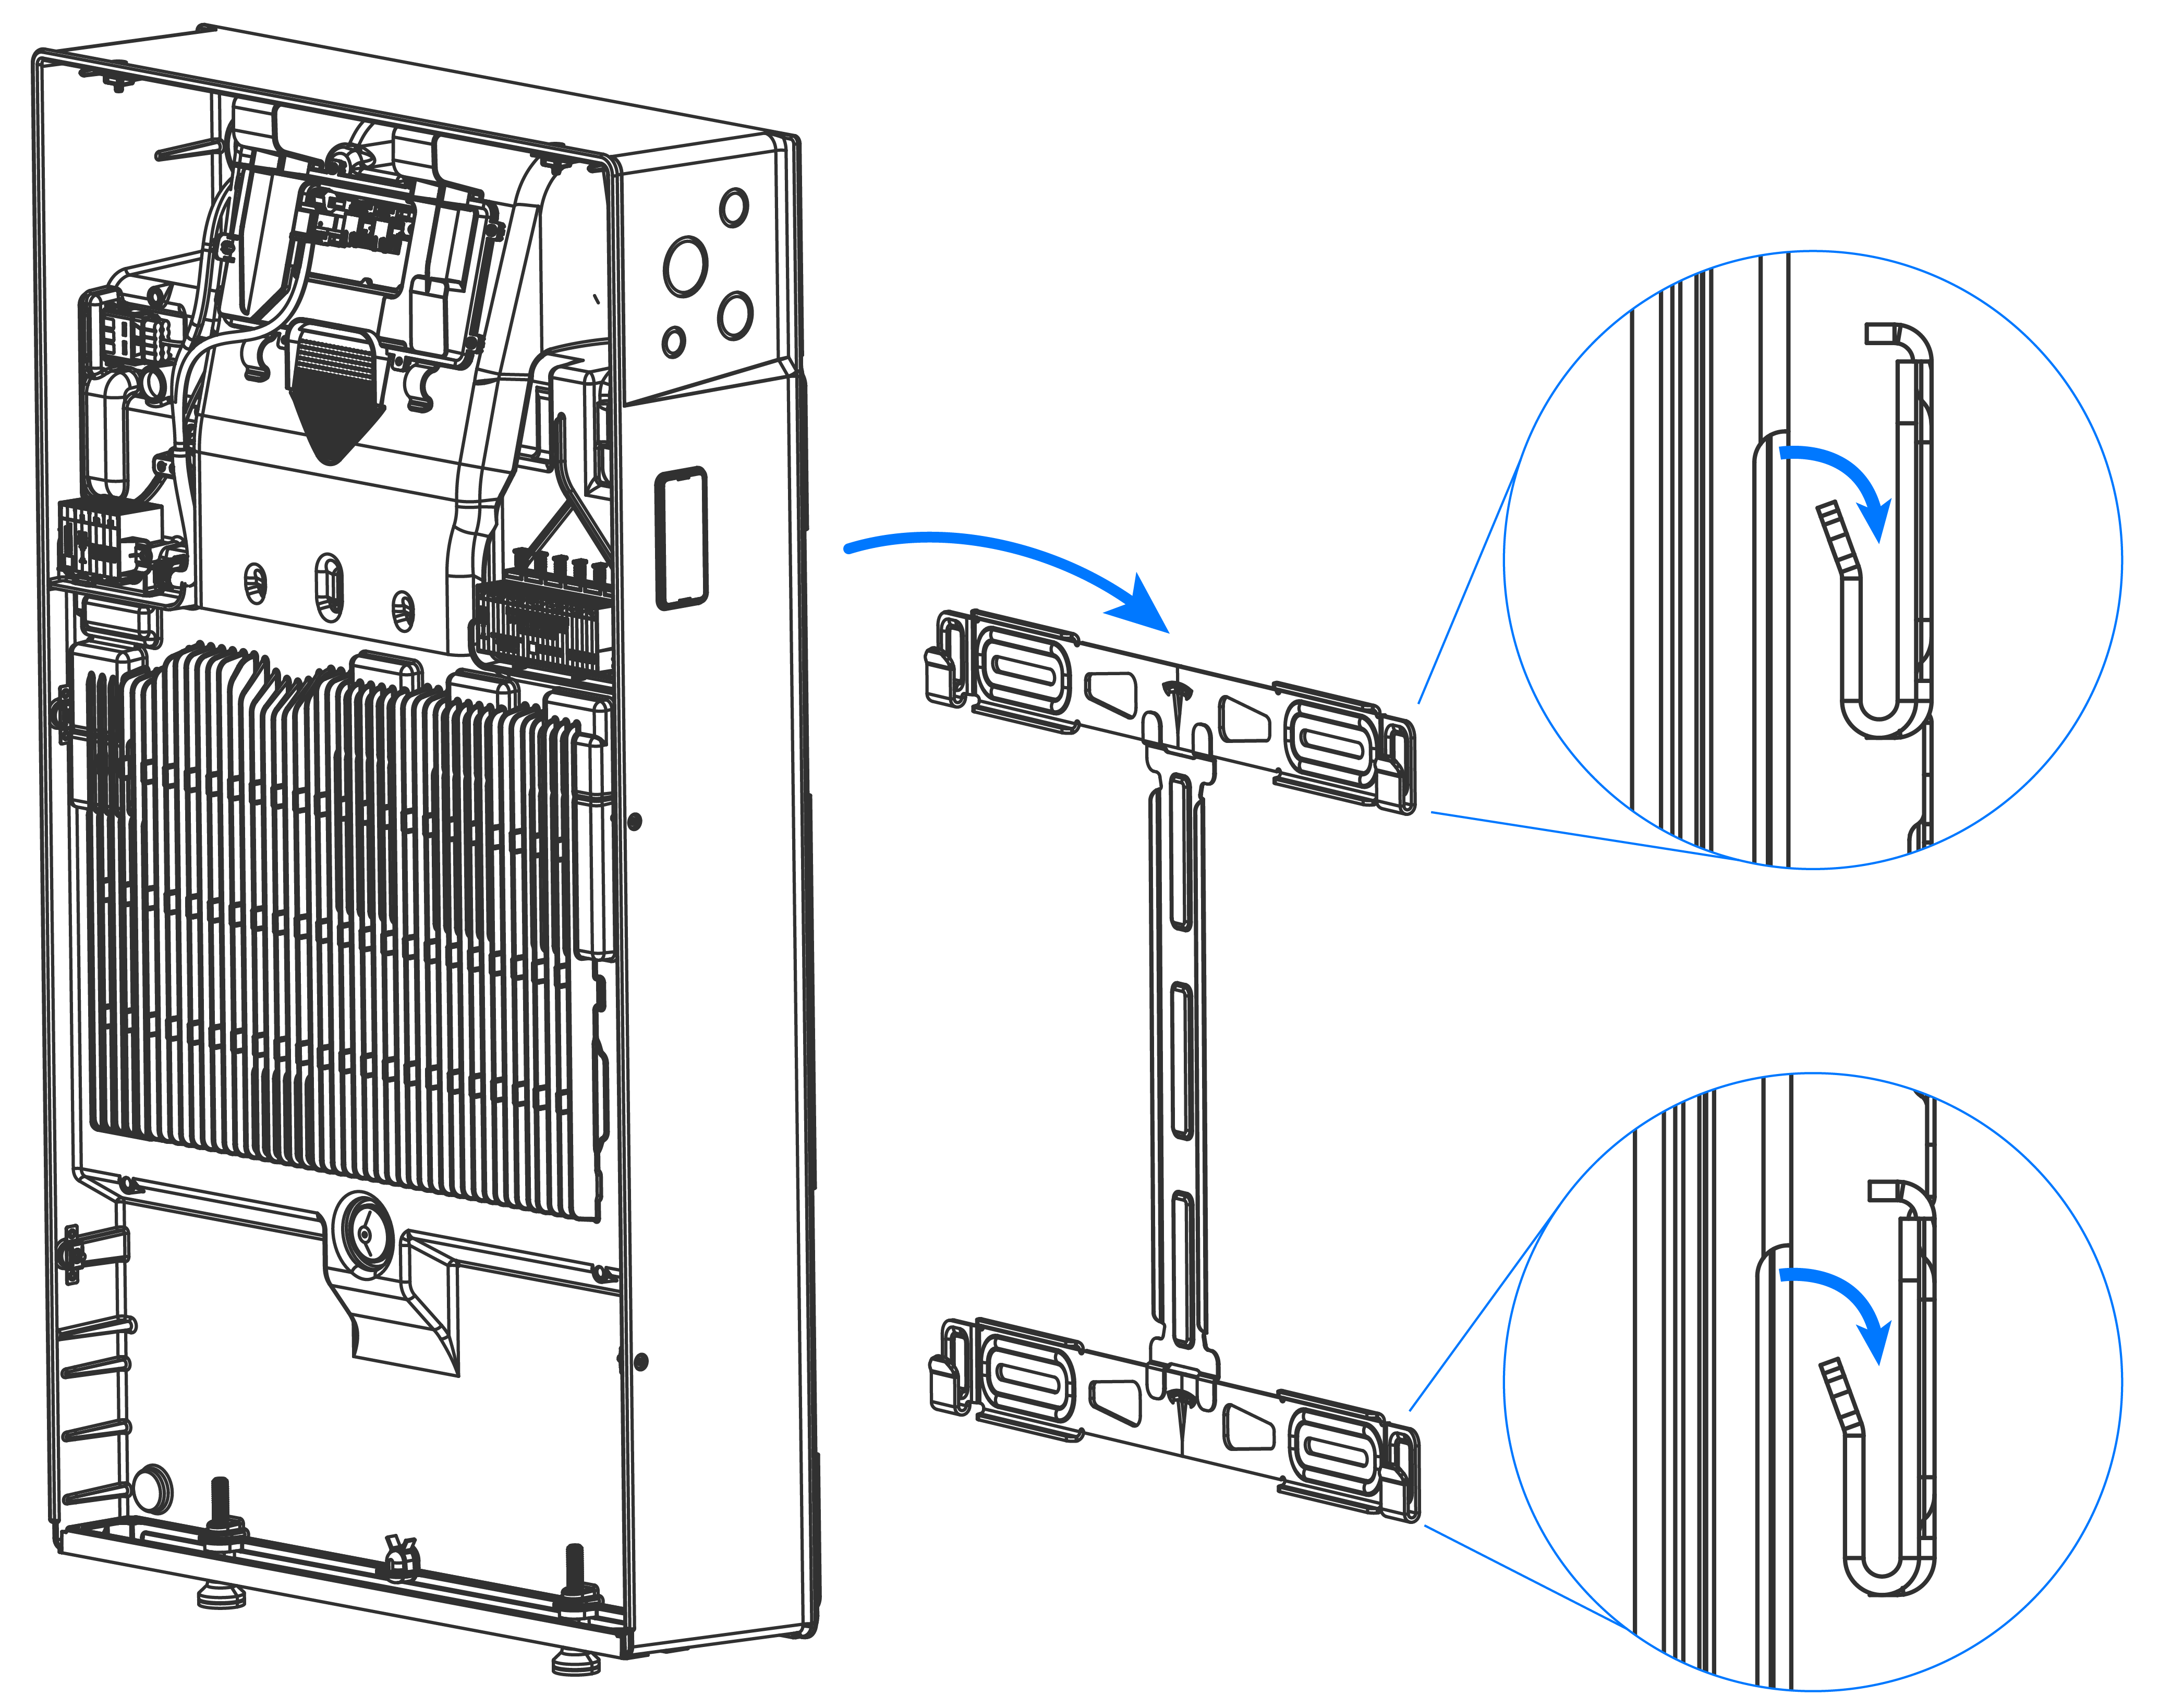
Move the dolly toward the wall, positioning Powerwall so that the mounting
cleats are just above the flanges on the bracket.
-
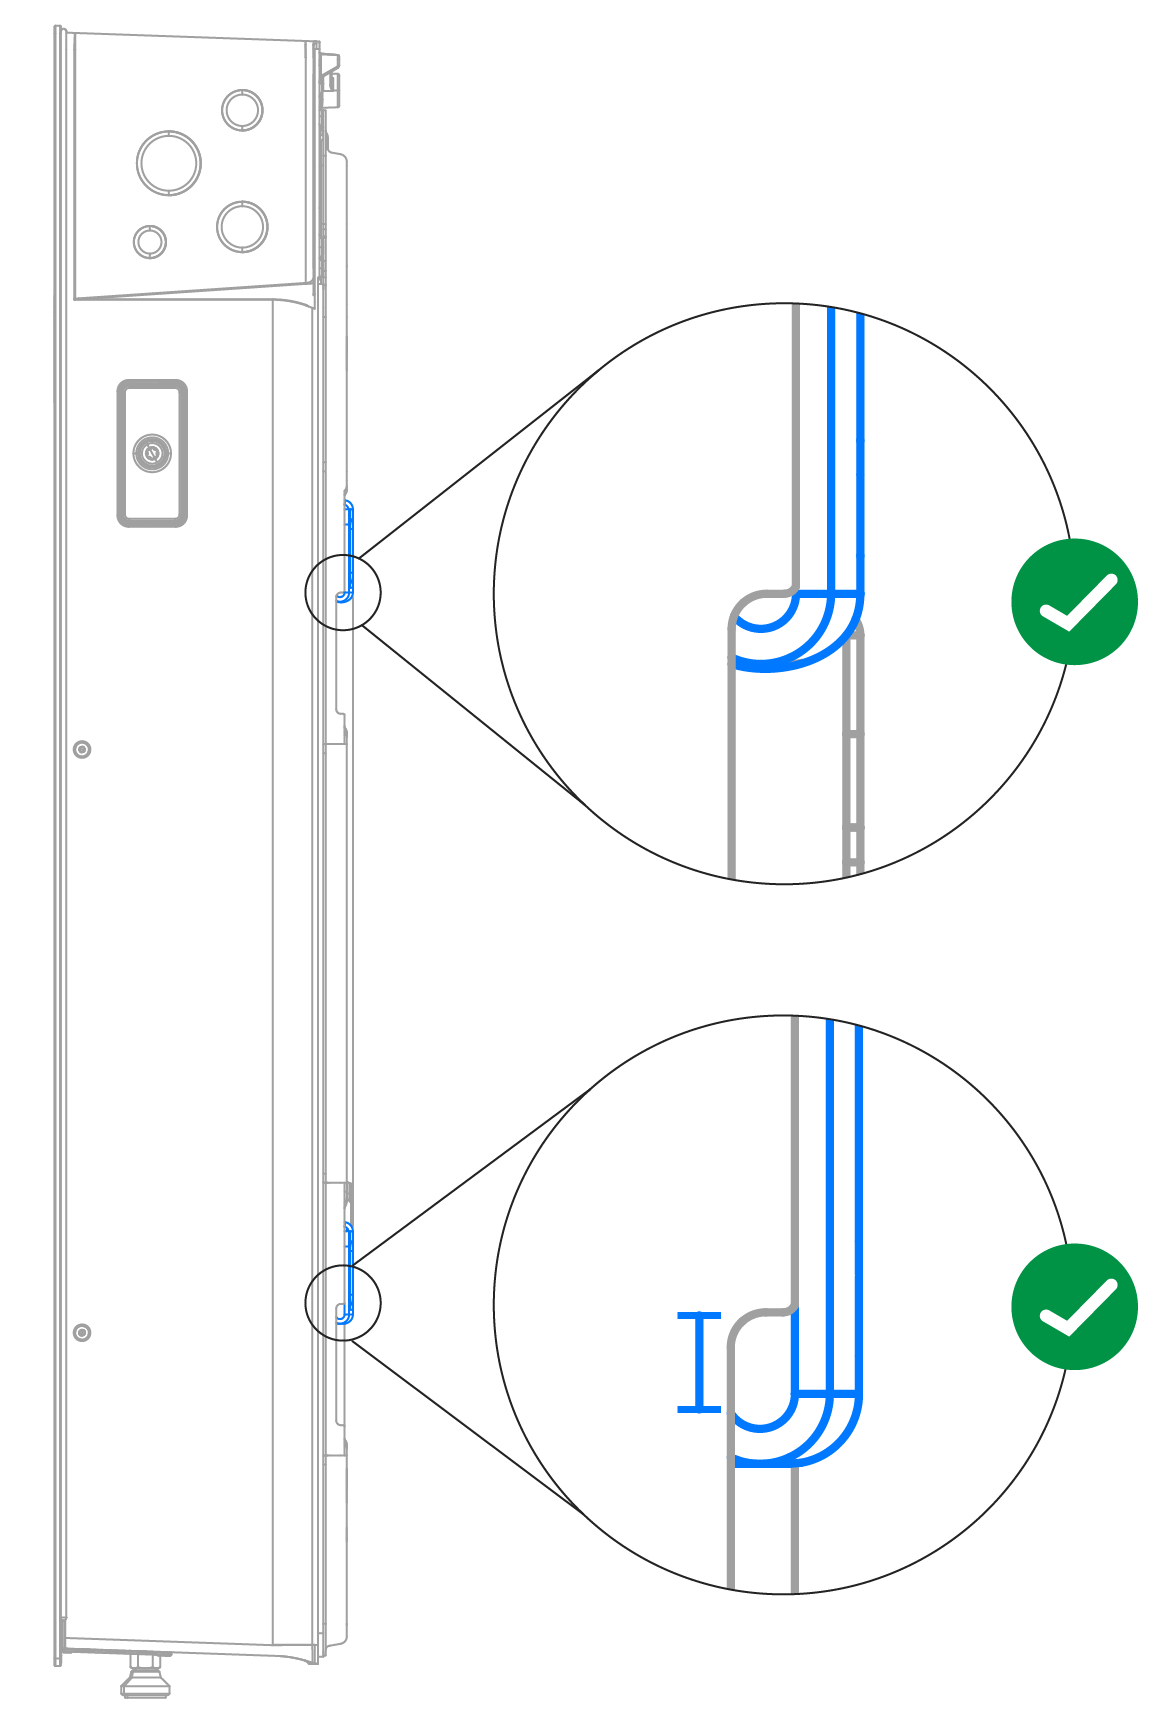
Lower Powerwall until:
- The upper set of cleats is fully seated on the bracket flanges
- The lower set of cleats is engaging the bracket flangesNoteOnly the upper set of cleats will be fully seated; the lower cleats will still engage the bracket, but there will be a small gap between the lower cleats and the bottom edge of the bracket.
-
If ground-mounting Powerwall,
use an
11/16-inch (or 17 mm) wrench to adjust the leveling feet until
Powerwall is level. The unit should be level within ± 2 degrees side-to-side and
within ± 5 degrees front-to-back.
NoteThe top of each foot must be visible above the threaded boss; do not unscrew the foot so far that the top is no longer visible.