2023-02-06
Anchor the Powerwall+ Mounting Brackets
Note
For additional information on
mounting Powerwall+, including minimum spacing
requirements, refer to Appendix A: Powerwall+ Mounting Details.
-
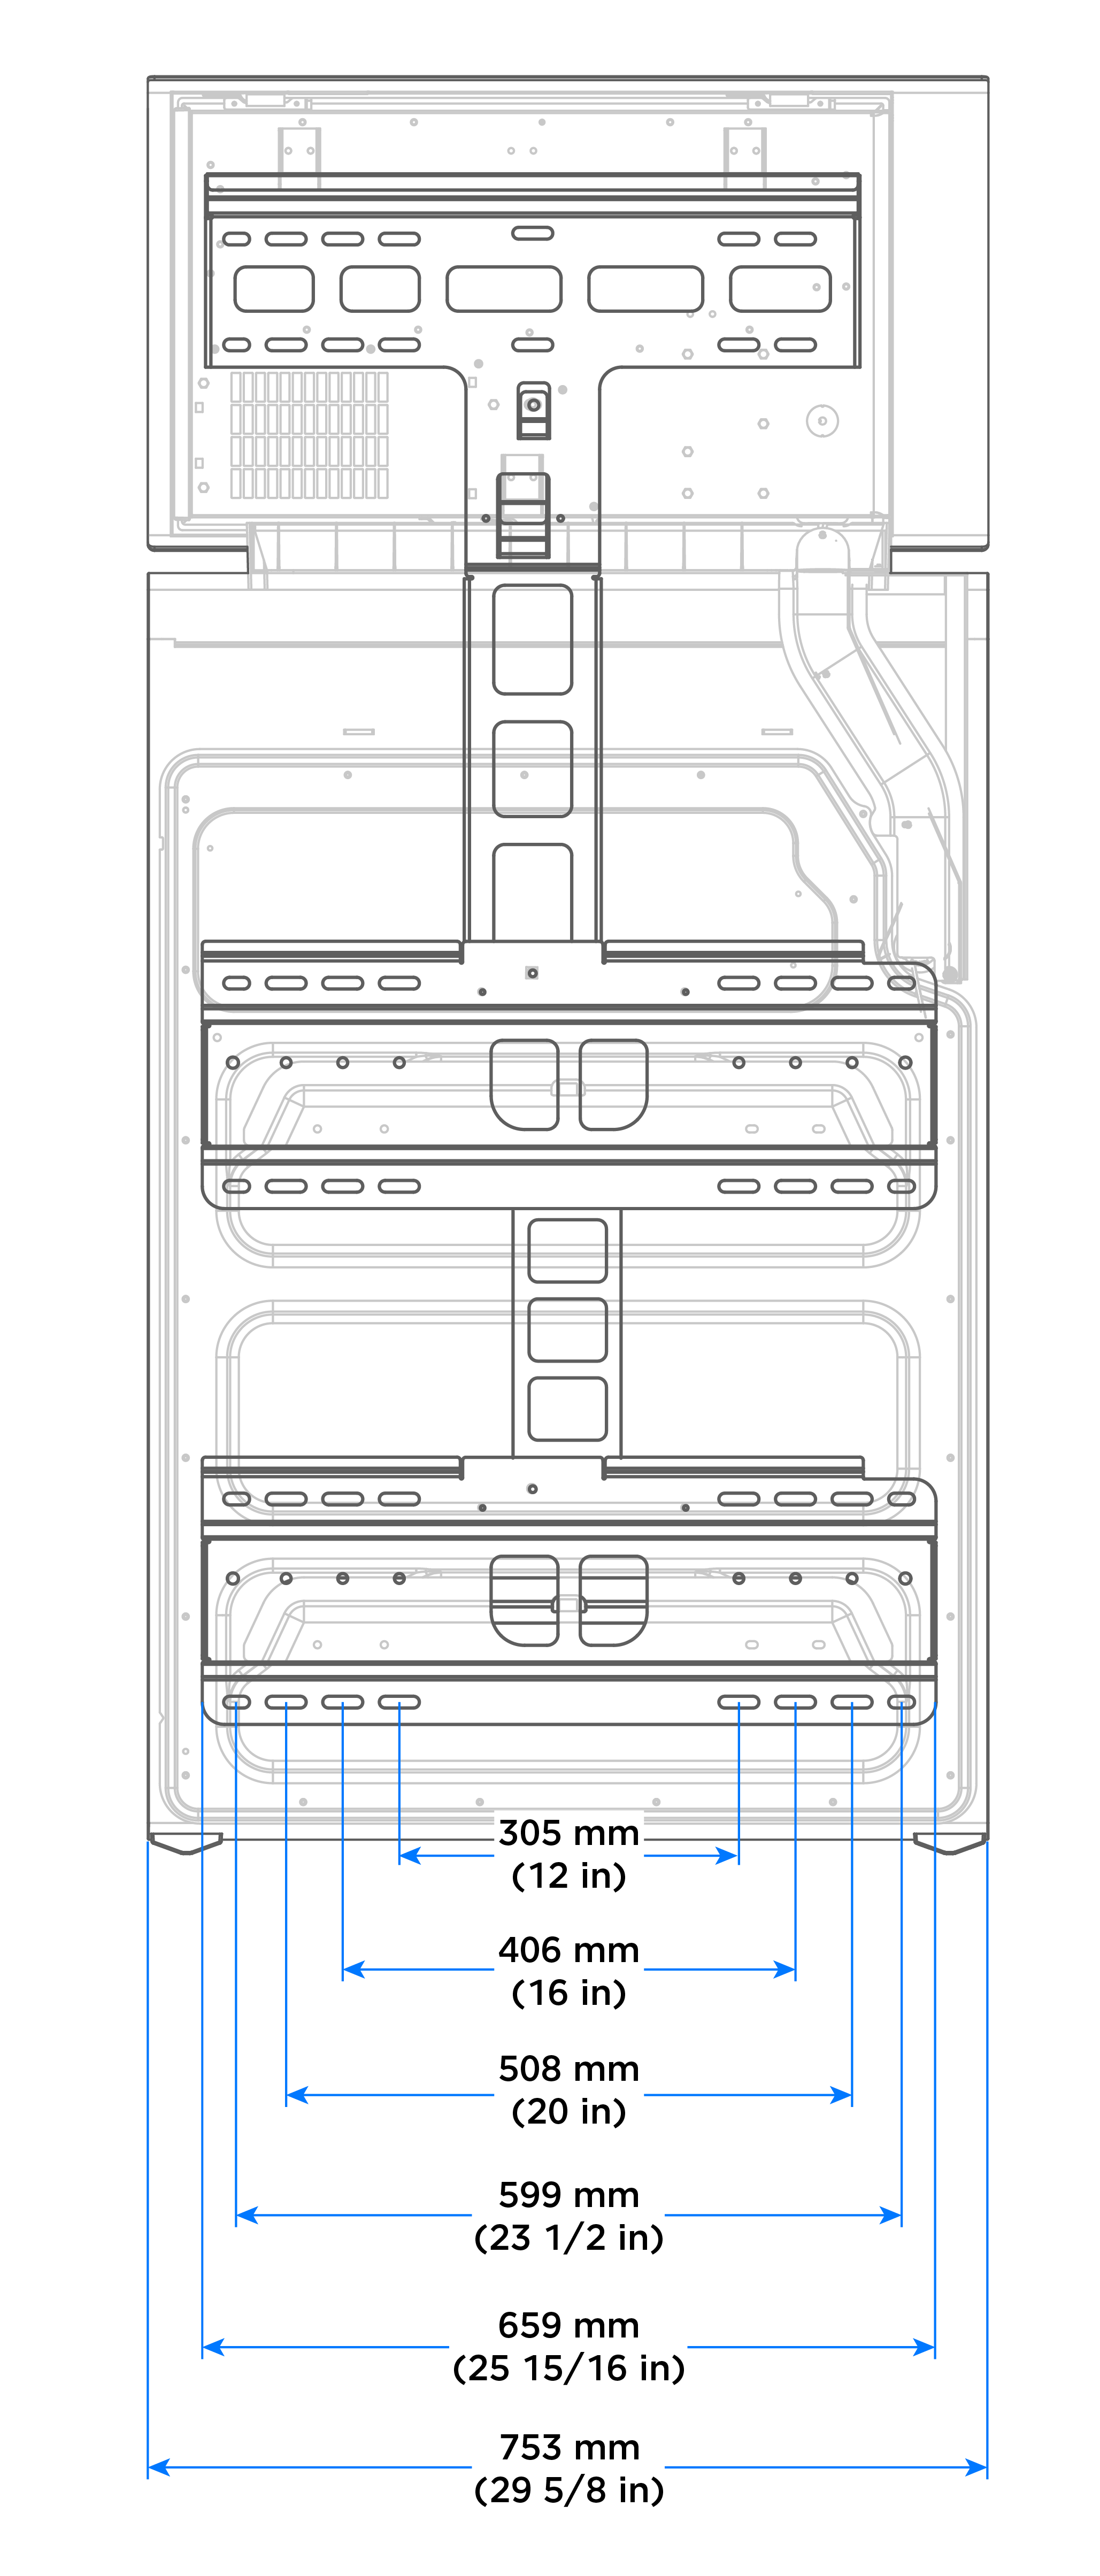
Using the bracket measurements
below for reference, plan the position of the brackets before mounting. Note
that alignment of the battery assembly and solar assembly to the brackets is
critical in installing Powerwall+; if each assembly is not properly aligned with its bracket, the installation
cannot be completed.
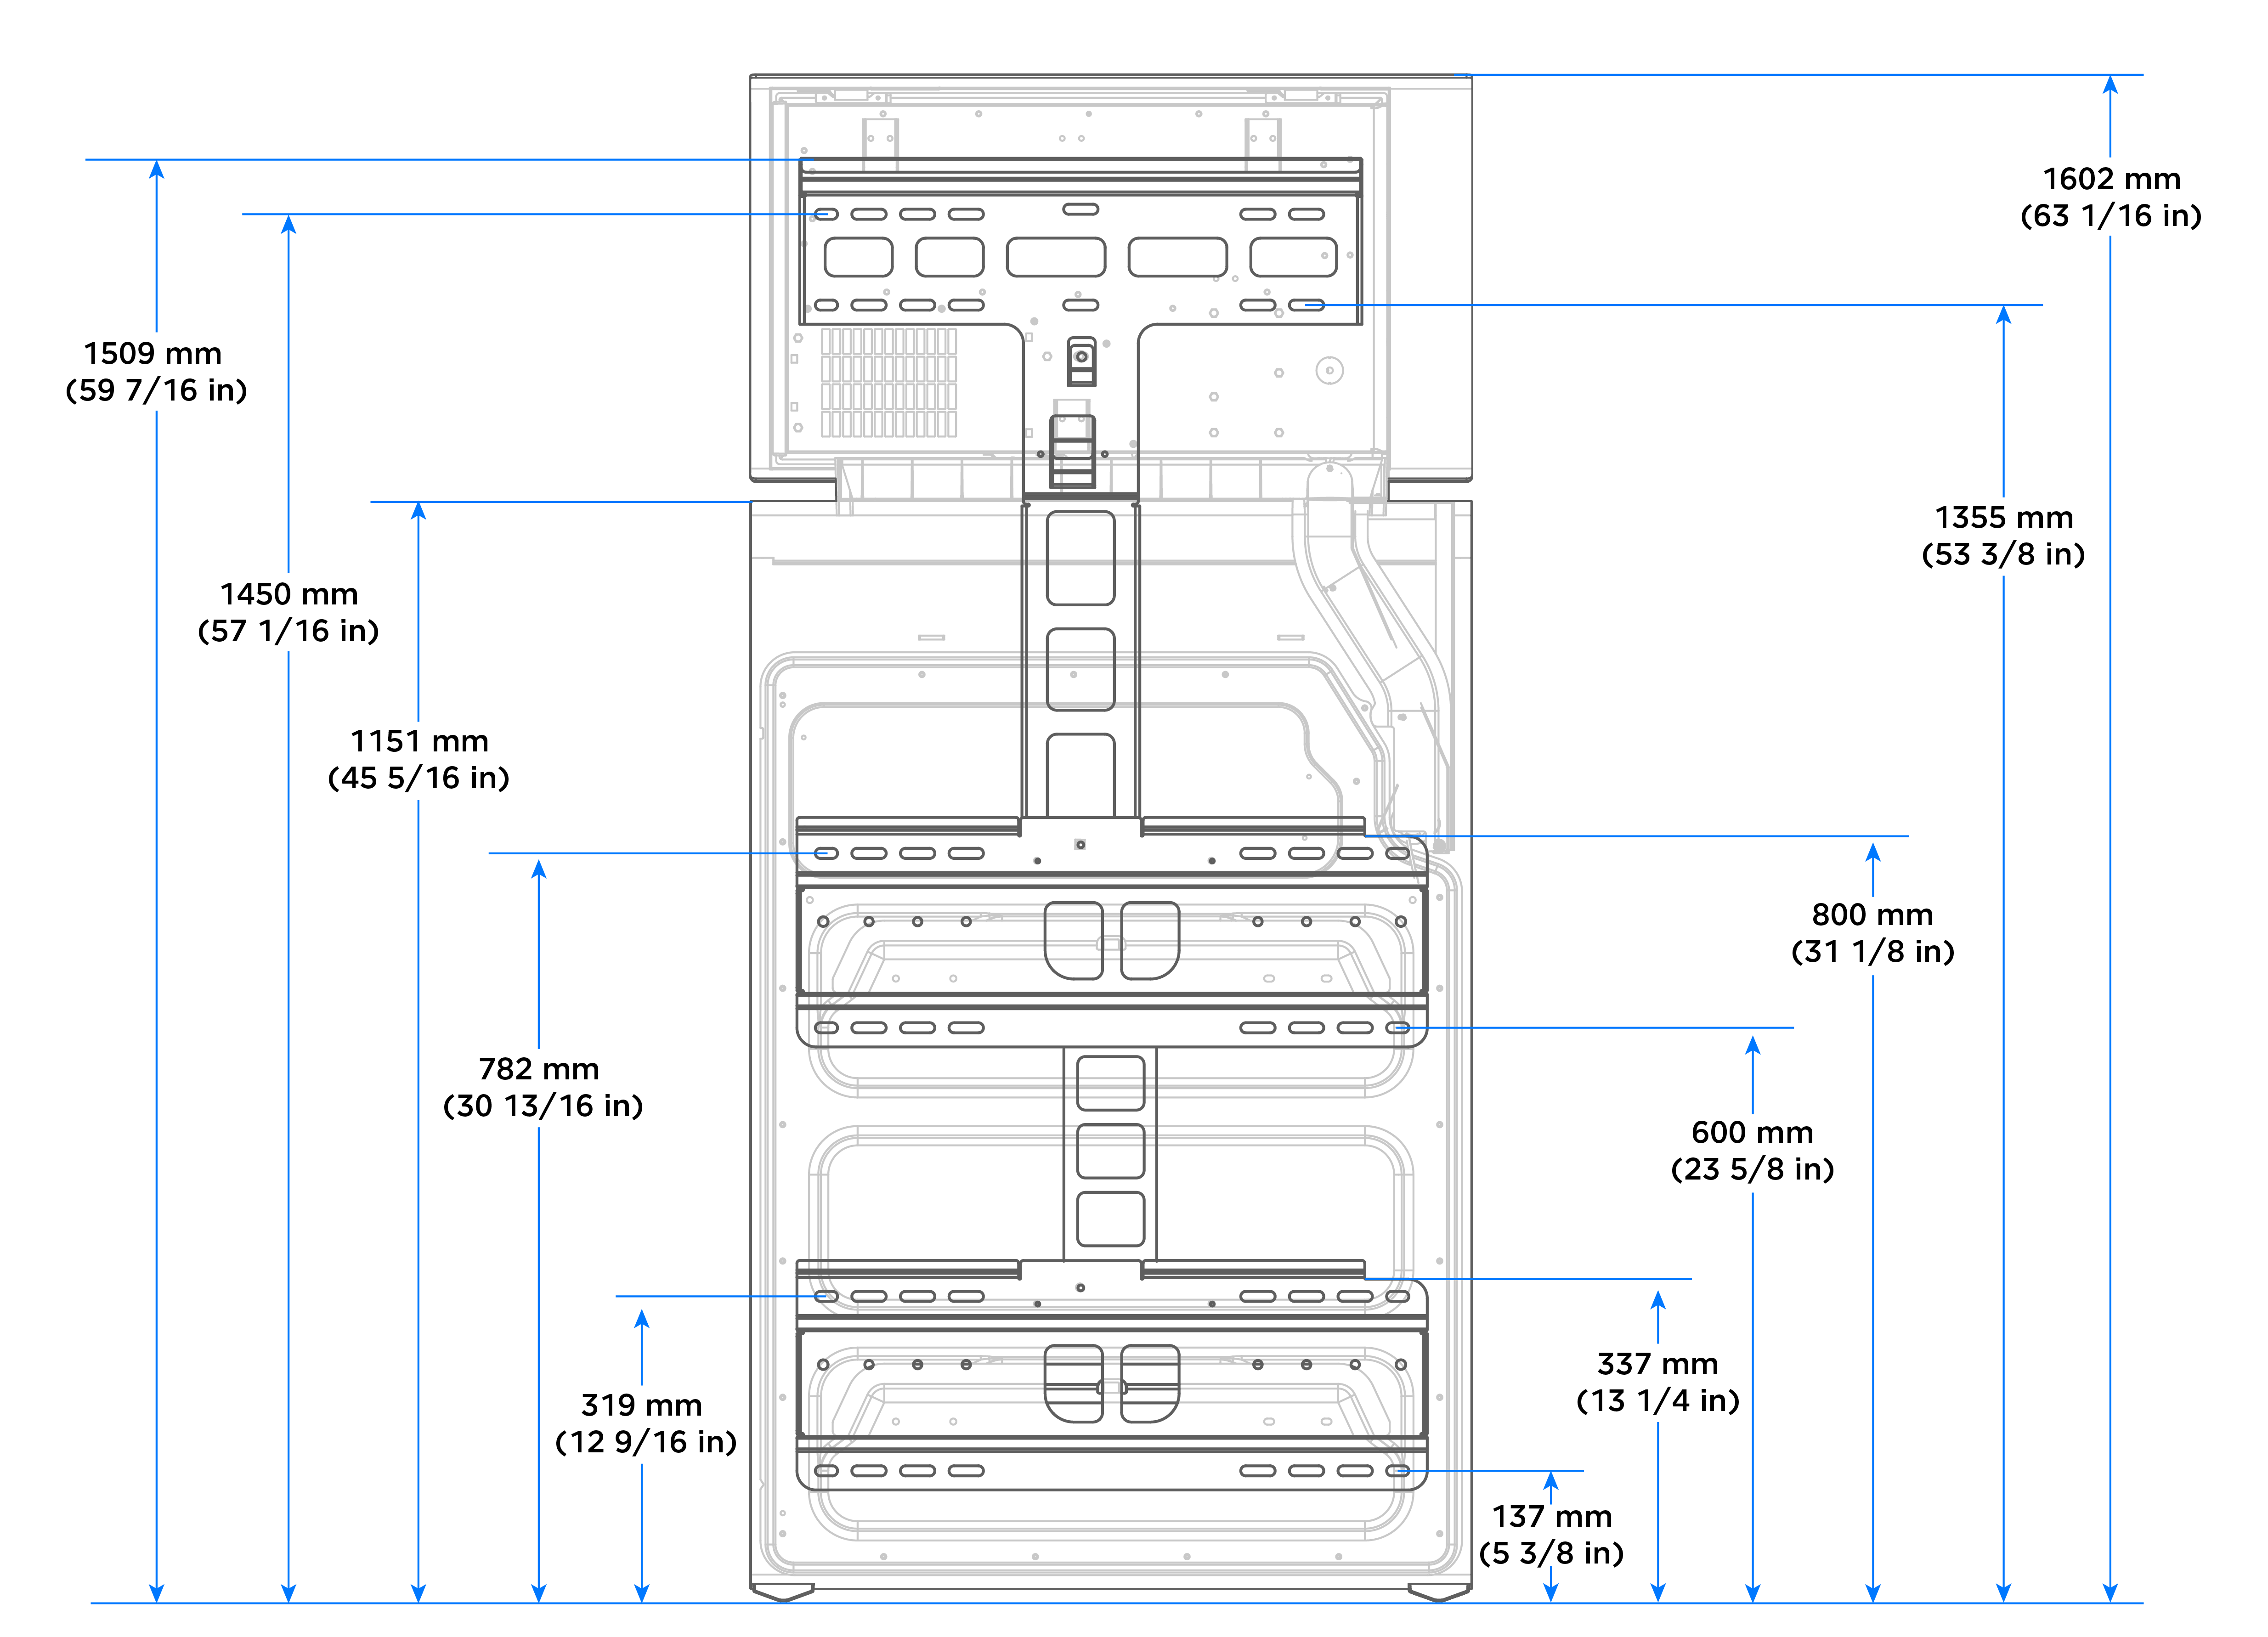 NoteWhen measuring from the top of the battery assembly bracket, measure from the metal edge of the bracket, not the rubber bumpers.
-
Using a drill and level, mount
the battery assembly bracket to the selected wall. See Mounting Bracket Anchoring Details for
additional details on the type and number of fasteners to use.
Figure 1. Mount Battery Assembly Bracket 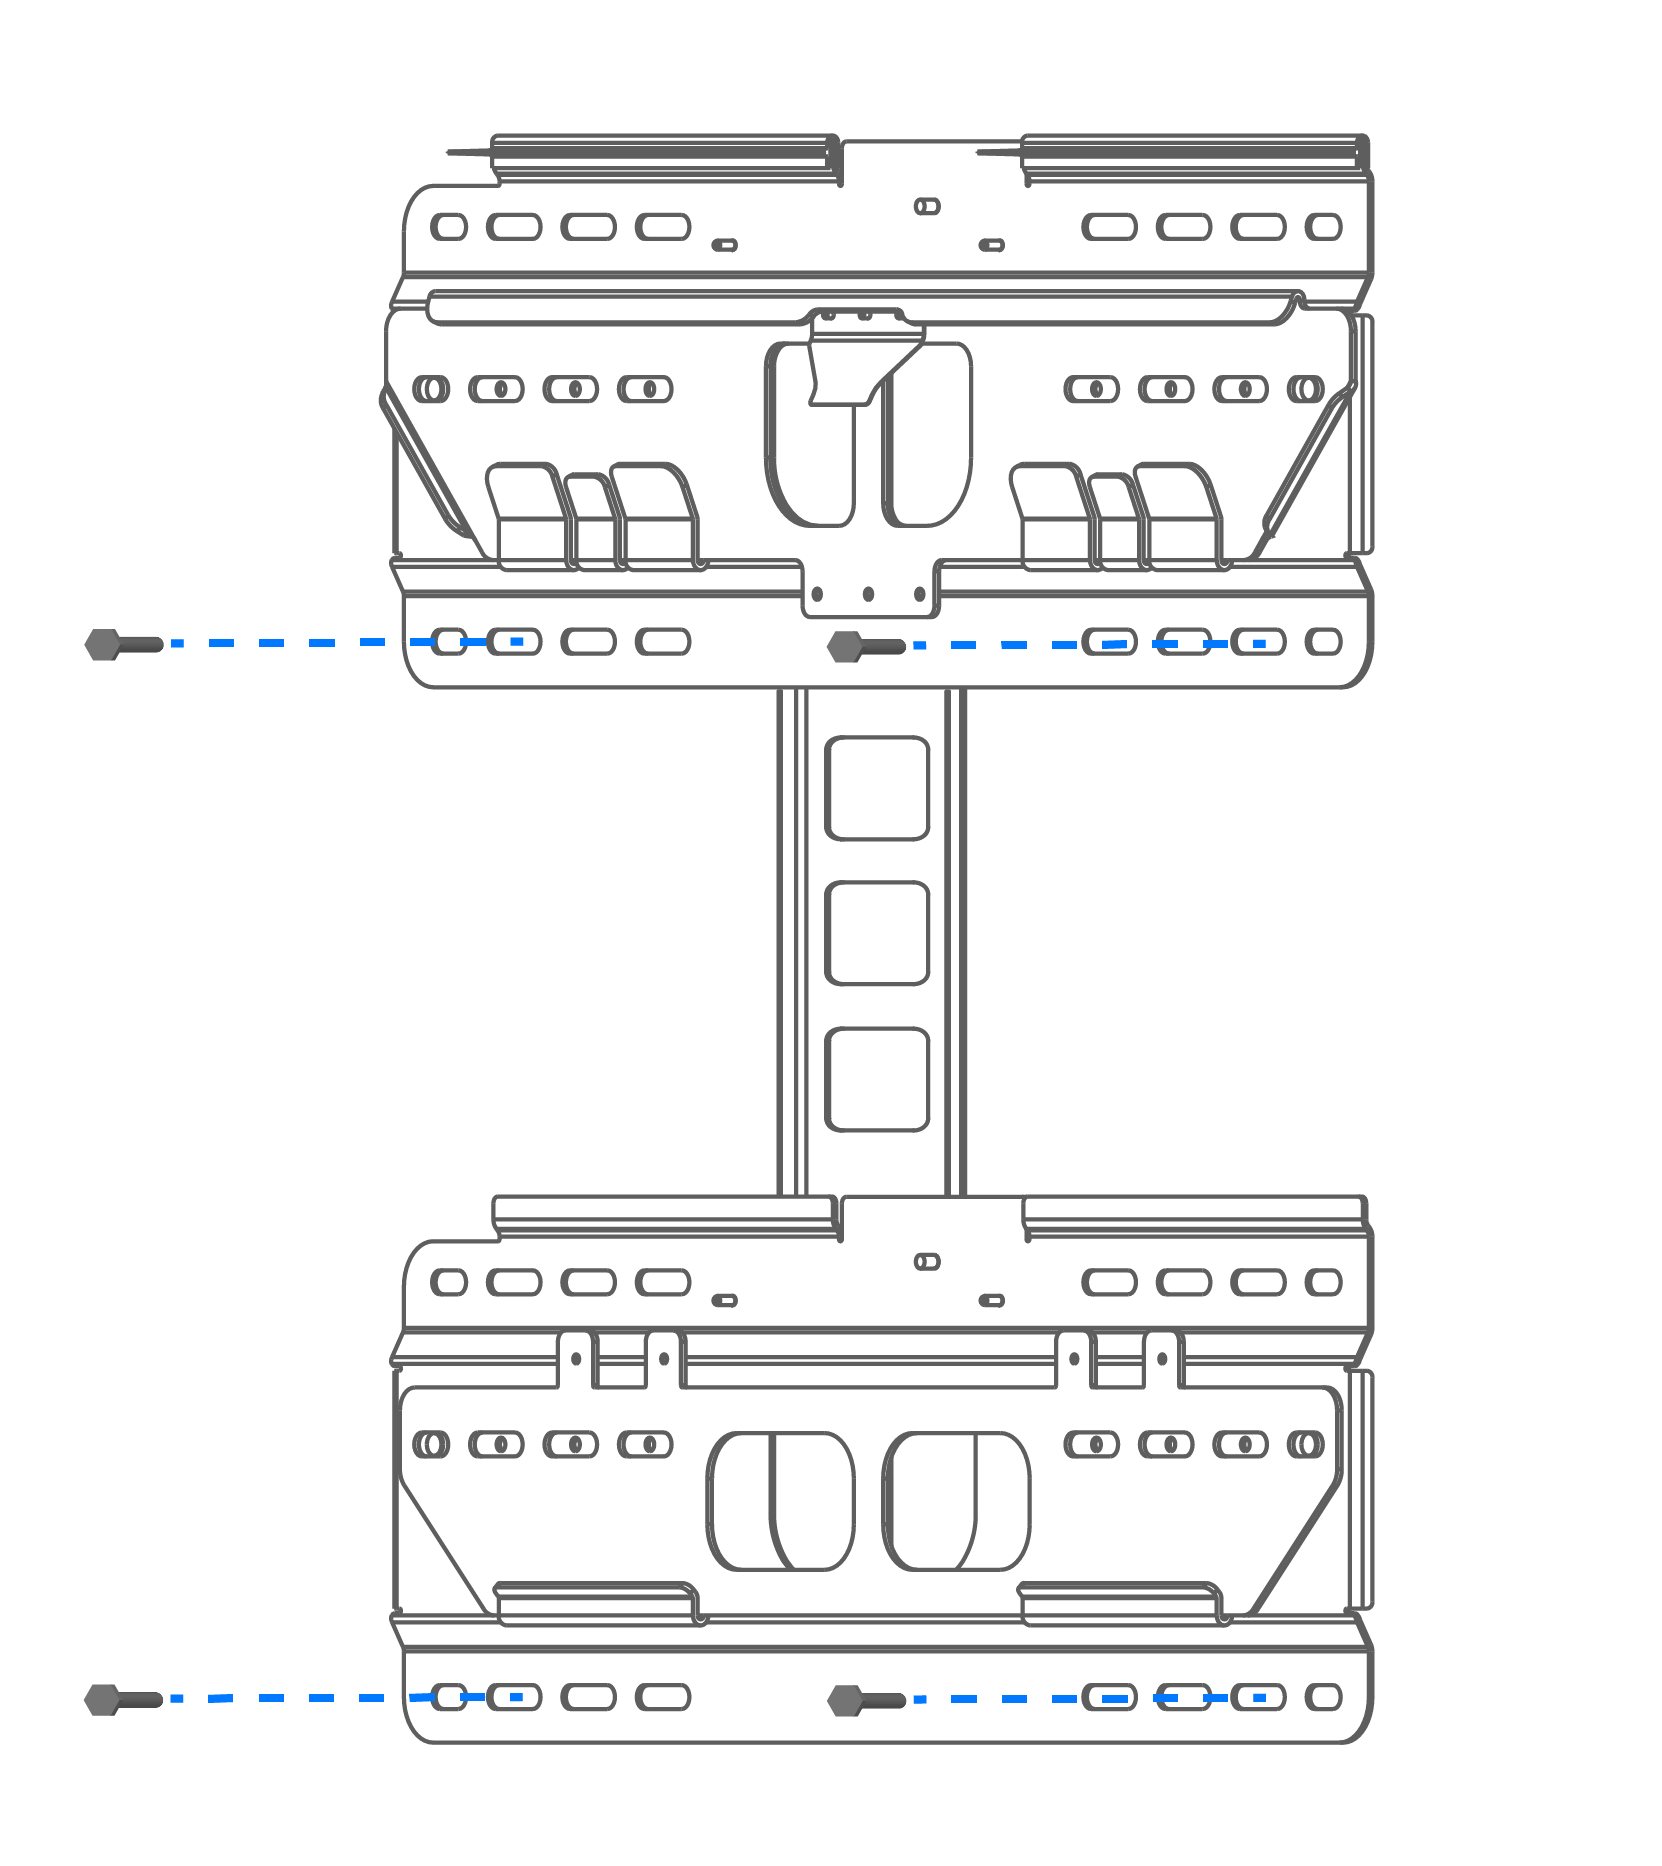
-
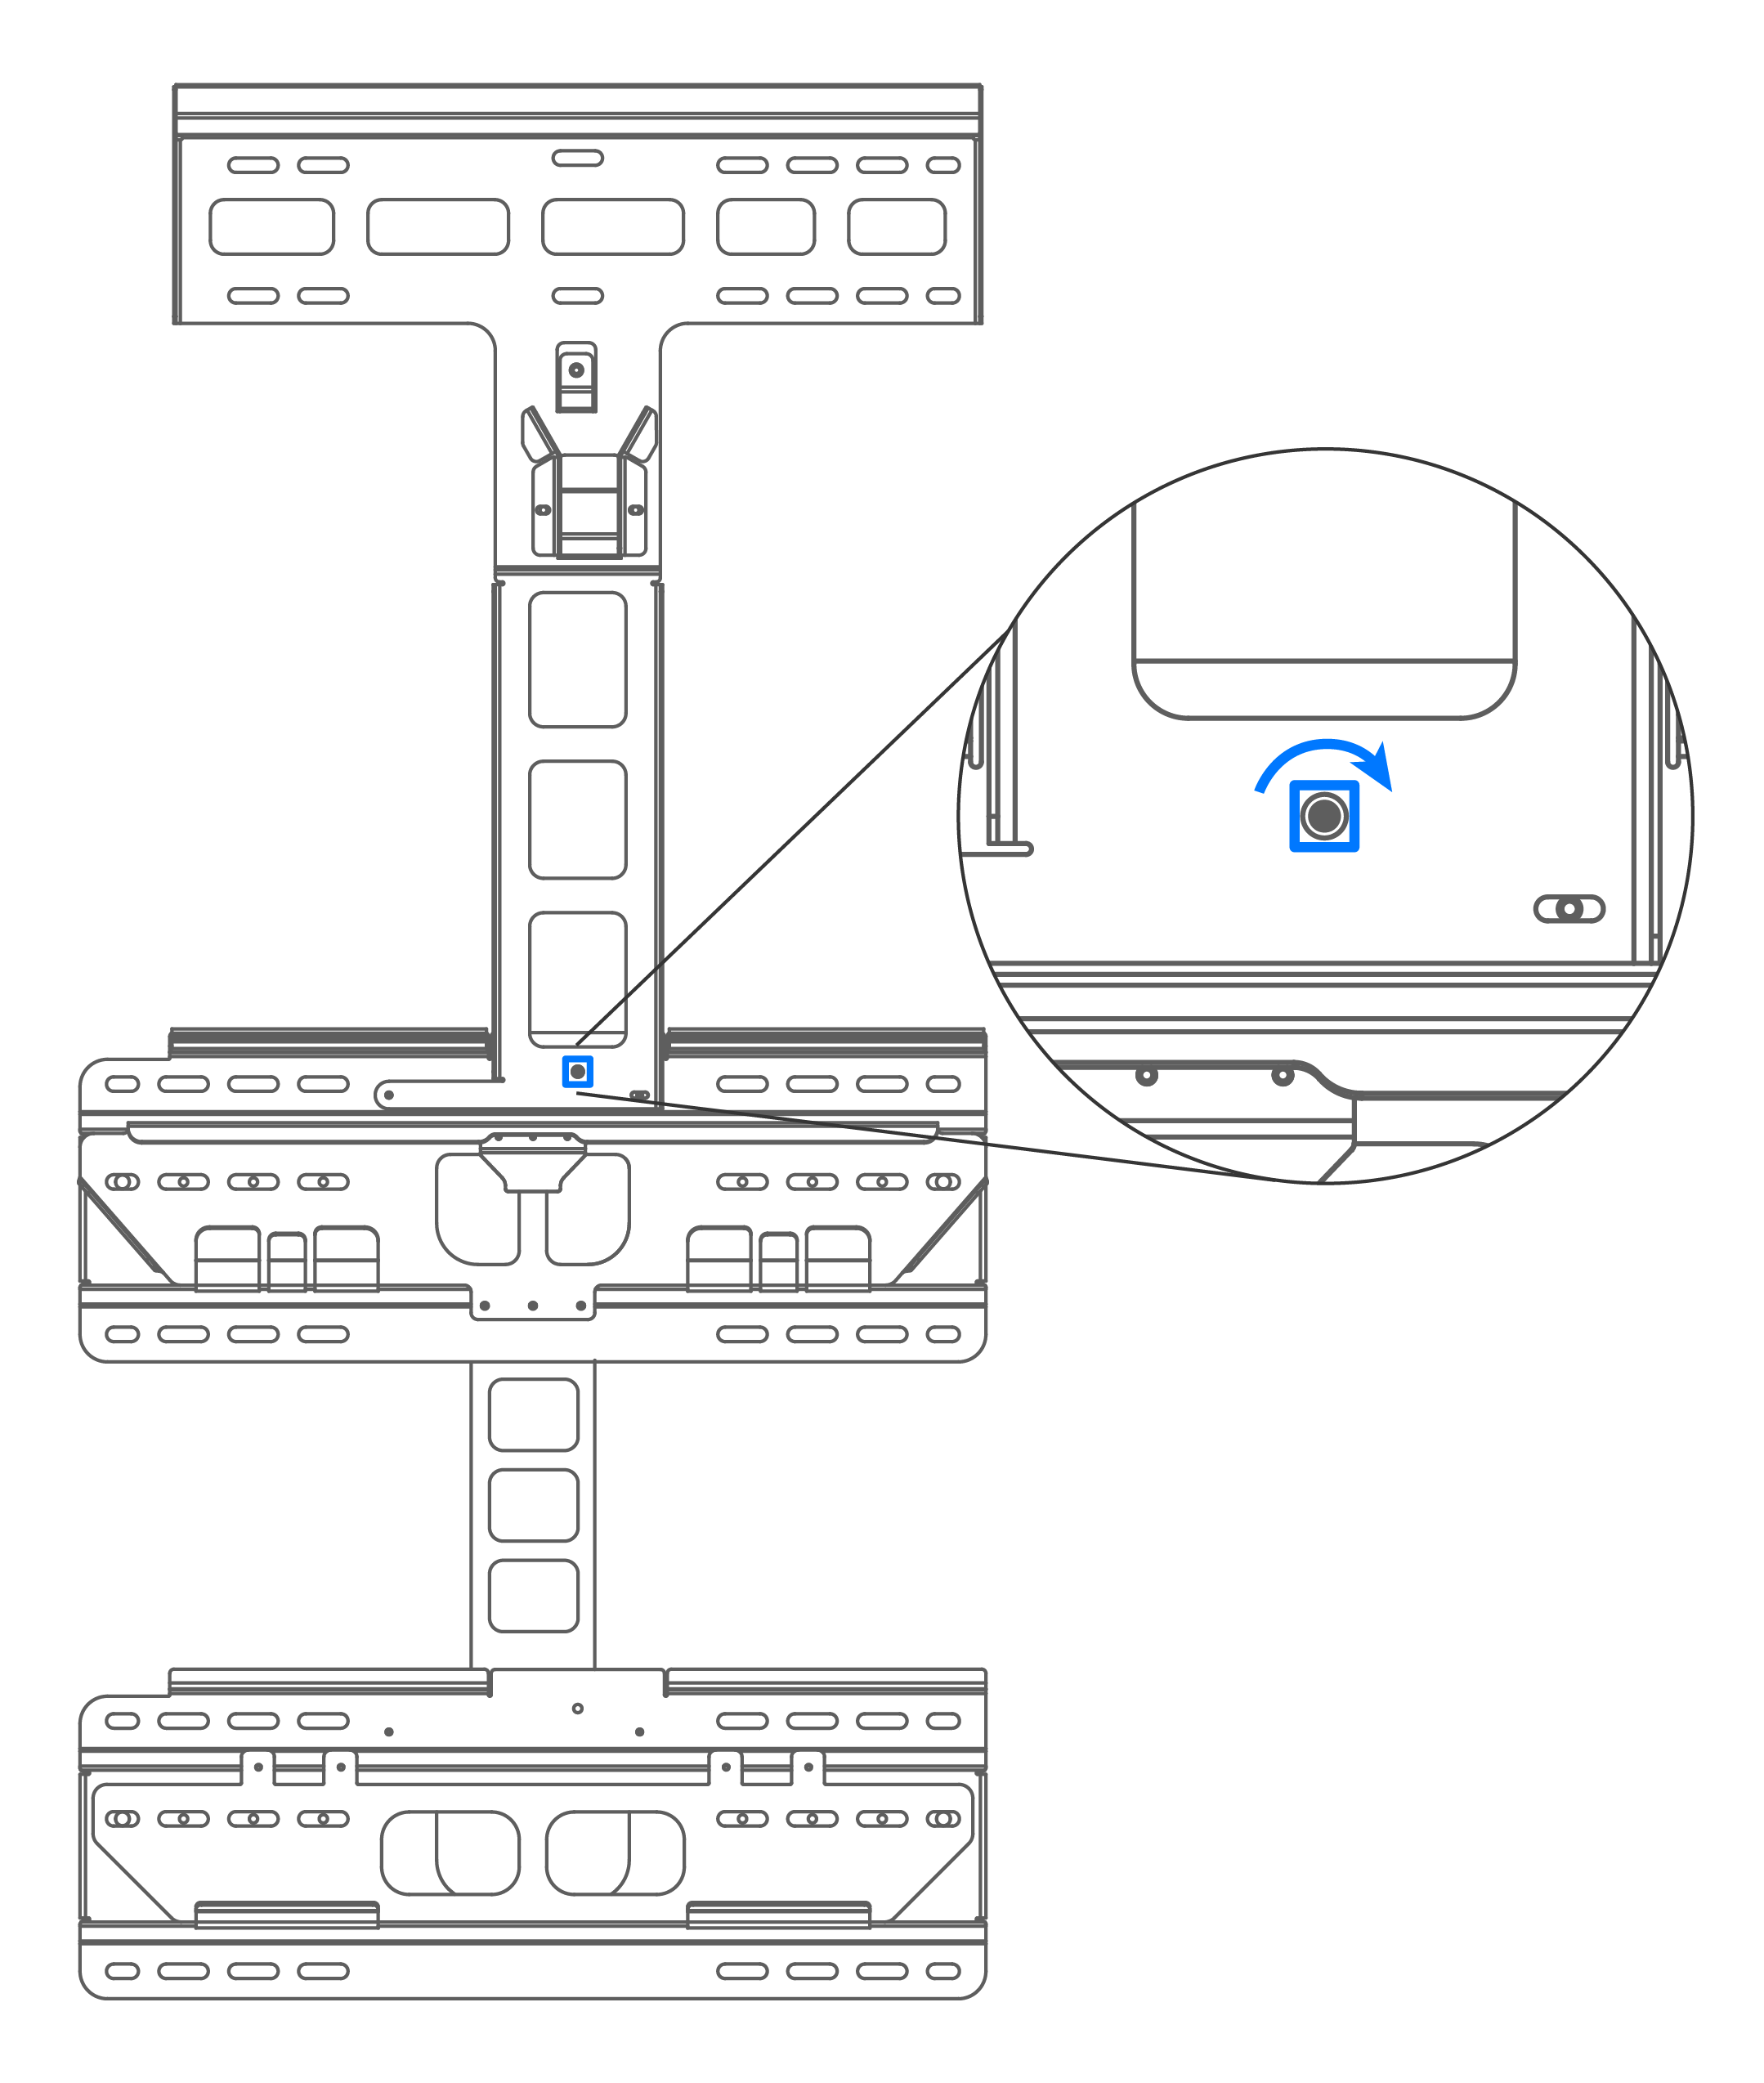
Align the solar assembly bracket
to the battery assembly bracket using the alignment pin. Using a drill and
level, mount the solar assembly bracket to the battery assembly bracket and
wall. See Mounting Bracket Anchoring Details for additional details on the type and number of fasteners to
use.
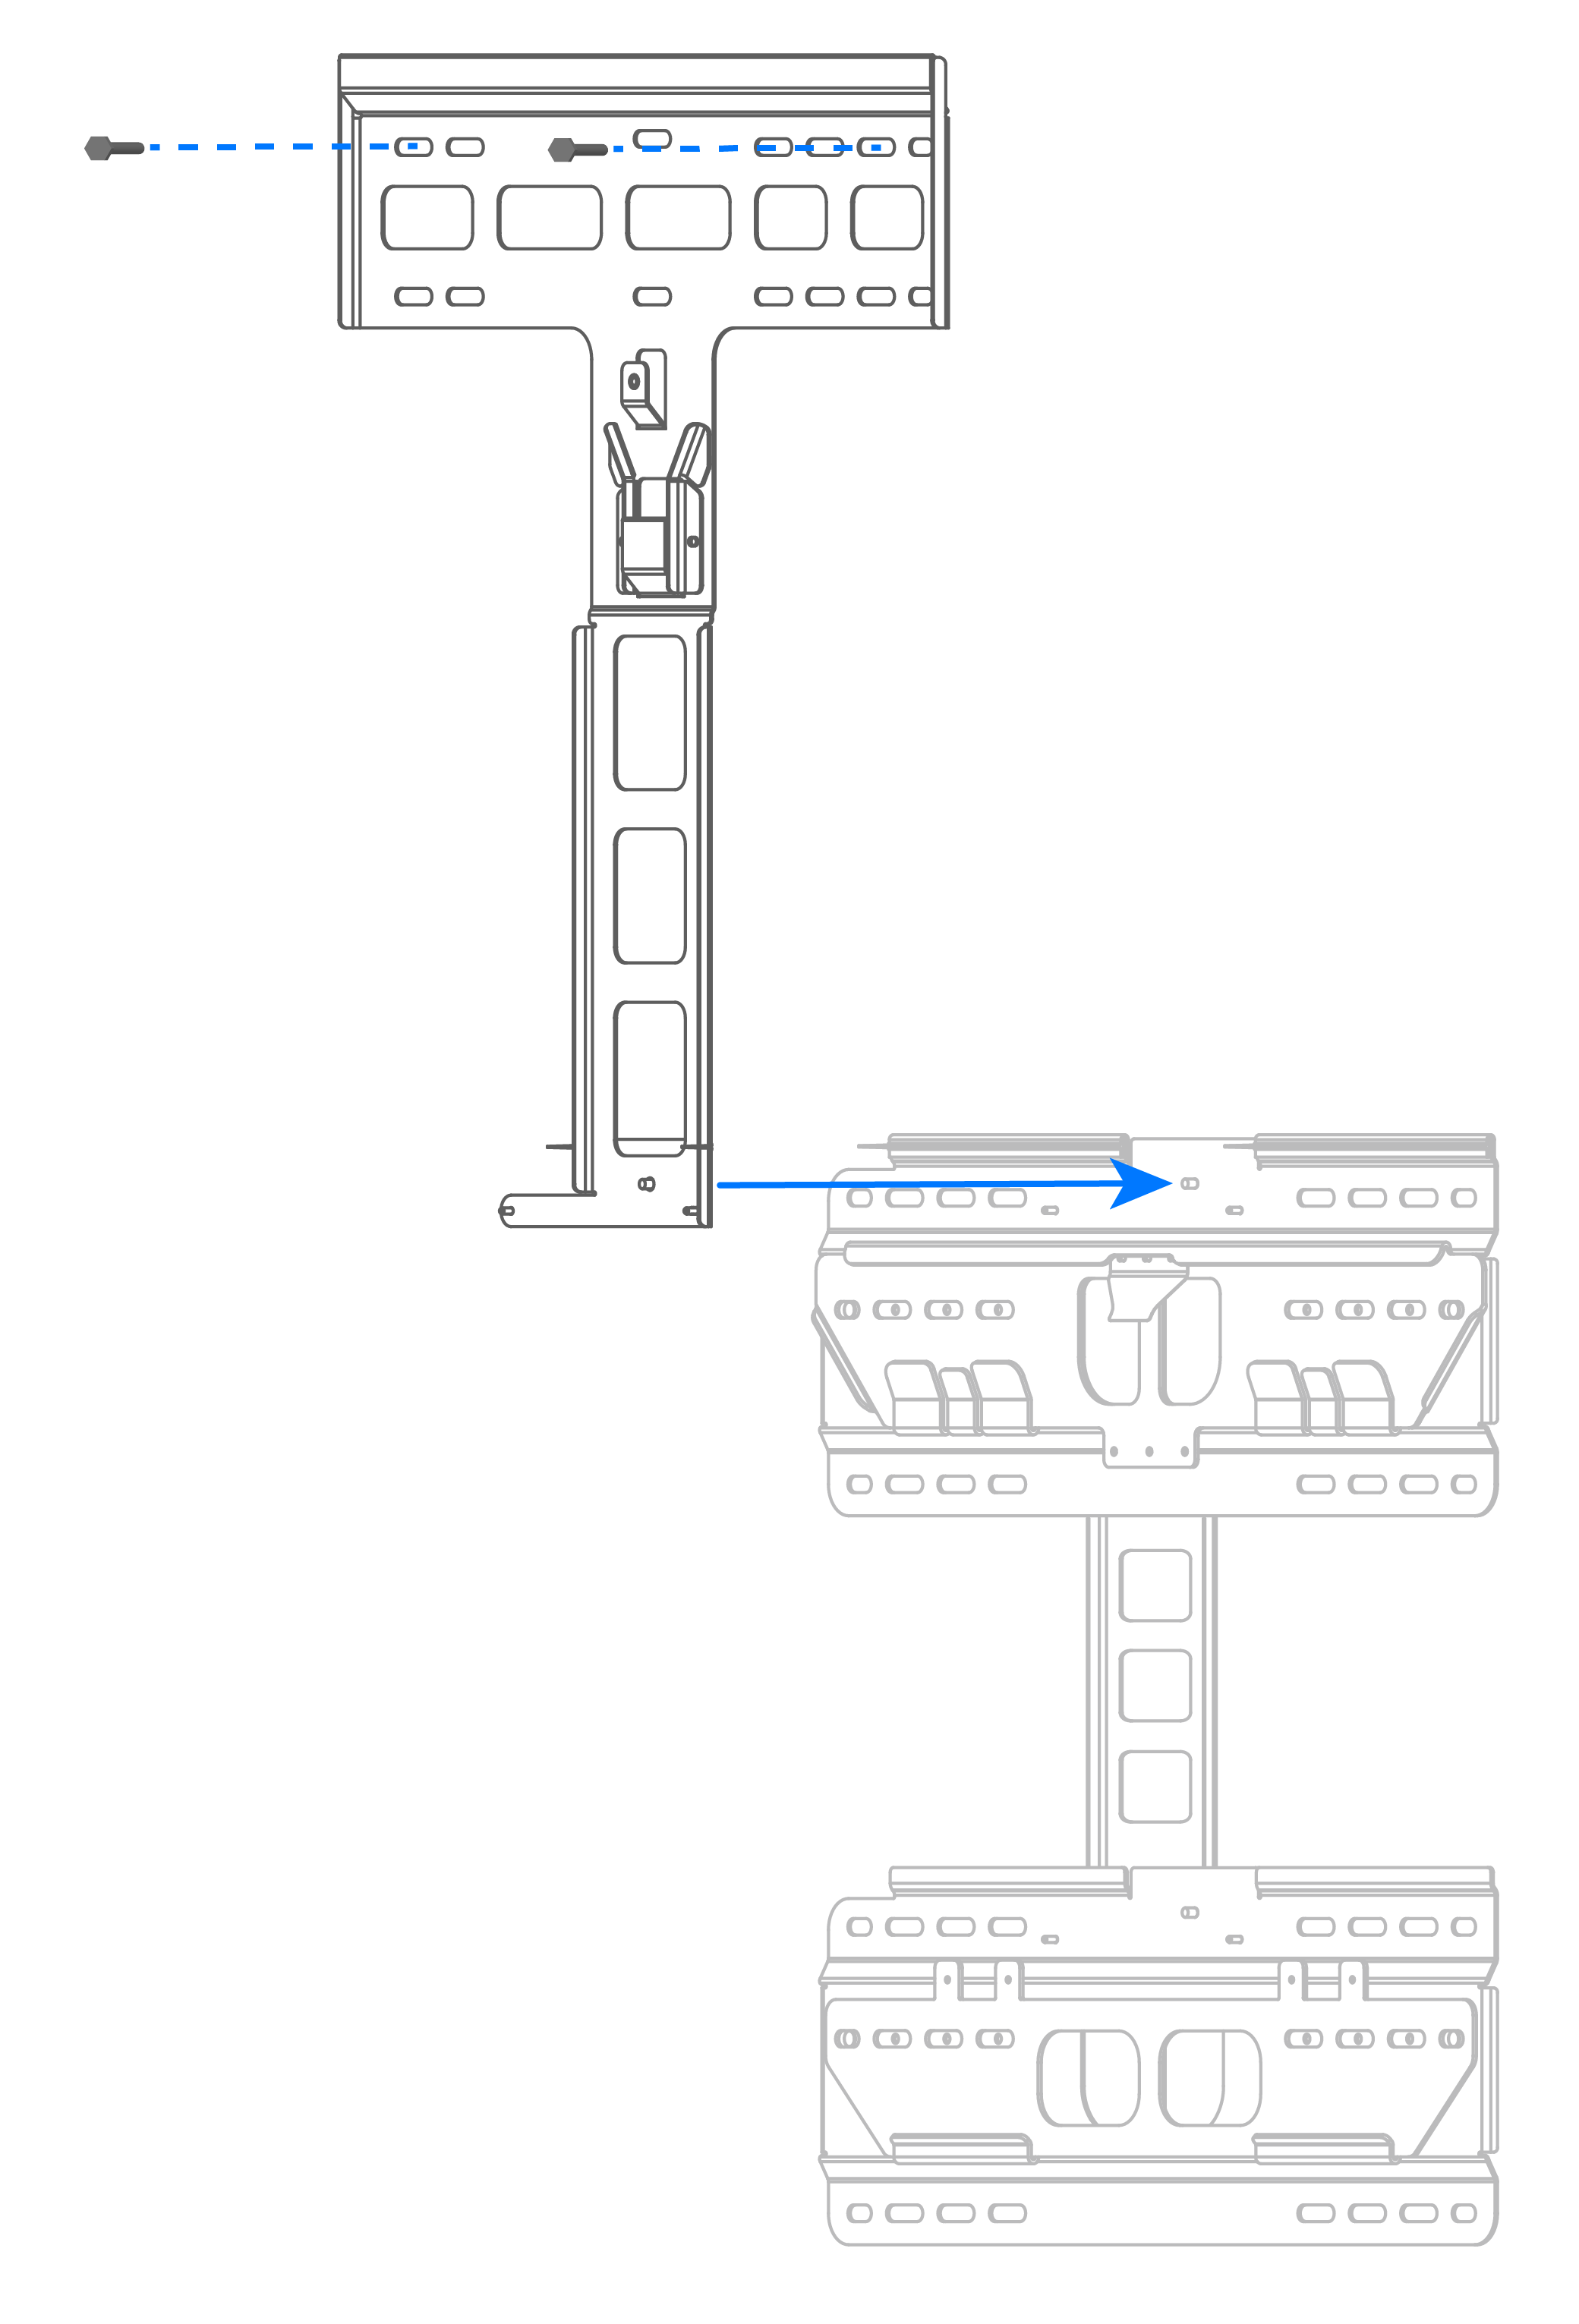
-
Install the provided square nut over the alignment pin and tighten it by
hand.