2023-06-19
Step 1: Prepare for Installation
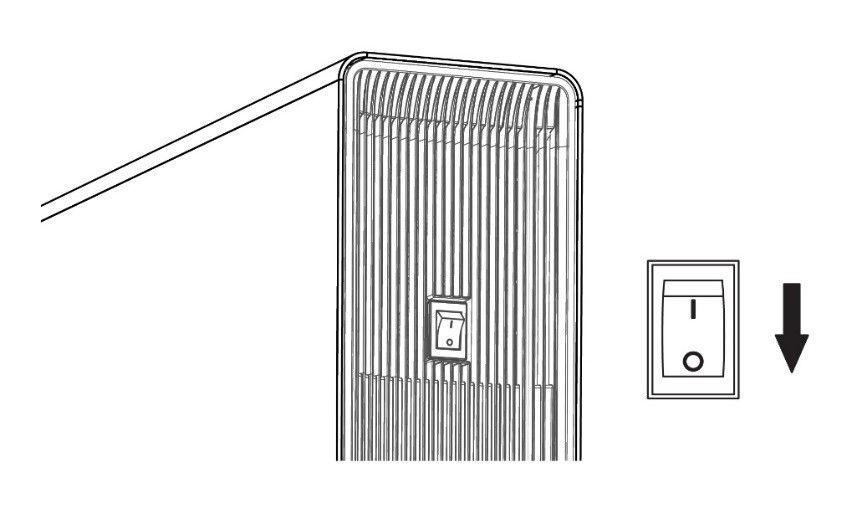
- Turn off the Powerwall+ battery assembly by setting its Enable switch to the OFF position.
- Turn off the AC circuit breaker for the Powerwall+.
- Ensure that the Powerwall is turned off by verifying that its Enable switch is set to the OFF position.
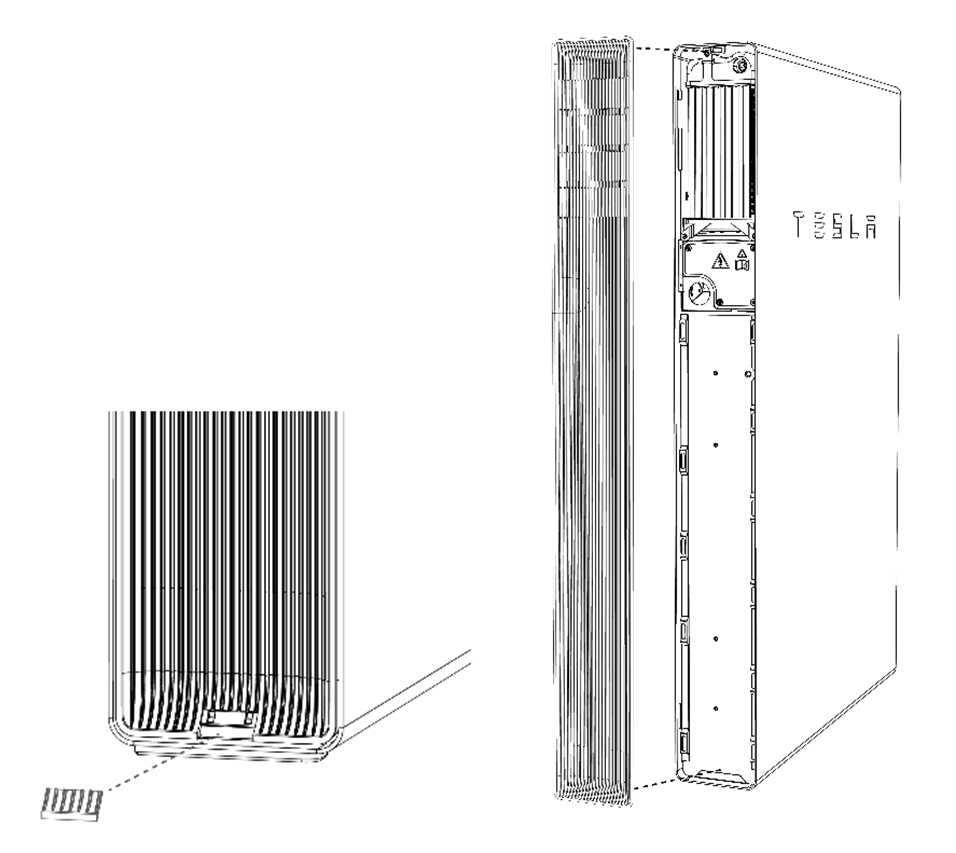
- Remove both side covers from each Powerwall to be joined.
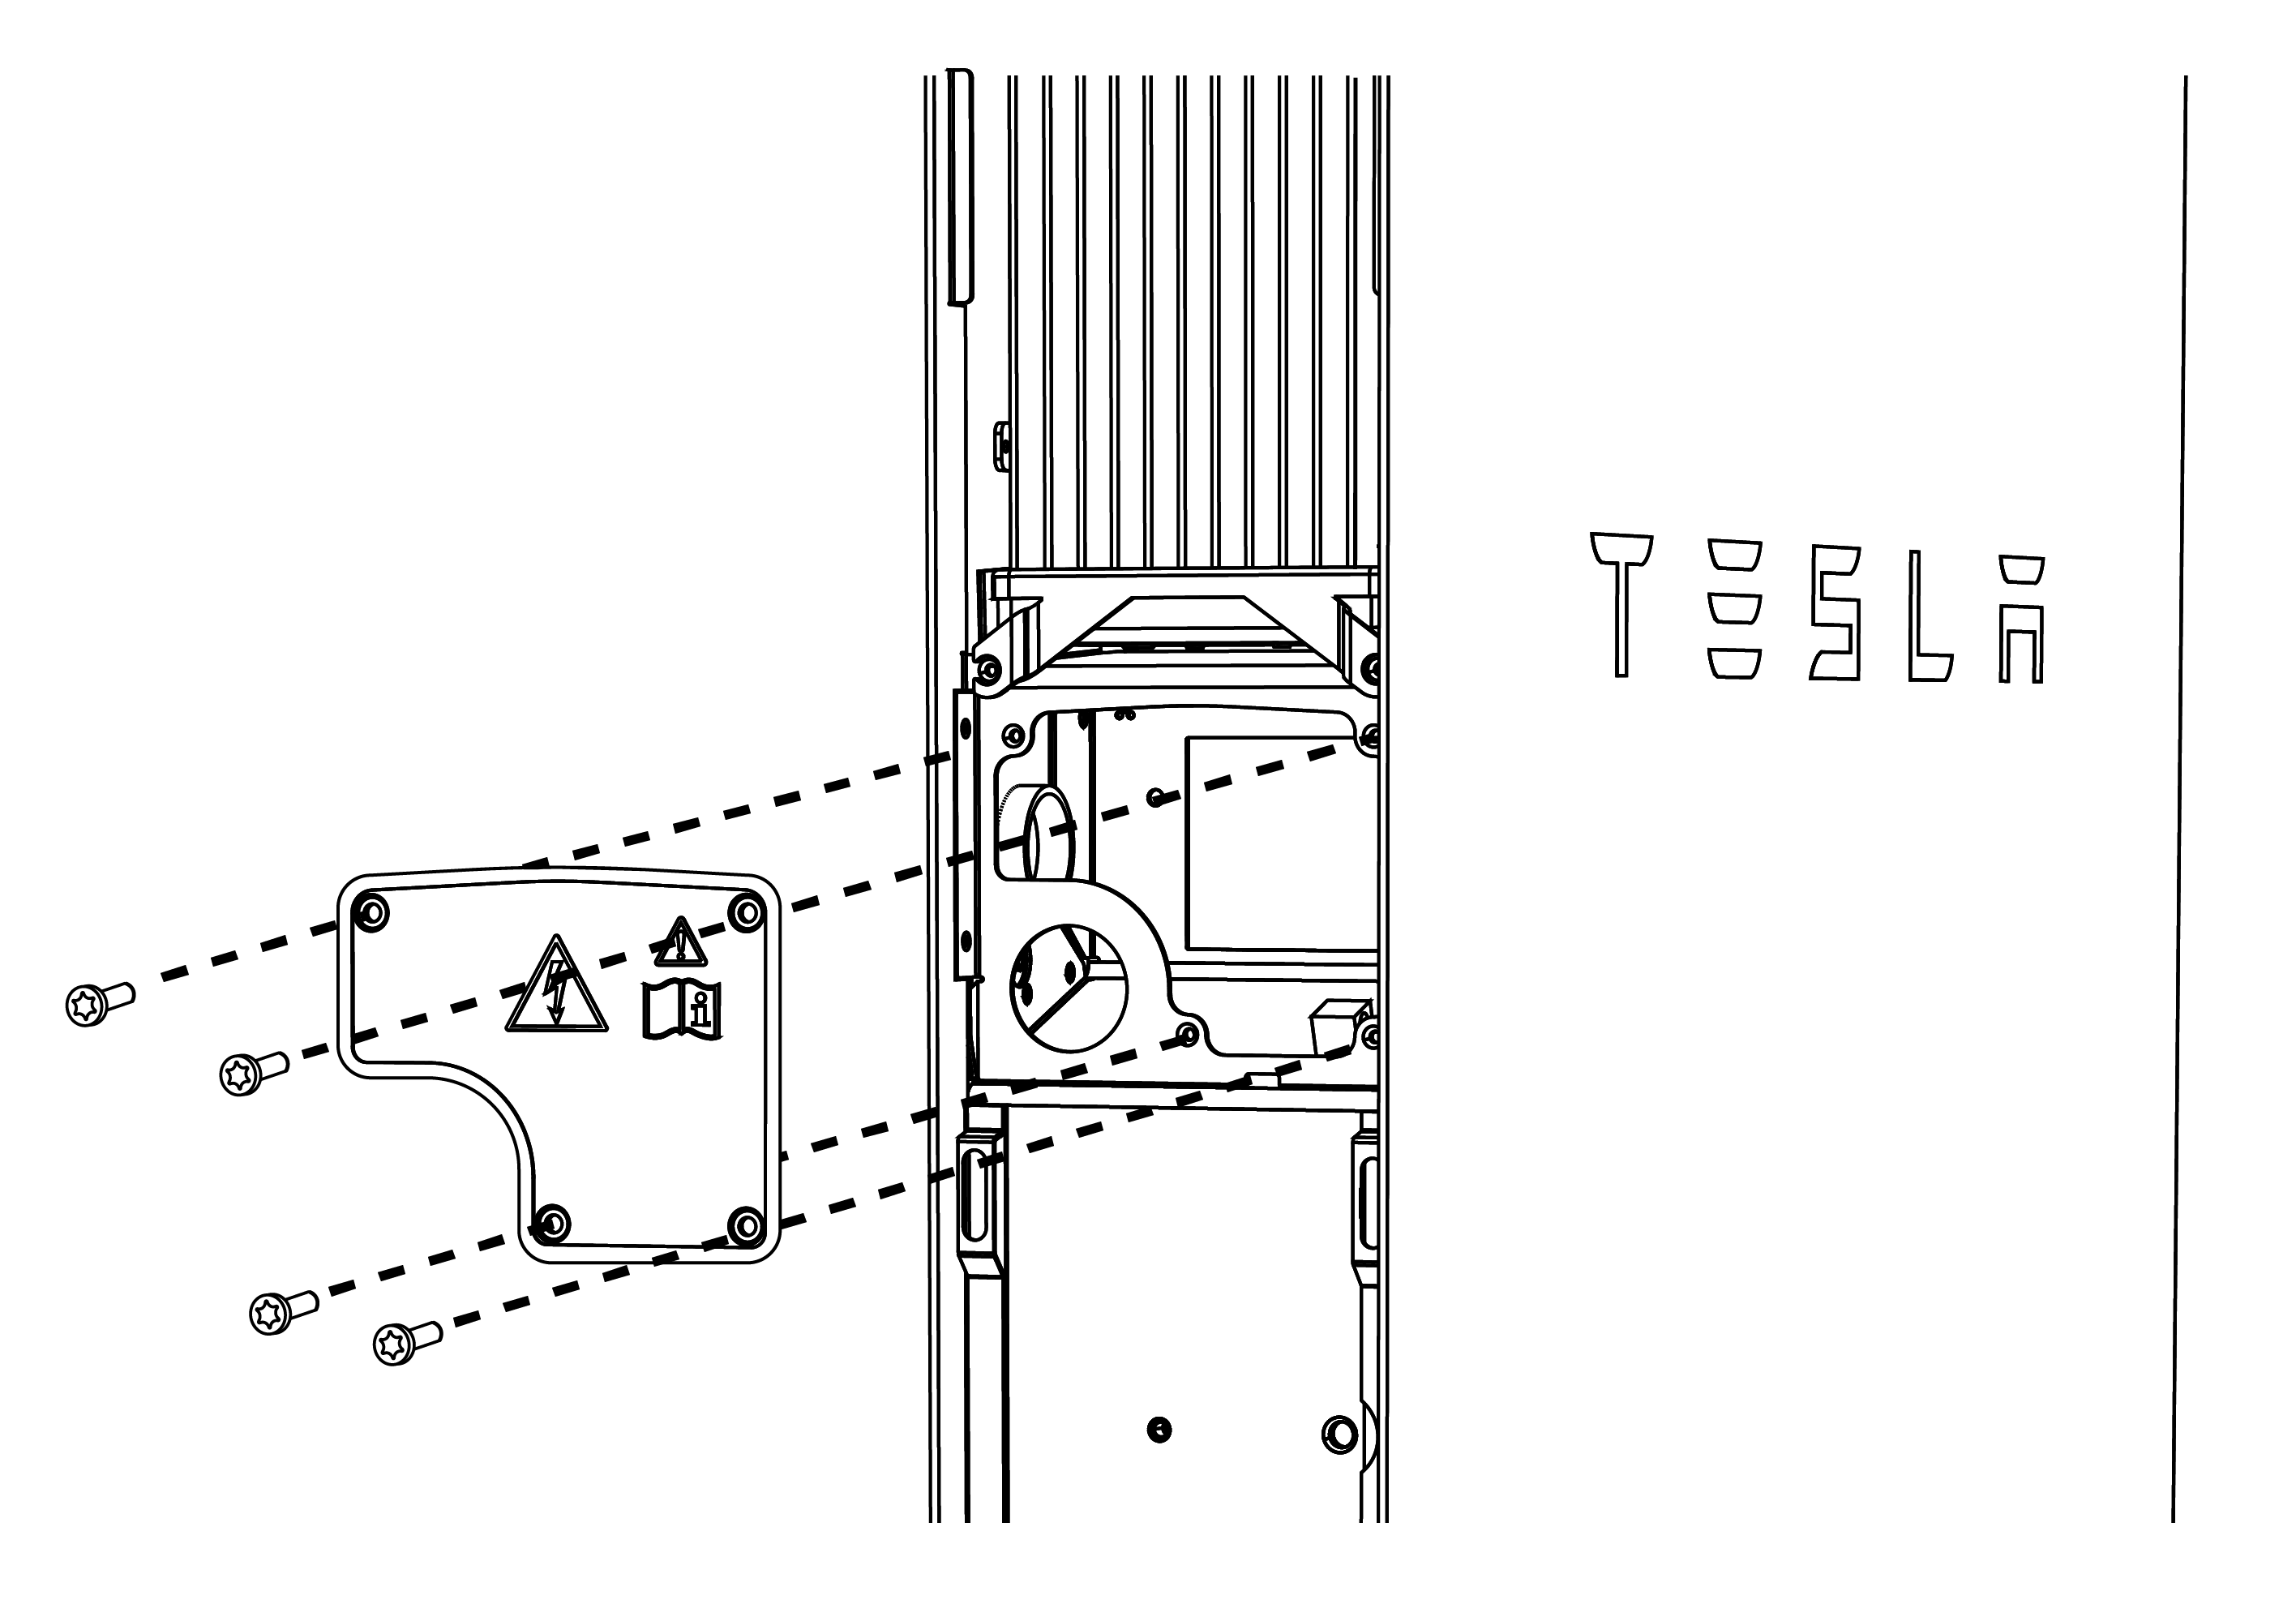
- Using a T20 Torx bit, remove the wiring compartment cover from the Powerwall+.


