2025-07-11
Mount the Solar Assembly
-
Using a hole saw or knockout
kit, drill out the cable access holes from the solar assembly. The communication
wiring knockout is ½" in diameter, and all other cable knockouts are ¾” in
diameter.
Figure 1. Recommended Wiring Order 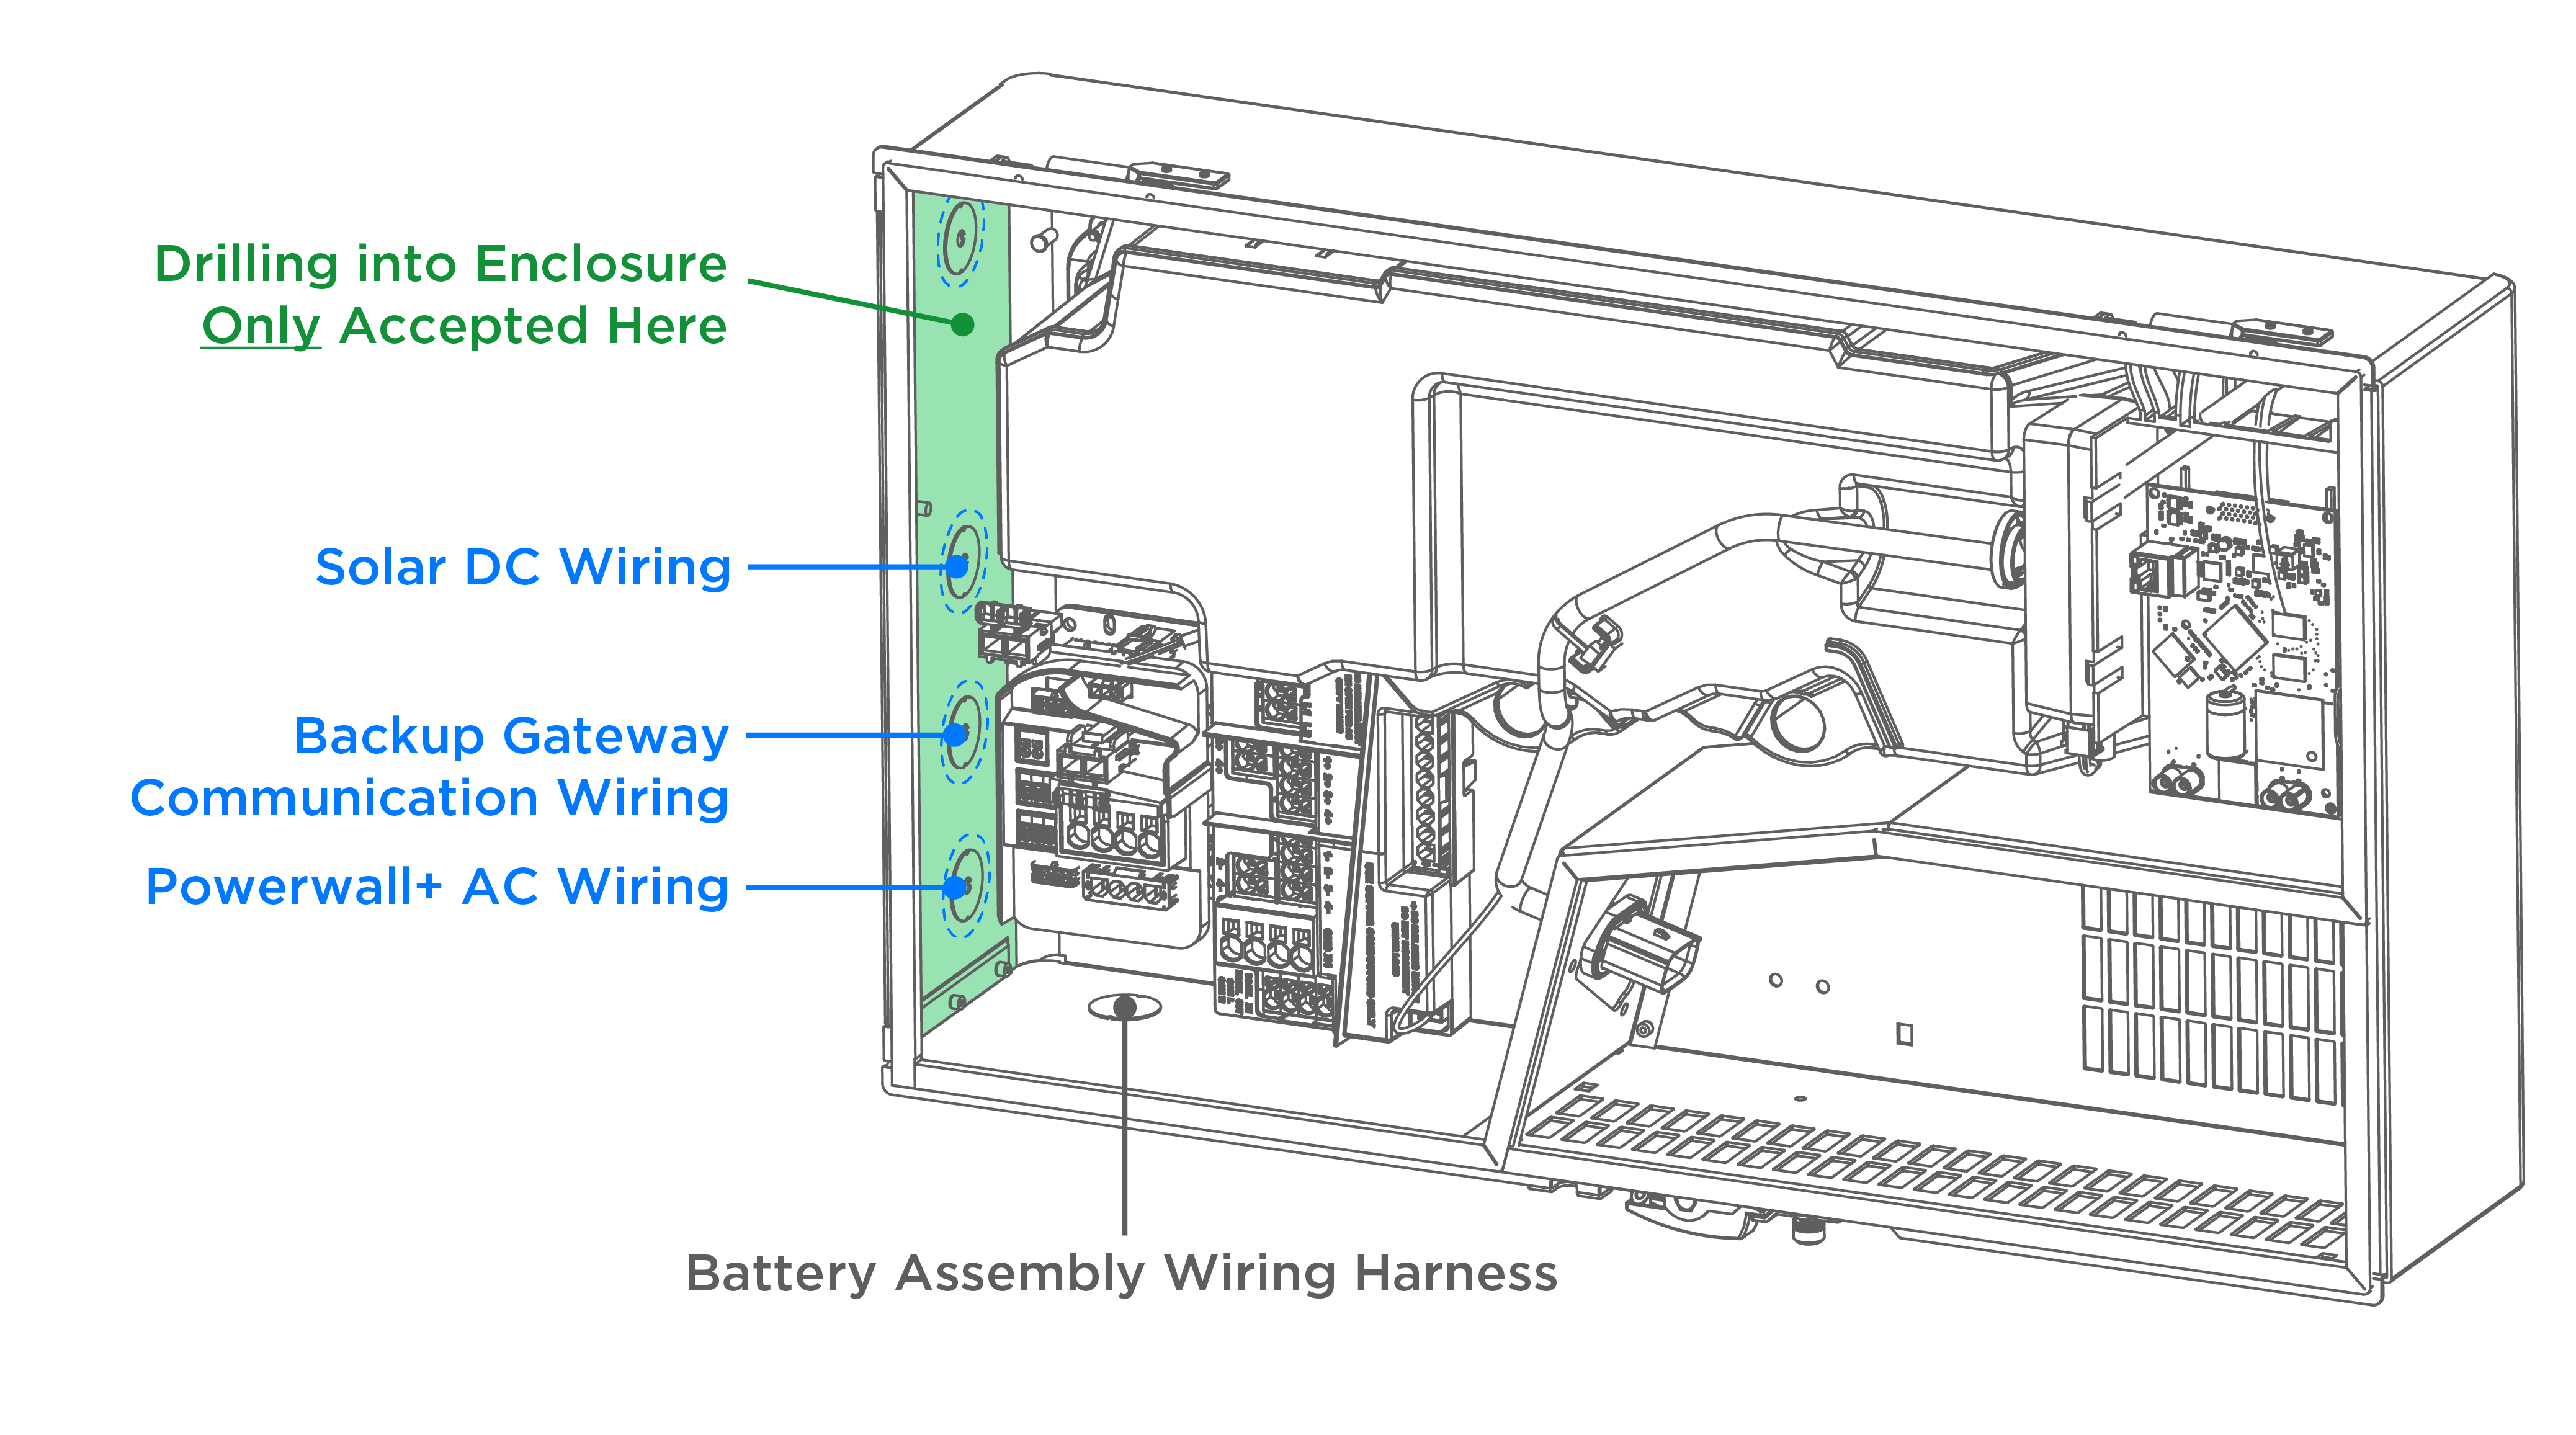 CAUTIONIf drilling into the enclosure, exercise caution and clean any metal shavings out of the enclosure after drilling. Only drill into the left side of the enclosure as indicated in the image above. Drilling elsewhere could result in damage to the solar assembly and/or water ingress (if drilling into the top of the enclosure).NoteThe cable access hole for the battery assembly wiring harness cannot be expanded; only the battery assembly wiring harness should be routed through this hole.
 -
Position the solar assembly
close to the wall with its mounting cleats just above the flanges on the
bracket, then lower the solar assembly until the cleats engage with the bracket
flanges.
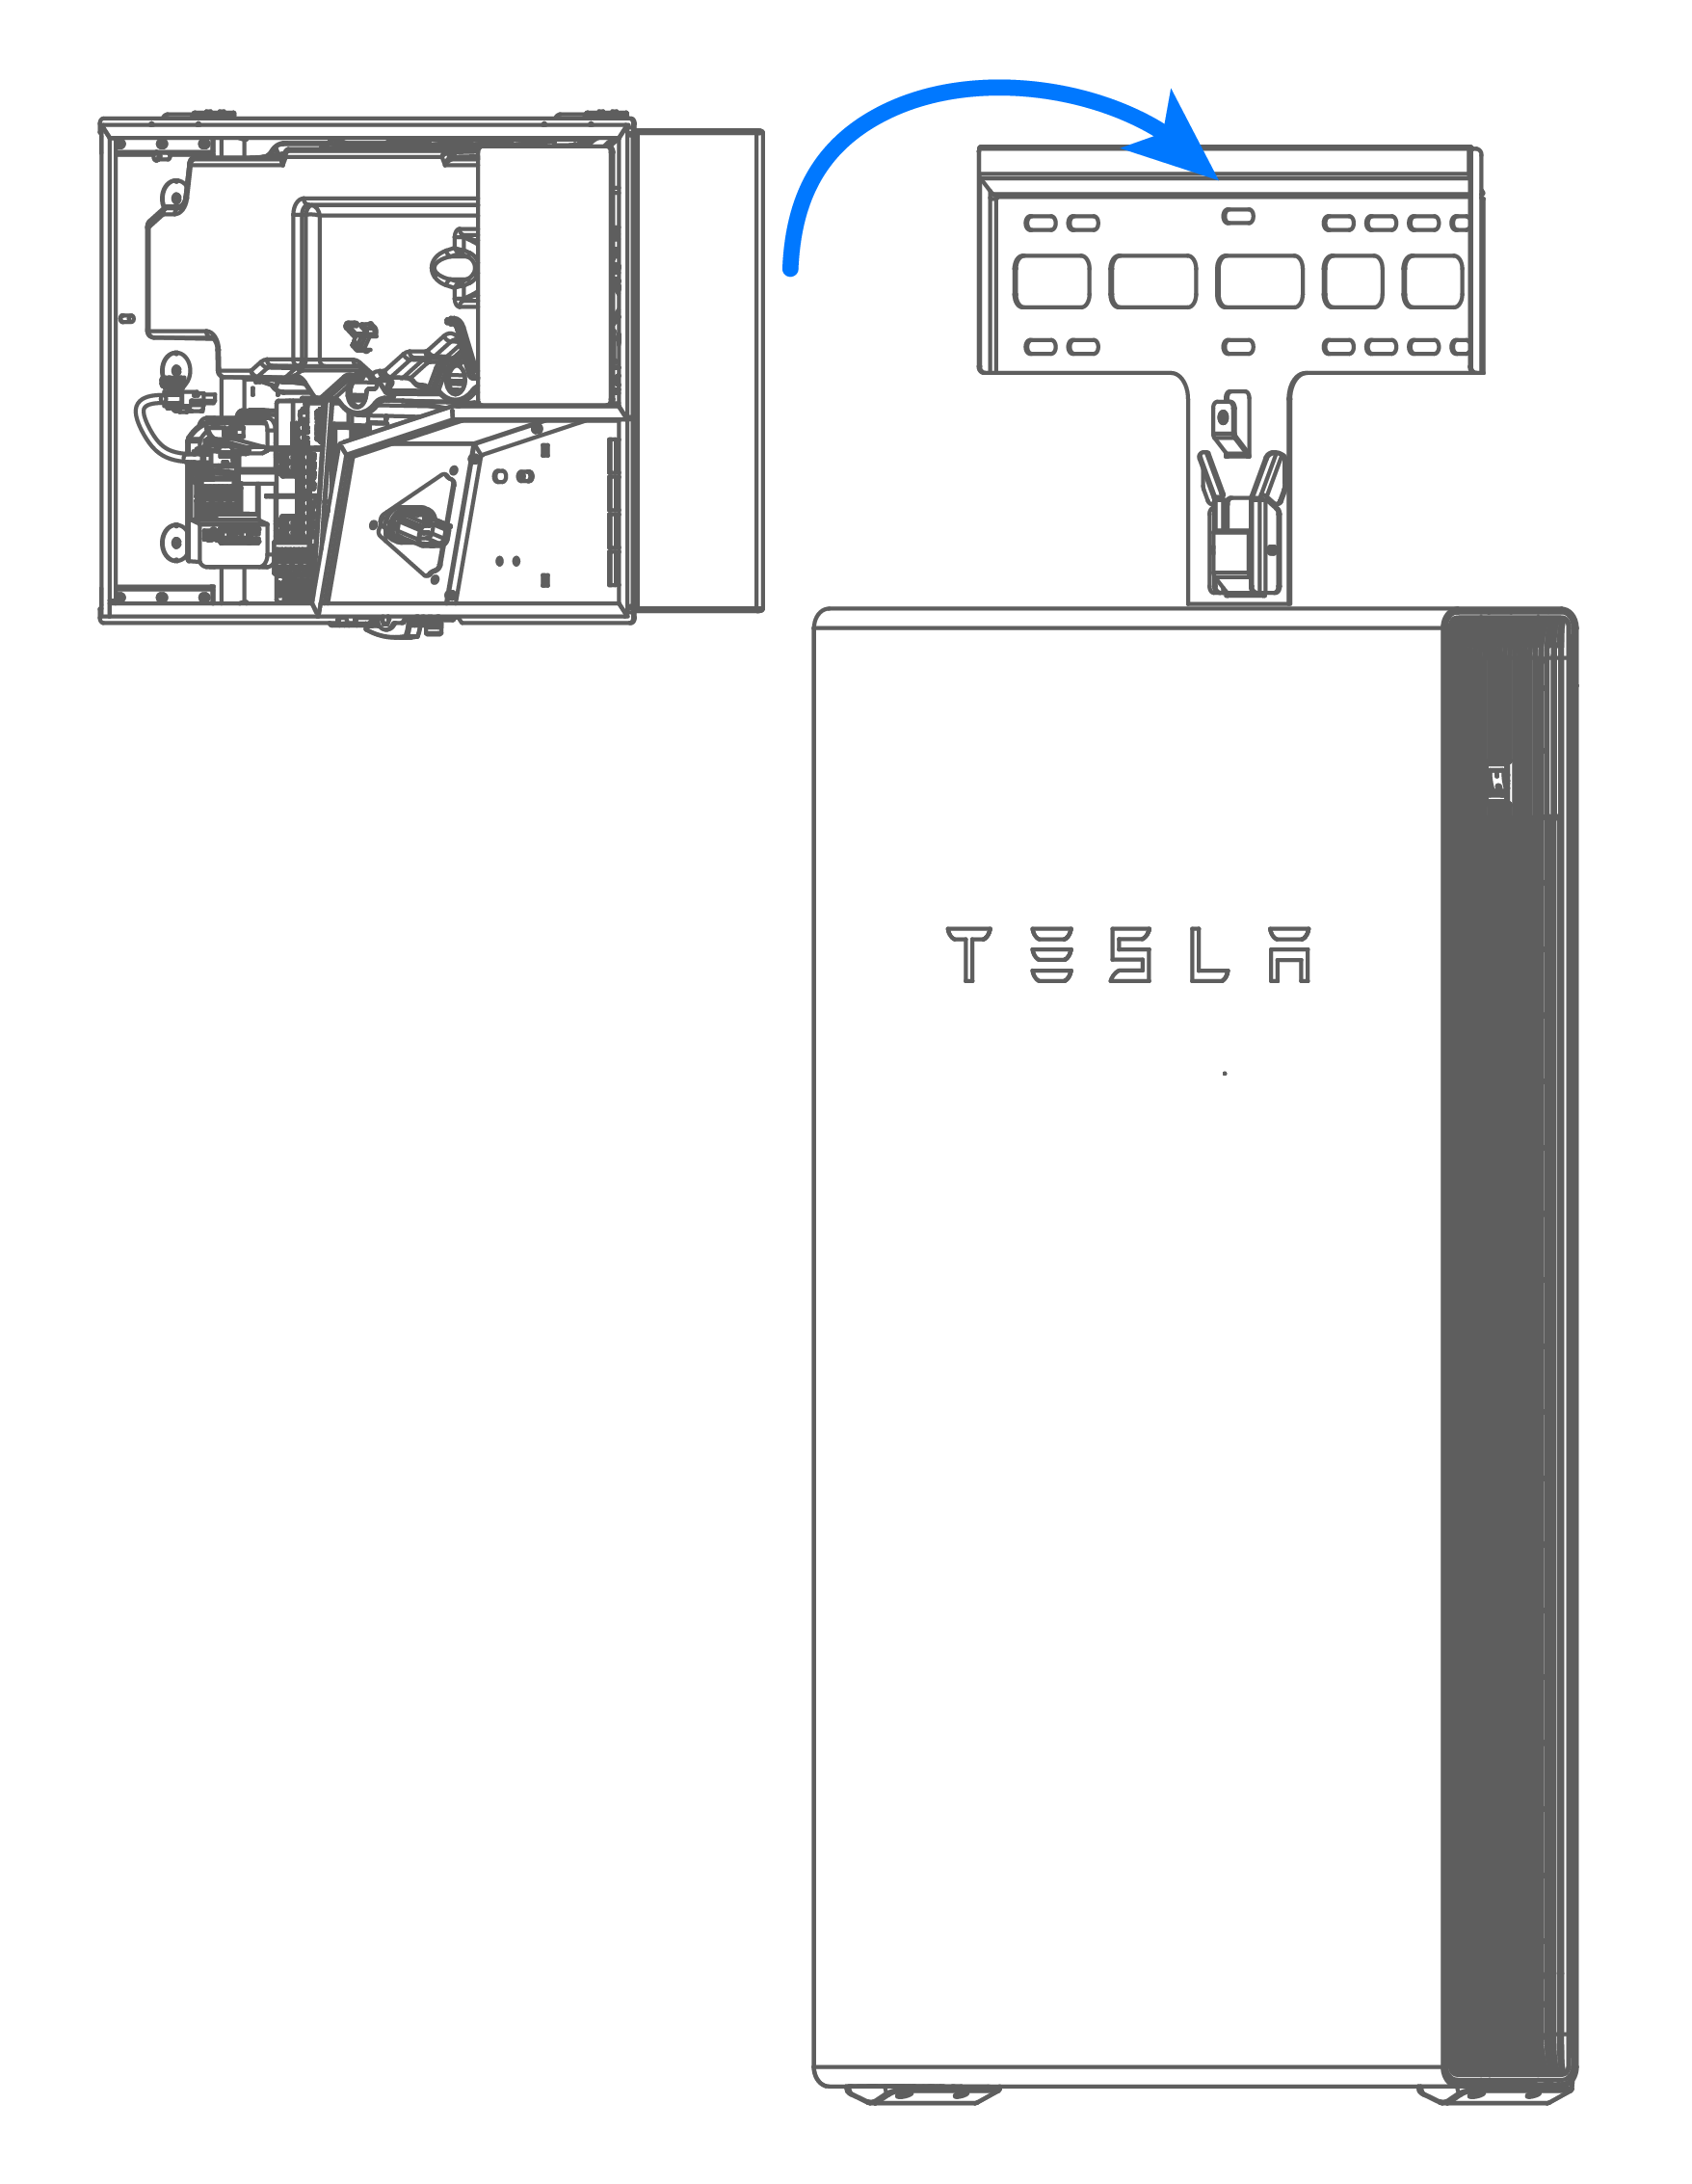
 NoteThe solar assembly must be installed in the orientation shown here. Do not install the enclosure upside down or on its side.
 -
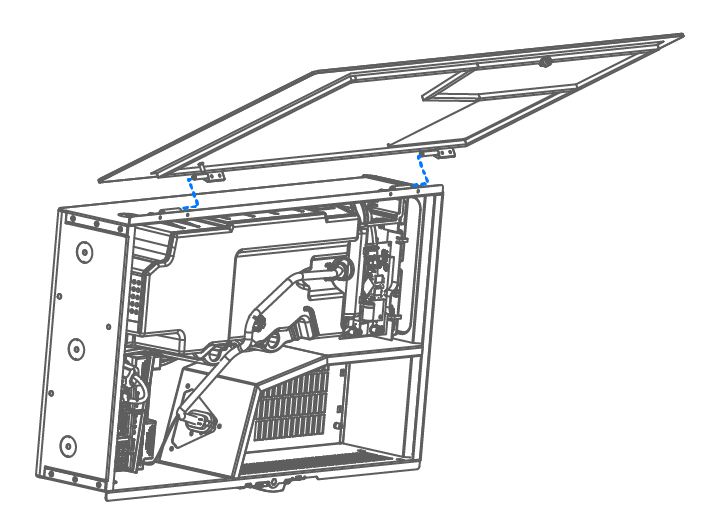
Mount the solar assembly
door.
-
Verify the solar assembly door
is aligned with the battery assembly on both sides. If it is not aligned, adjust
the solar assembly or battery assembly until they are aligned.
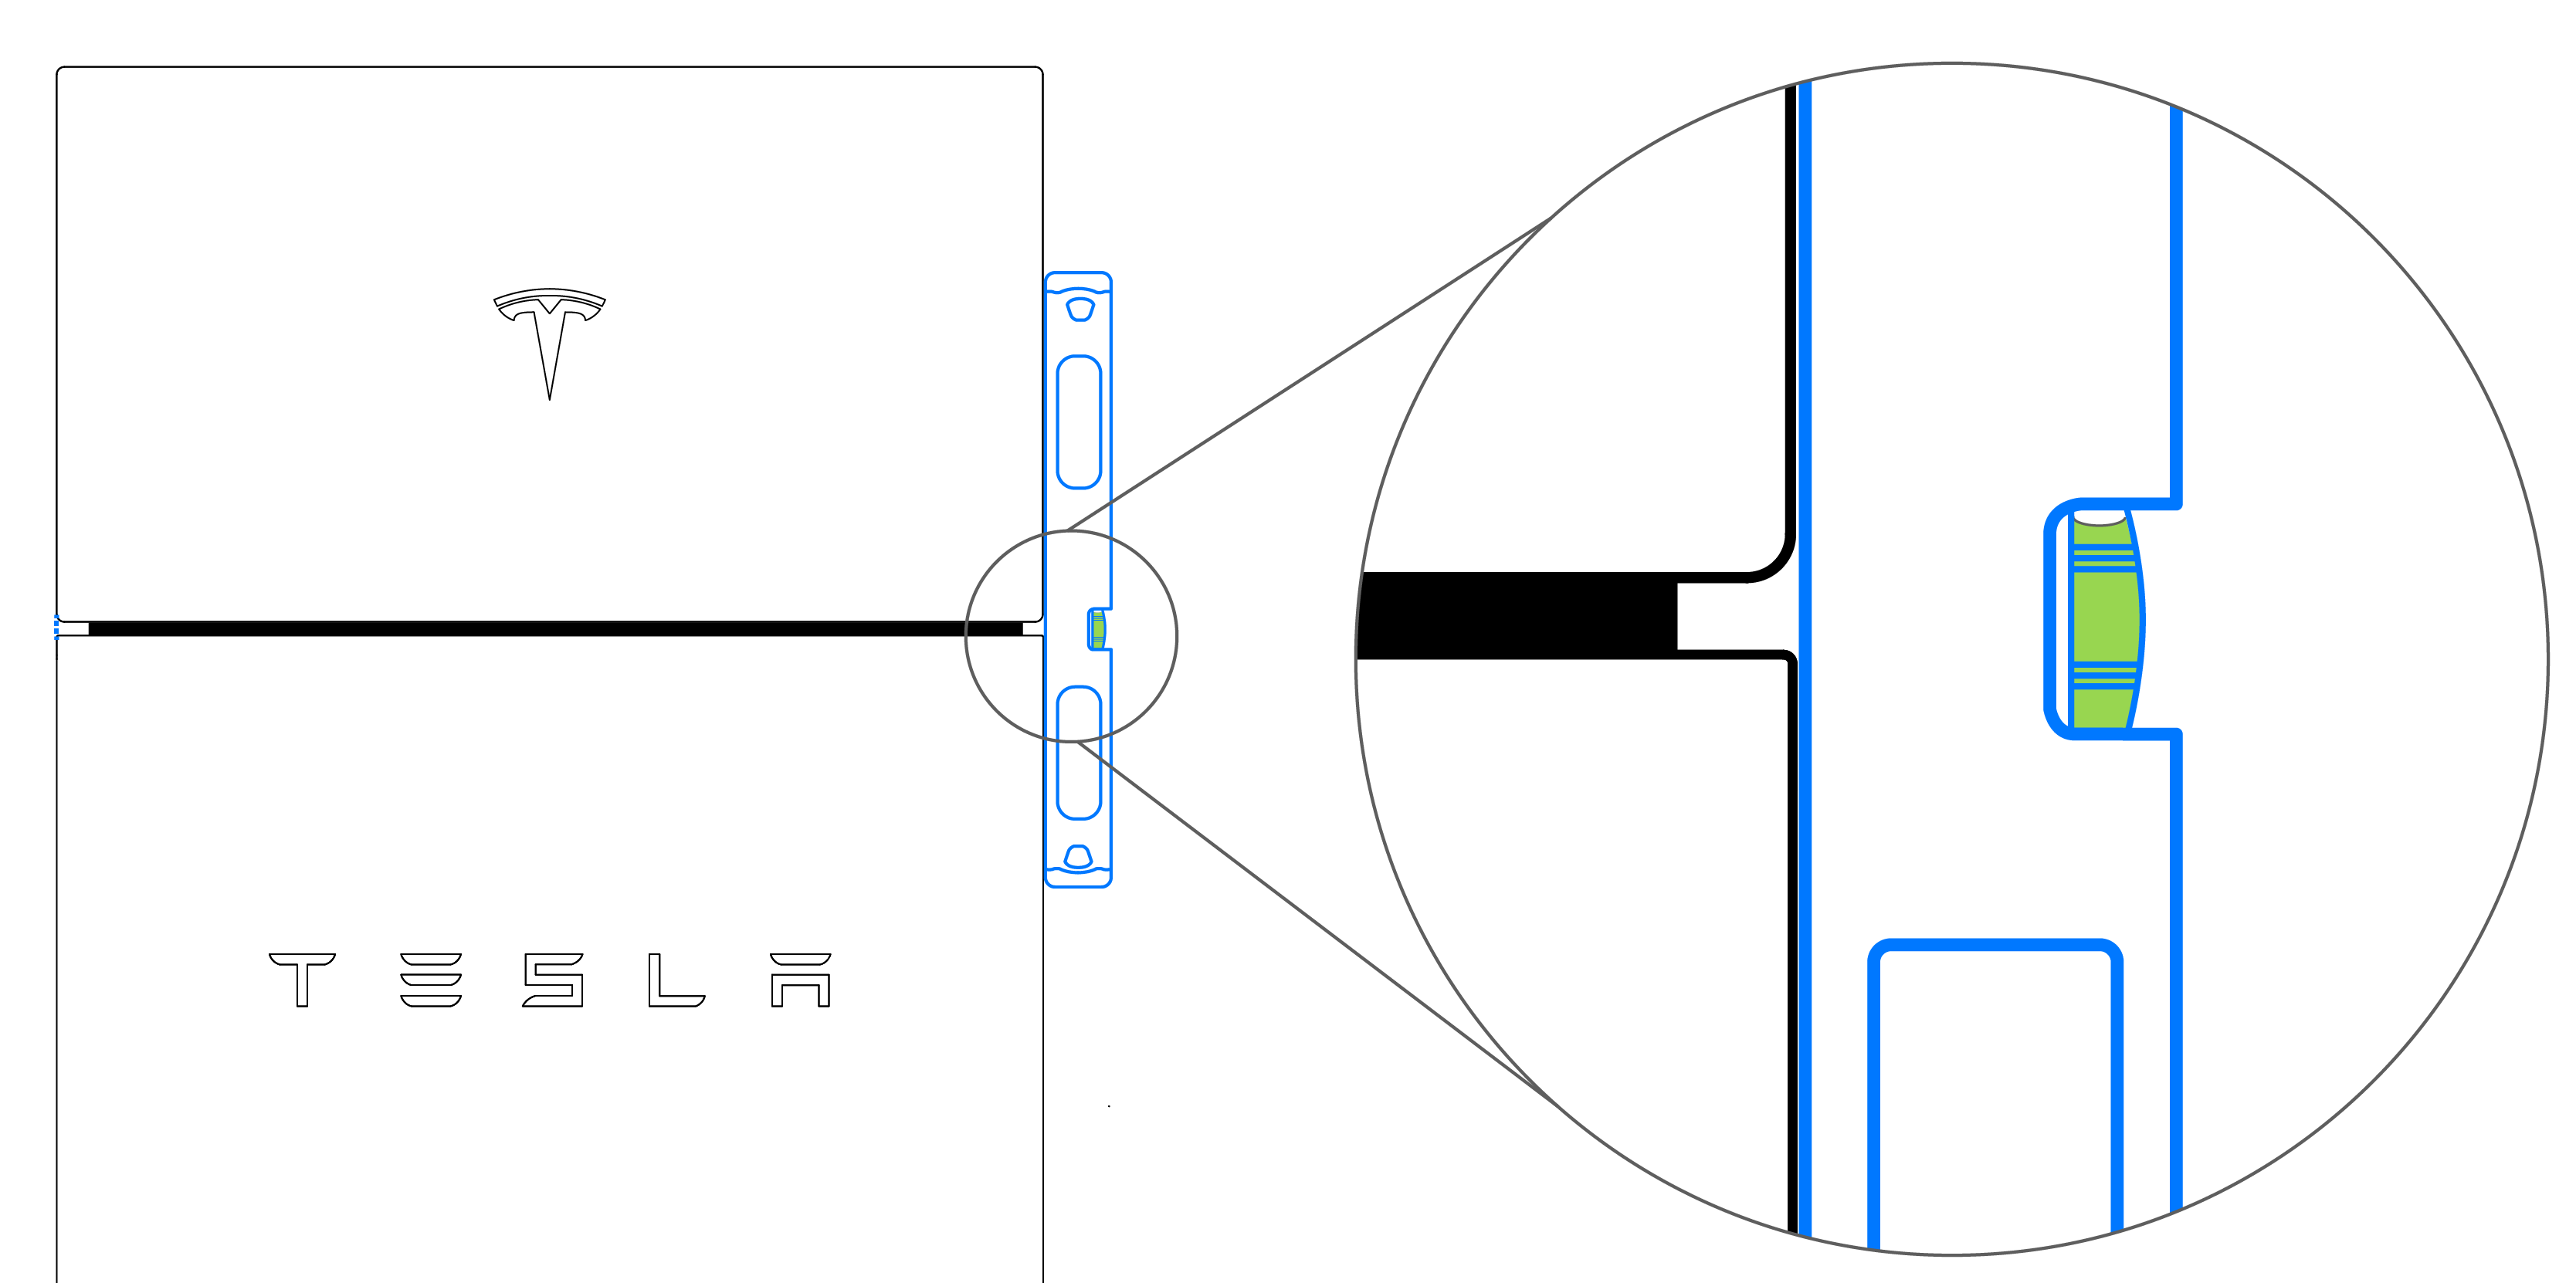 NoteThe Powerwall+ battery assembly can move approximately ¾ inch to either side of the bracket. The solar assembly can move approximately ¼ inch to either side of the bracket.
 - Remove the door for the remainder of the installation.
-
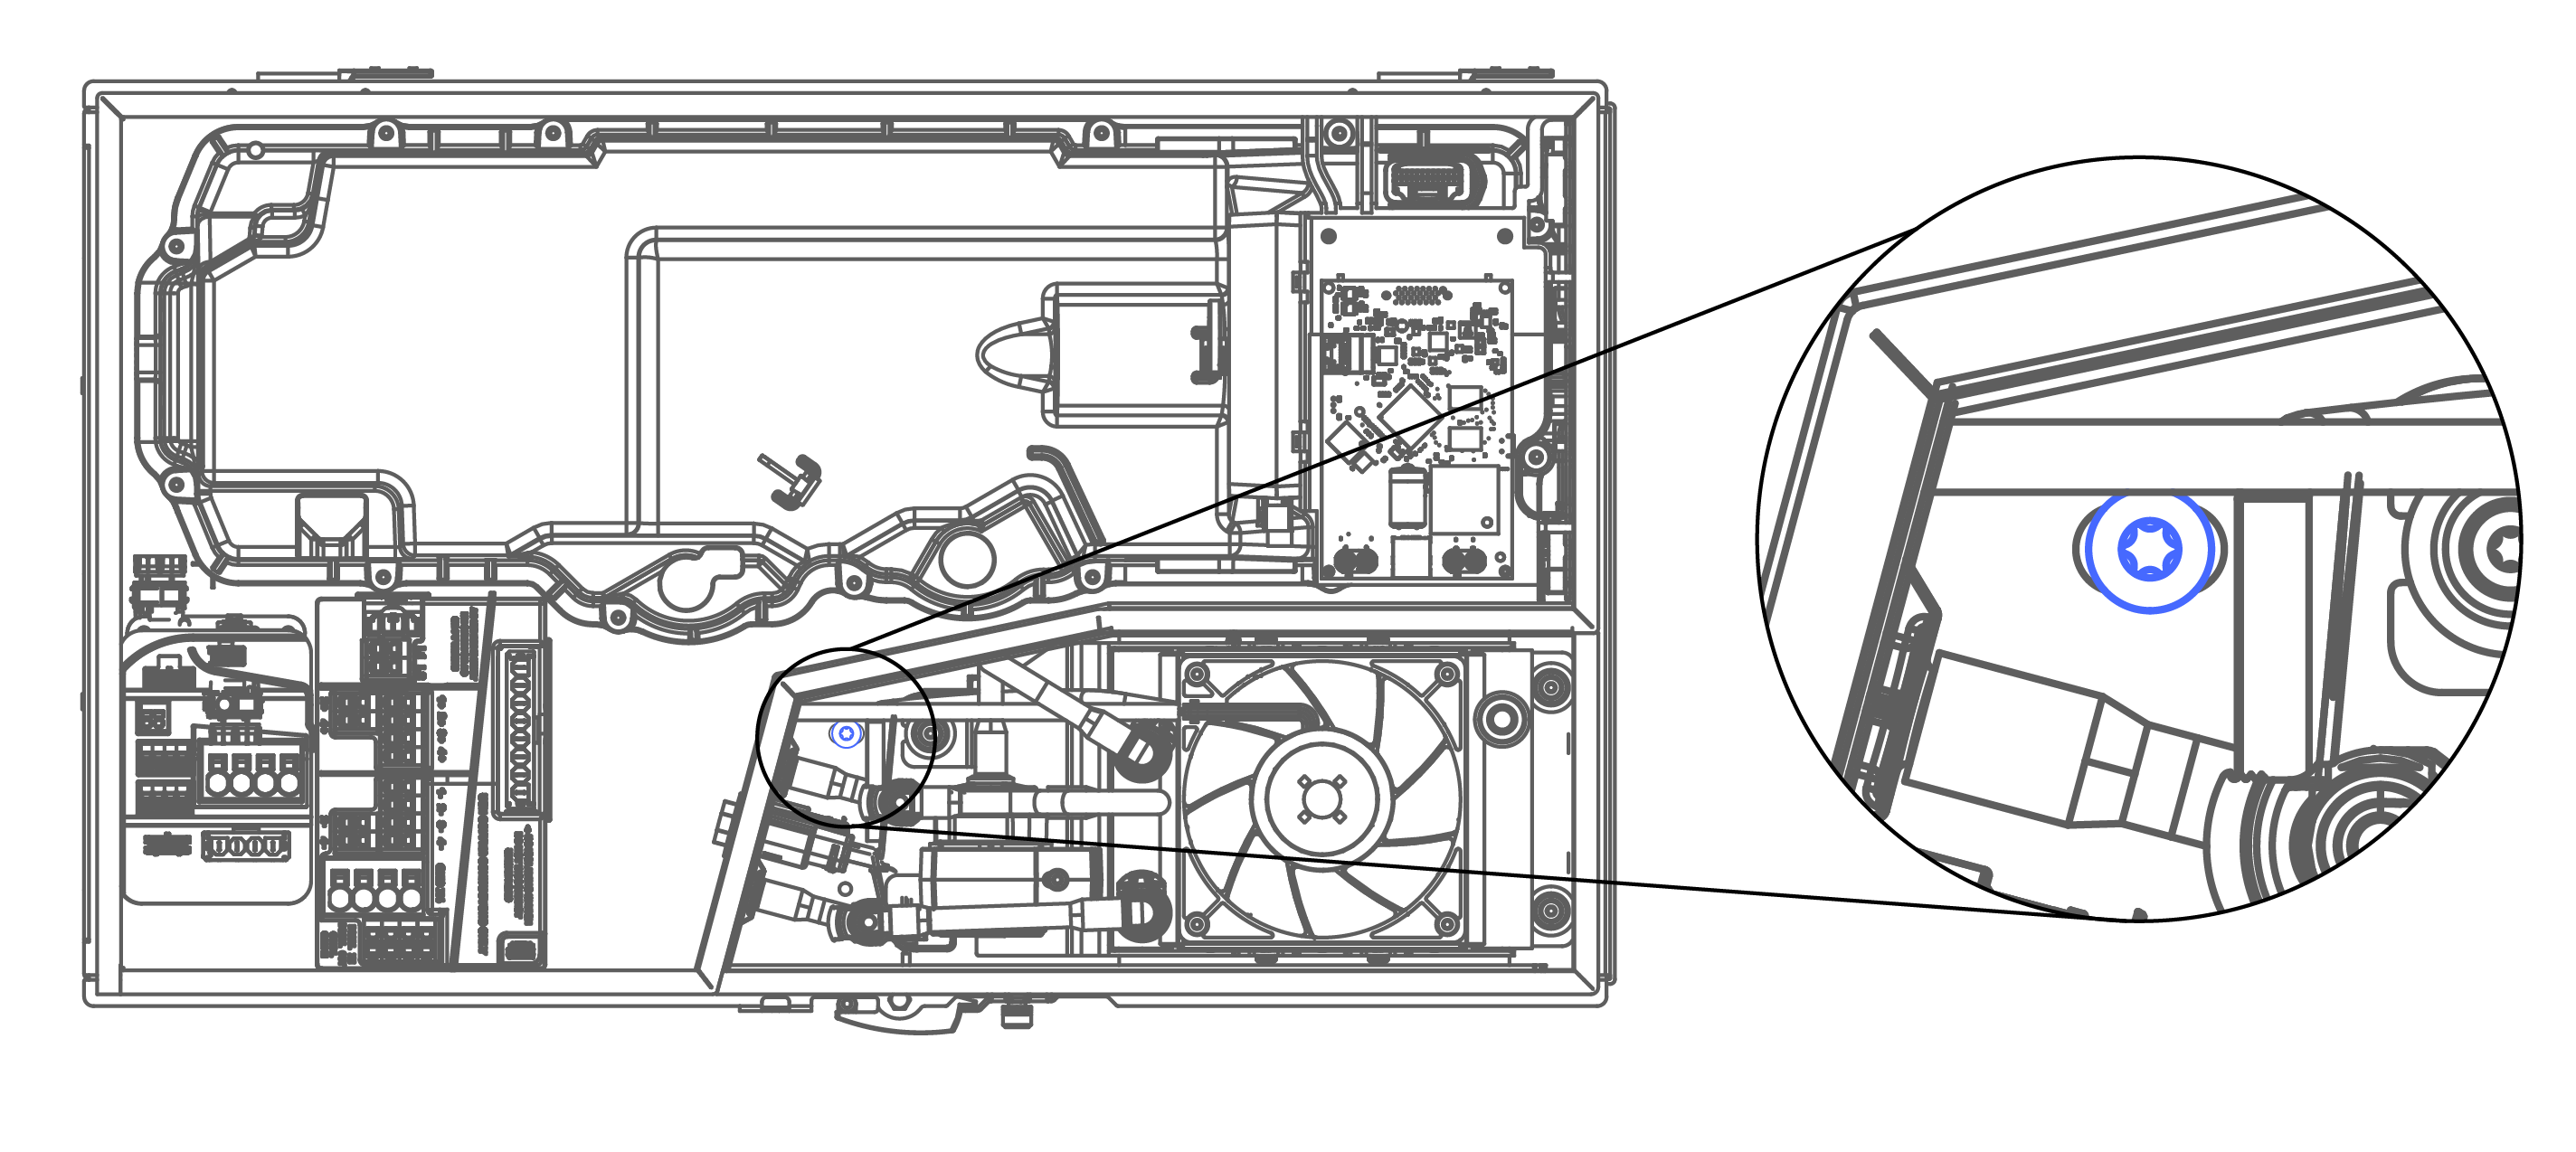
Secure the solar assembly to the
bracket by installing the provided T30 fastener (M6-1.0 x 10 mm stainless steel
screw) in the threaded hole as shown below.