STEP 6: Install Array Skirt
The first-row Array Skirt serves multiple functions: As a templating tool, the Array Skirt is used to mark the outside edges of the array, verify or establish cantilevers, identify potential Interlock and Cam Foot conflicts, and ensure that the first row or column of modules is straight and level. As an aesthetic feature, the Array Skirt conceals module hardware for a more finished appearance. If desired, the Array Skirt can be removed after installation is complete - or, alternatively, the installer can add finishing touches including End Caps or Corner Caps.
-
Rock in array
skirt.
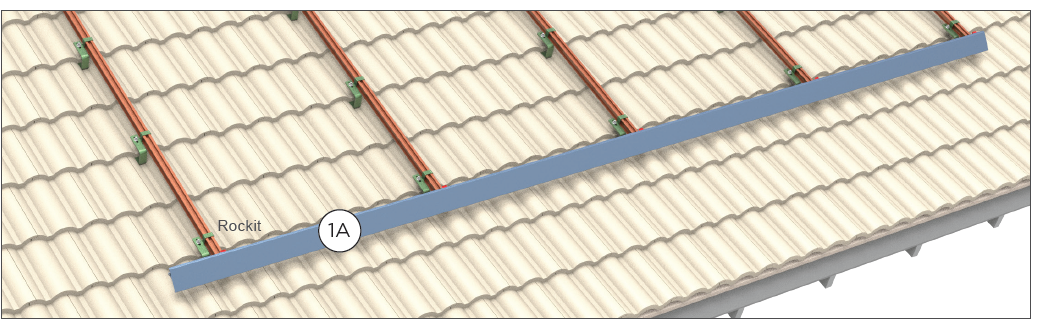
The first Array Skirt (1A) should be installed at the front of the system, starting with the Rockits that are closest together. Set the Array Skirt on the Rockit and rock down (1B), making sure to fully engage with the Key side of the Rockit. The Array Skirt should press flush against the Rockit (1C). Rock in the second Array Skirt, aligning it to be flush against the first Array Skirt.
 Set the Array Skirt on the Rockit and rock down.
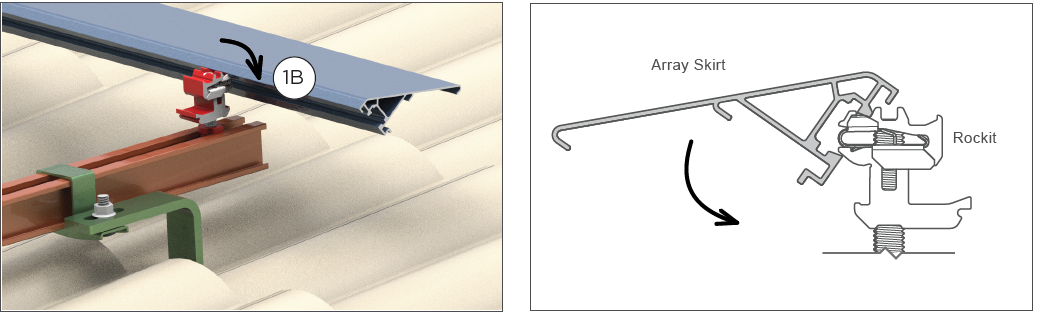 Fully engage with the Key side of the Rockit.
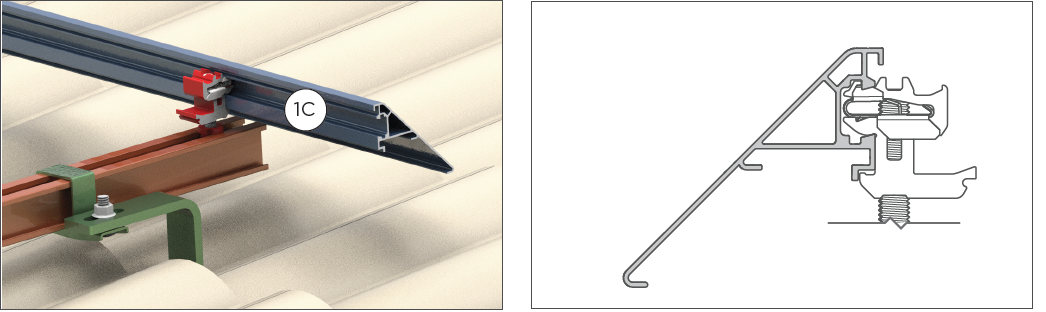
-
Install
Interlocks.
Place and center an Interlock over the seam of the two Array Skirts, using timing marks as shown (2A). Use the Zep Tool to rotate Interlock Zeps from Position 1 to Position 3 (2B). The outside edge of the Array Skirt should line up with the array perimeter. Complete the Skirt by installing additional Array Skirts with Interlocks.
Center the Interlock at the Array Skirt seam, using timing marks. Rotate Interlock Zeps from Position 1 to Position 3.
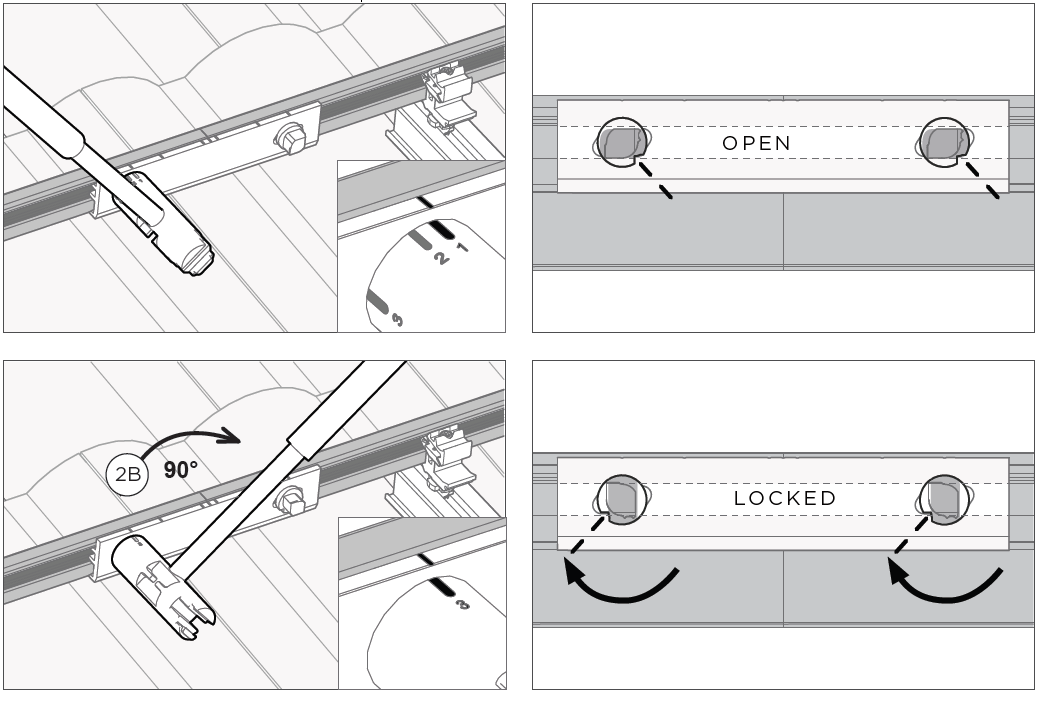
-
Install Grips.
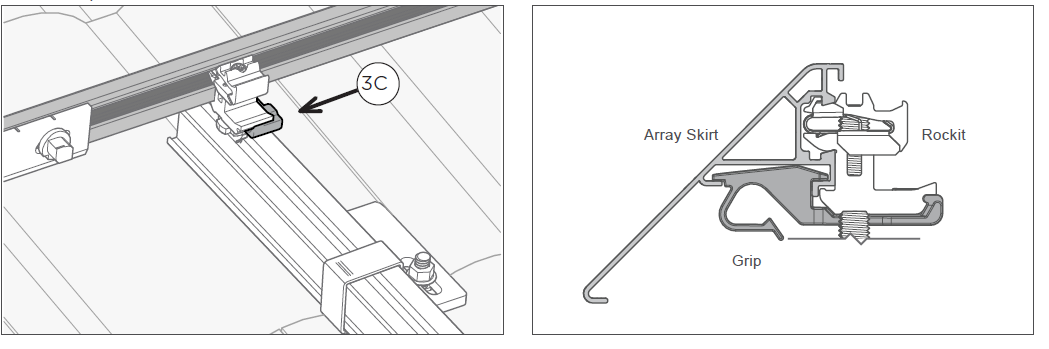
To fully secure the Array Skirt, a Grip is fitted around the Rockit of every first-row Cam Foot. Insert Grip into Grip Slot on underside of Array Skirt. (3A). Grips are installed to the RIGHT of the Rockit. Rotate Grip parallel with the Rockit until it clicks into place (3B). Slide the Grip into position around the Rockit and threaded stud of the Cam Foot (3C).
Insert Grip on underside of Array Skirt.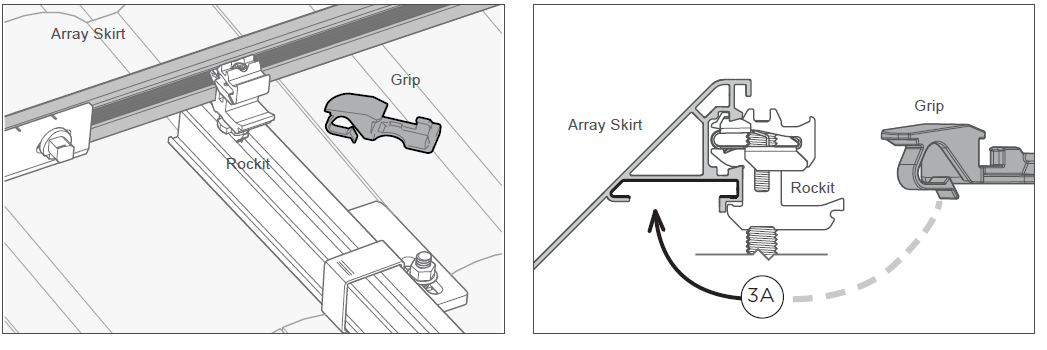 Rotate Grip until it clicks into place.
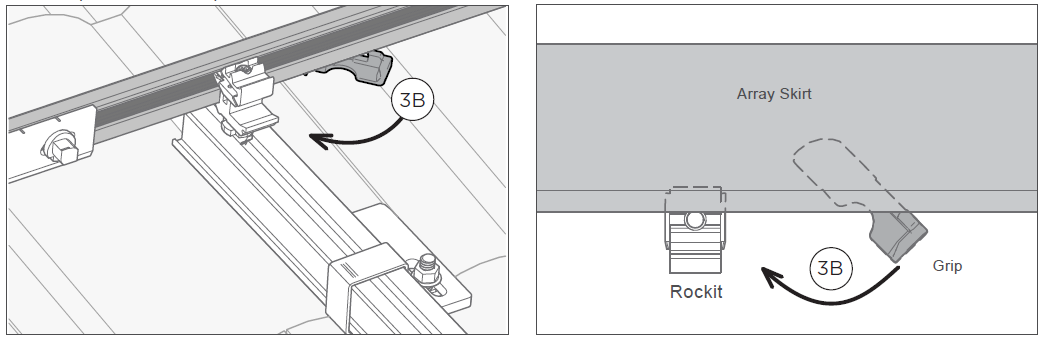 Slide the Grip until it clicks into the Rockit.