STEP 2: Install Mighty Hook V2
-
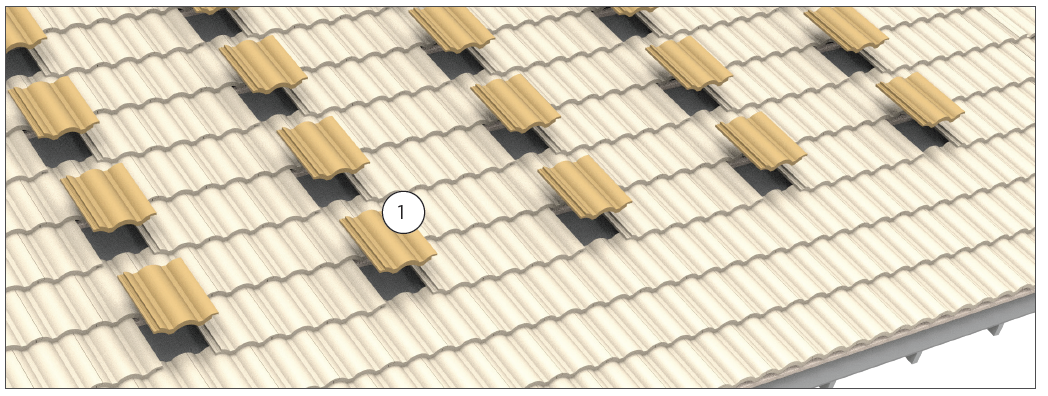
Remove the identified roof tile.
Preserve tiles for later re-installation. (Roof sheathing not shown).
-
Drill 2 pilot
holes.
Using a 3/16” bit, drill pilot holes (x2) into the center of the rafter.
-
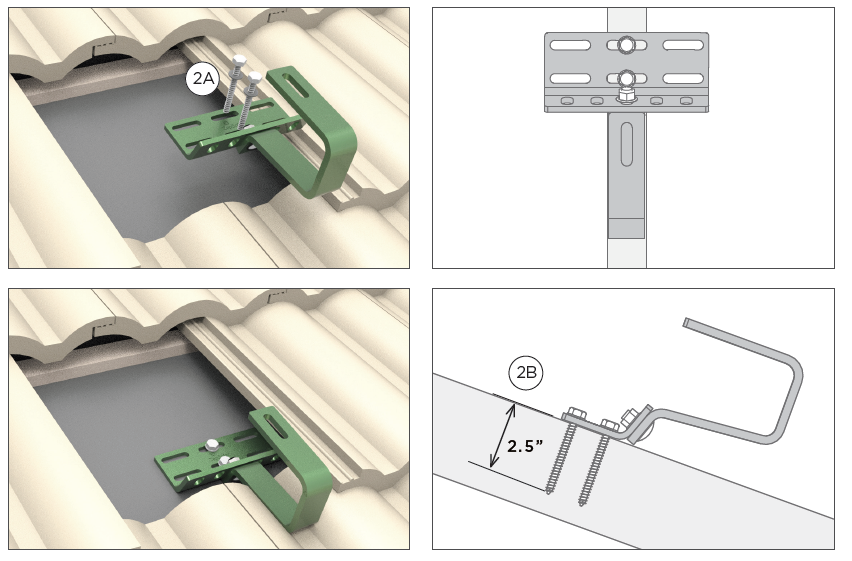
Install the Mighty Hook.
Install Mighty Hook through a rafter using two lag screws (2A). Minimum rafter penetration for lag screw is 2.5” (2B).
 The hook portion of the Mighty Hook can be shifted as well (2D). Some Tile Hooks allow adjustment of the hook depth.
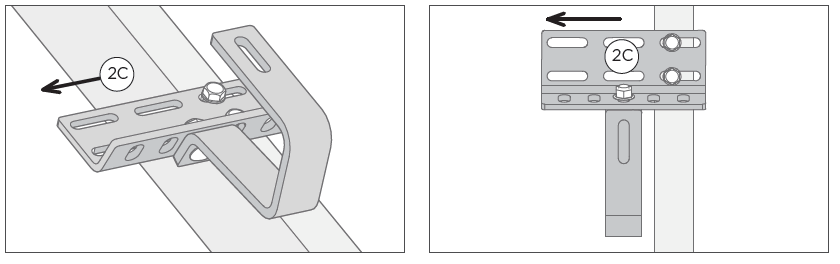 For extreme off-center placement, roof sheathing and additional deck screws are required. Use four additional #10 Deck Screws (2E) when attaching Lags within 1” of outer edge of slots on one side.
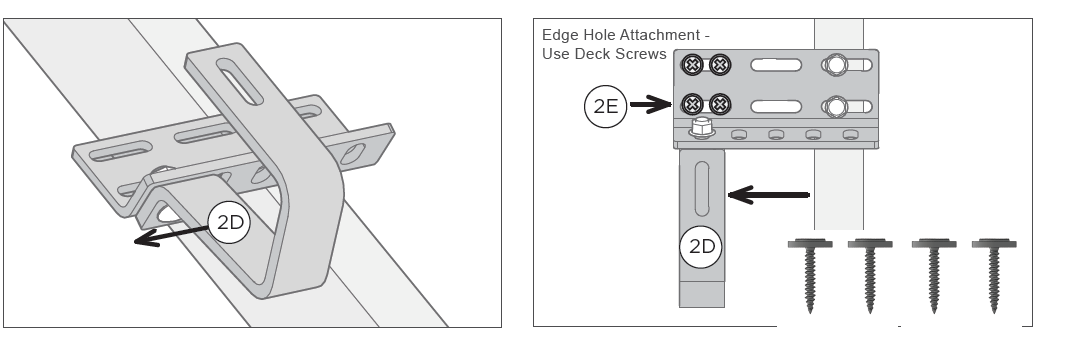
-
Re-install roof tiles.
Tiles may require grinding in order to fit flush.
Note
Refer to Replacement Flashing Installation for information on installing replacement flashing on roofs with
S-Tiles, Flat-Tiles or W-Tiles.