STEP 3: Install First Row Leveling Feet
-
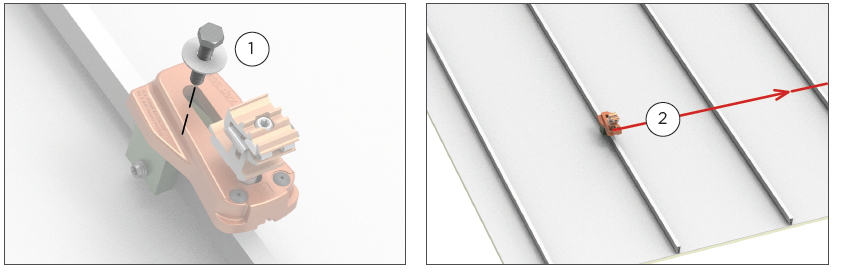
Fasten outer Leveling Feet.
Install outer Leveling Feet to Seam Mounts (1A). Adjust Leveling Foot position as needed. DO NOT install Leveling Foot at an angle. The position of the Rockit should be Tongue side uproof and Key side downroof as shown.
-
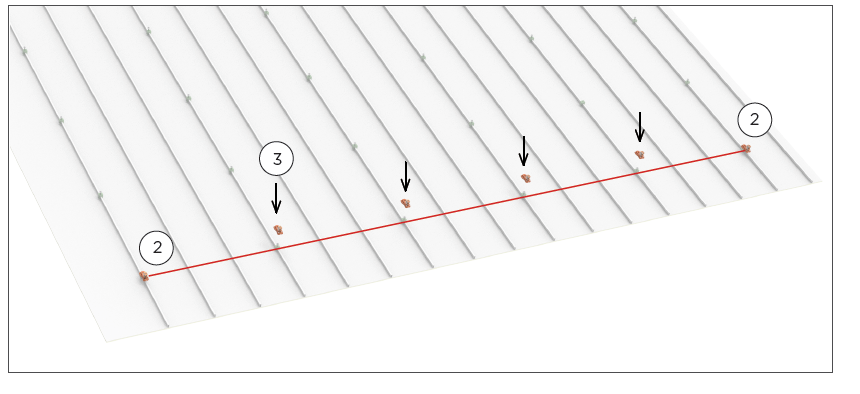
Anchor a string line to outer Leveling Feet.
Set a string line on the outer Leveling Feet (2A), ensuring the proper orientation of the Leveling Foot Rockit. Make sure the string line is running in front of the Leveling Foot stud. Center the Rockit on its stud (approximately 5/8 inch from base of Rockit) to provide maximum flexibility on consecutive rows.
-
Mount inner Leveling Feet.
Drop in the inner Leveling Feet (3).
-
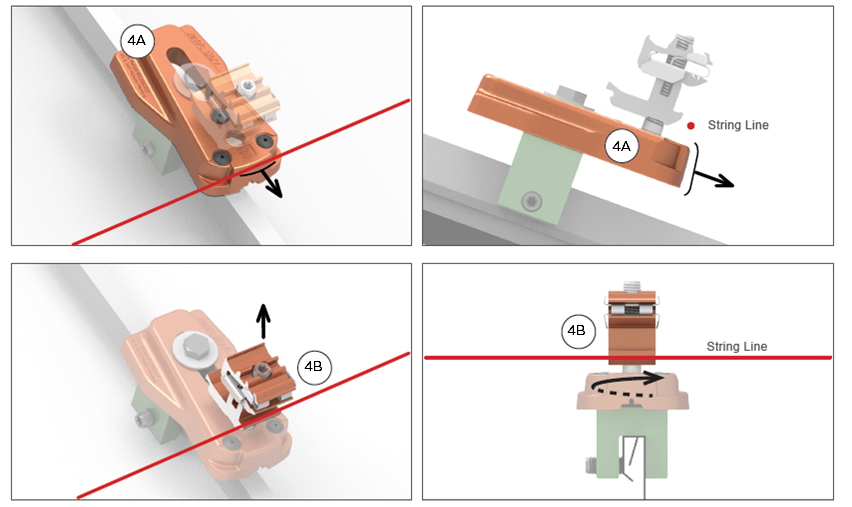
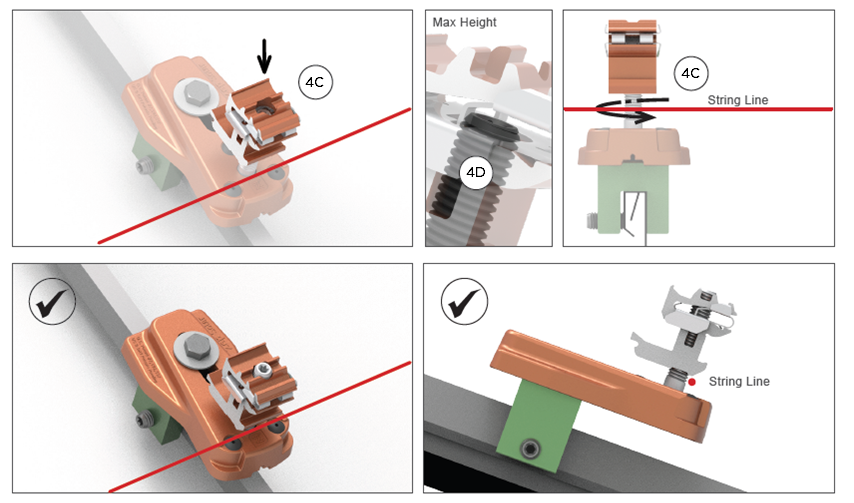
Align inner Leveling Feet using string line.
Align to the string line and fasten (4A) the Bolt to secure the N-S direction of the Leveling Foot. Spin the Rockit to adjust Leveling Foot height up (4B) or down (4C) within allowable range. The Rockit is reverse threaded. In the highest position, the top of the stud sits just below the level of the spring clip (4D), or approximately 1.25”.