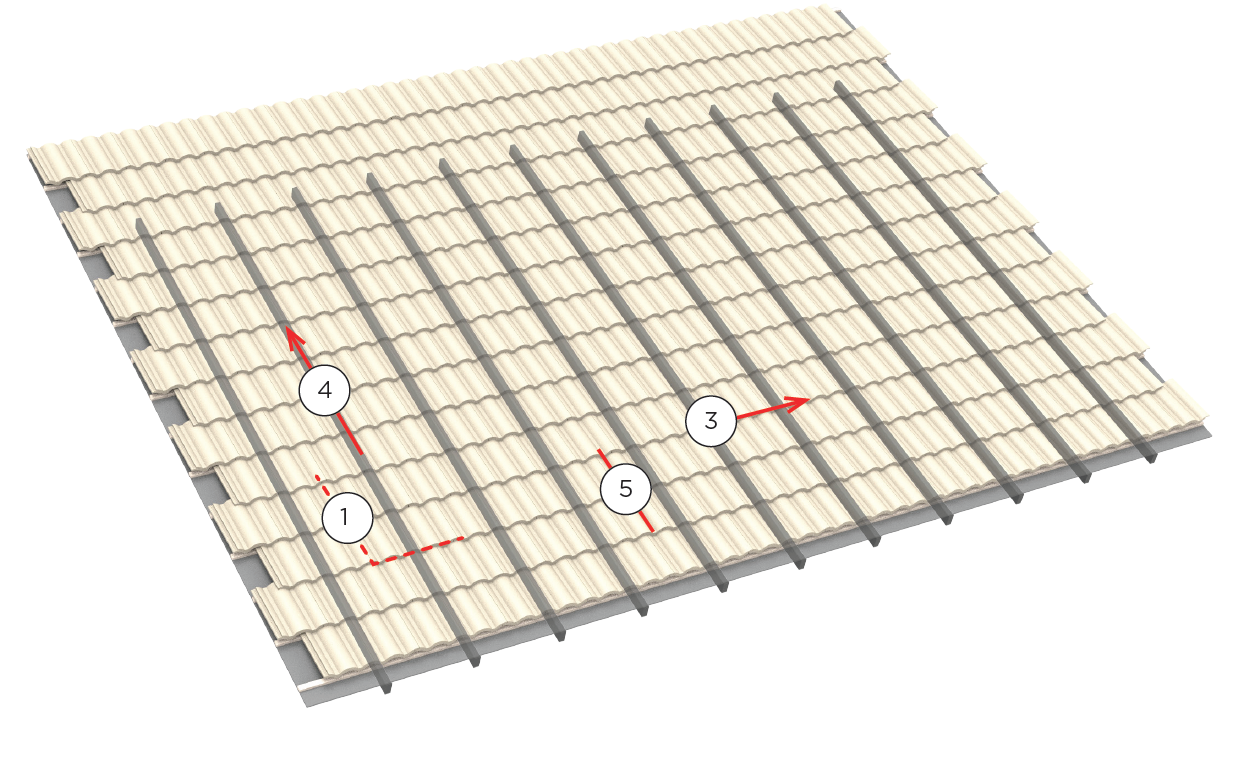
STEP 1: Array Layout
-
Mark
out array perimeter.
Locate the outside edges of the array. Mark array perimeter according to module dimension + 1/2 inch.
-
Locate the first rafter and tile.
To mark roof attachment points, start by finding the first available rafter within the mounting area. Working up the rafter, choose and mark the first tile to be removed. It is best not to select a tile at the very edge of the array, and to fully utilize allowable Spanner Bar cantilever.
-
E - W
Span
Work across to select rafters based on allowable East-West span. Mark corresponding tiles above.
-
N - S
Span
Work up selected rafters and mark tiles according to allowable North-South span.
-
Mark array skirt intervals.
Mark intervals for Array Skirt sections (custom matched for each module type and orientation) to identify Cam Foot/Interlock conflicts and lay out module gaps. Array can shift over attachment points if needed. Do not exceed cantilever allowance.