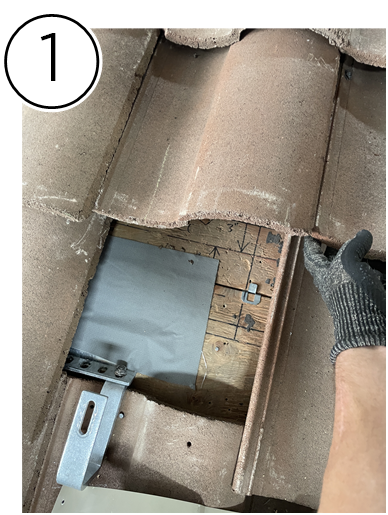
This section provides instructions for installing replacement flashing on roofs with
S-Tiles, Flat-Tiles or W-Tiles. Replacement flashing is installed in place of Tiles
that are damaged / destroyed during removal (Tiles are typically removed to provide
space for Mighty Hook installation on the roof).
Note
These work instructions
assume a Mighty Hook has been installed prior to replacement flashing
installation. These instructions are still applicable in situations where a
replacement flashing is required but no Mighty Hook is installed.
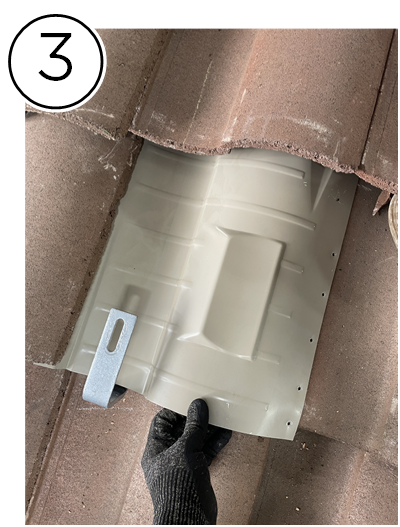
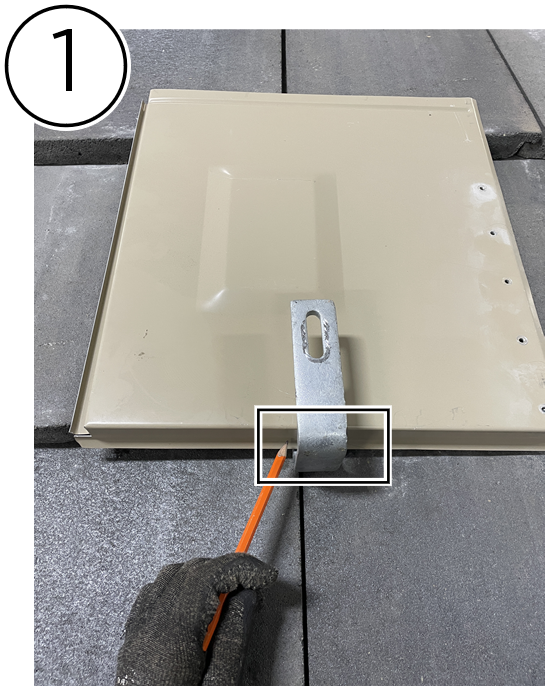
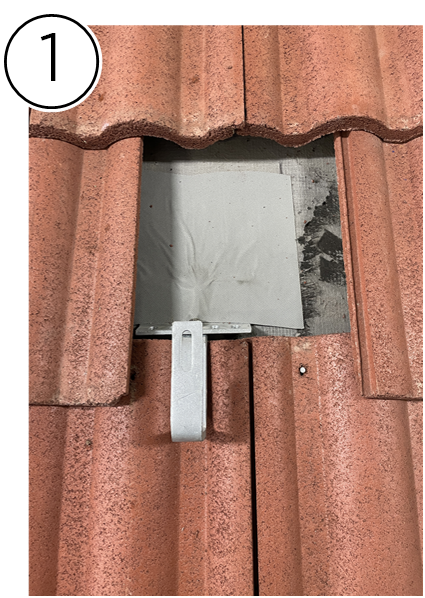
Slightly lift the upper course of S-Tile using either your hands or a prybar
(1)and slide the replacement flashing in place (2). Ensure the
down roof edge of the replacement flashing aligns with the adjacent S-Tiles (this
will ensure proper overlap is maintained between courses) (3).
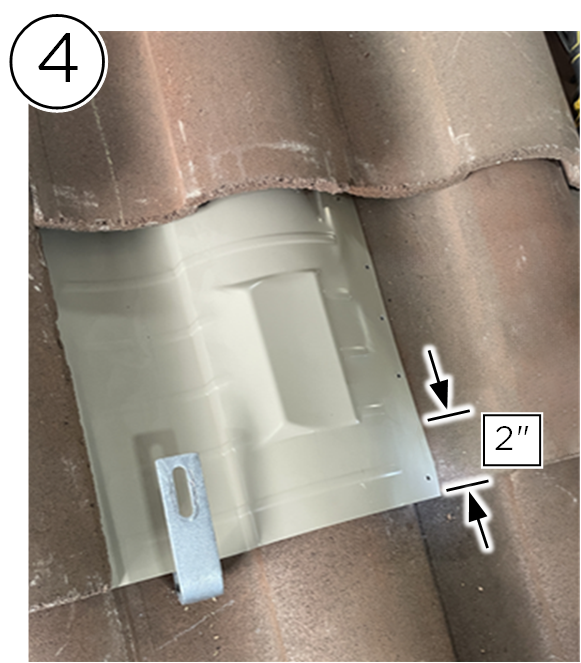
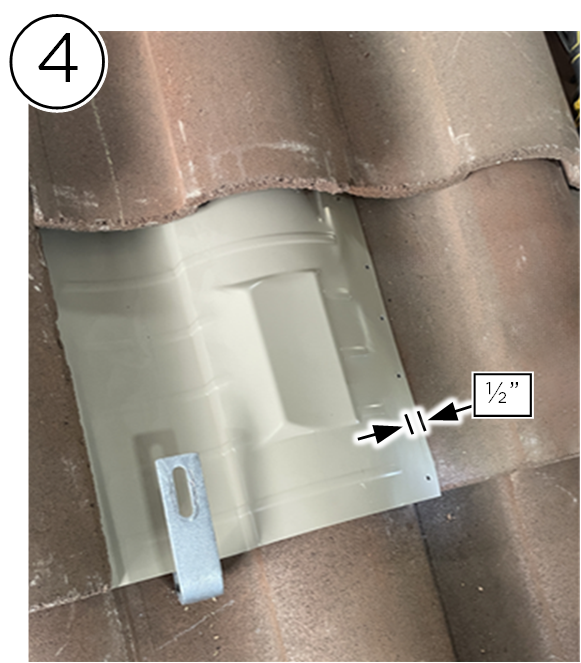
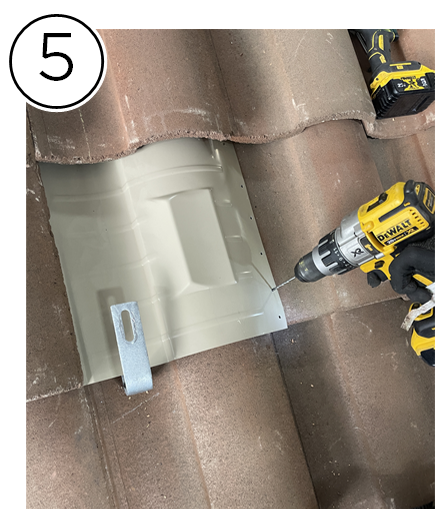
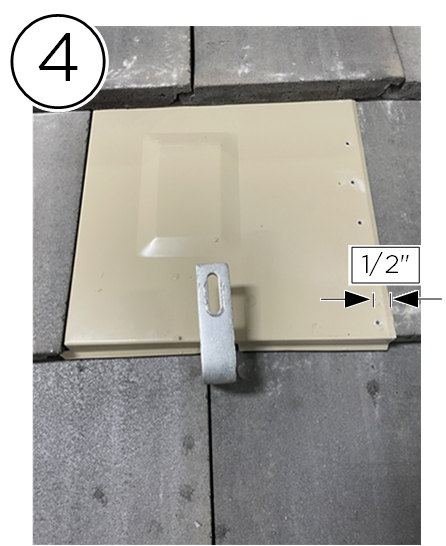
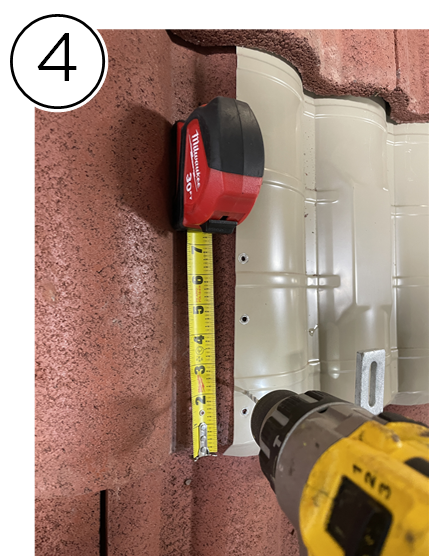
On the side opposite to the Mighty Hook, measure 2-inches from the down roof edge of
the replacement flashing and ½-inch from the edge (4). Drill a hole at this
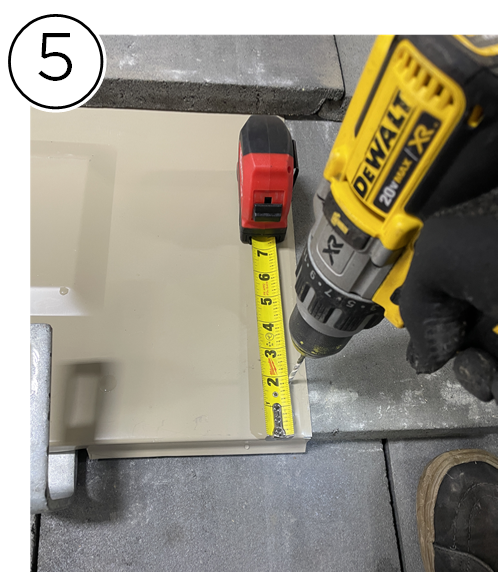
point using a concrete bit and a hammer drill driver (5).
Note
Pro Tip: Use some tape on
the drill bit as a depth guide to prevent unintentionally hitting the
underlayment.
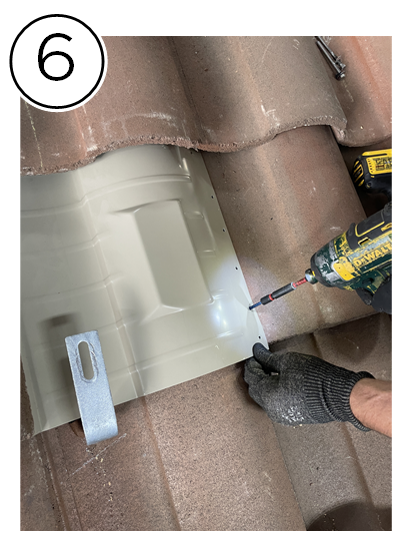
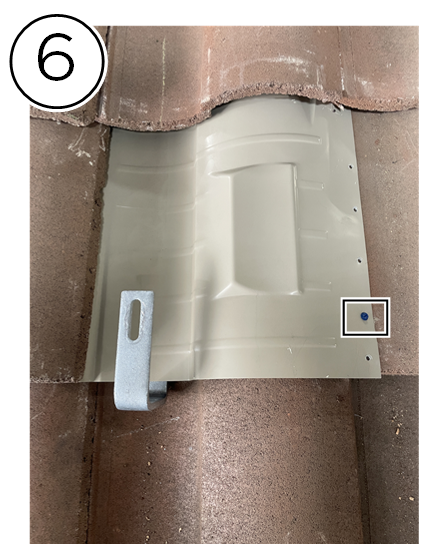
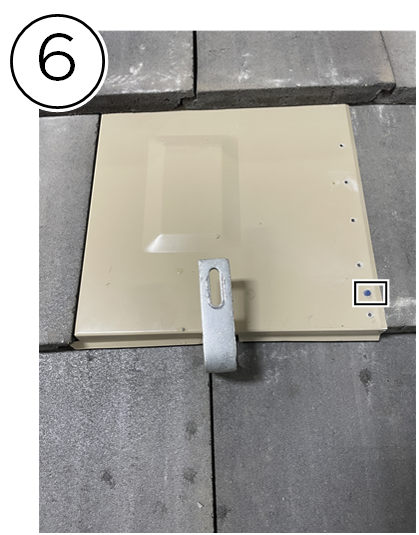
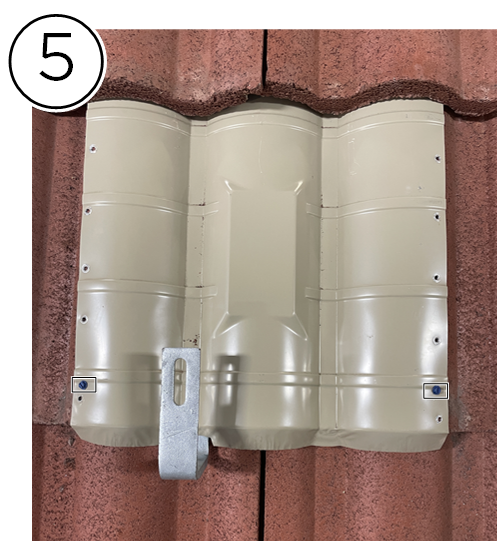
Fasten a Tapcon Concrete Screw through the pre-drilled hole. Only one screw is
required for S-Tile replacement flashing (6).
Flat-Tile Replacement Flashing Installation
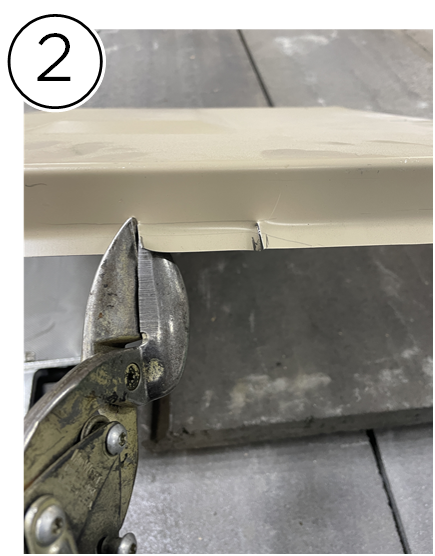
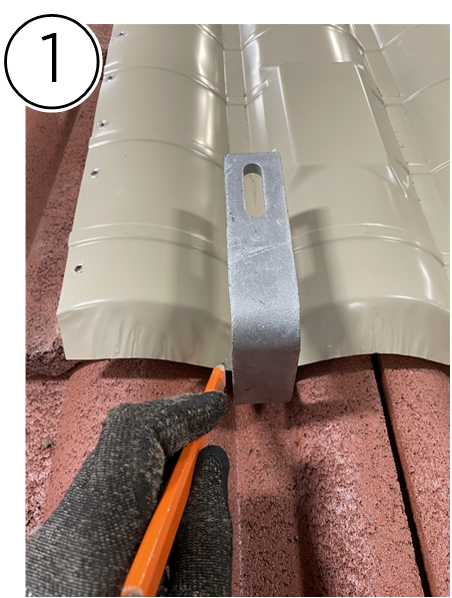
Place the Flat-Tile replacement flashing over the dead zone. Mark the Mighty Hook
interference onto the replacement flashing (1).
Cut out the marked portion of the replacement flashing (this is typically ¼-inch x
1½-inch of material) (2). This will allow the replacement flashing to sit
flat against the roof / Mighty Hook.
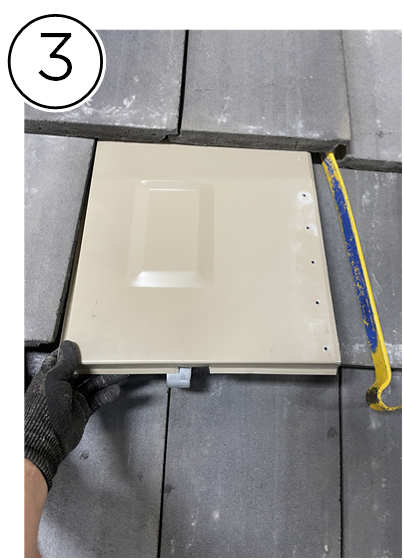
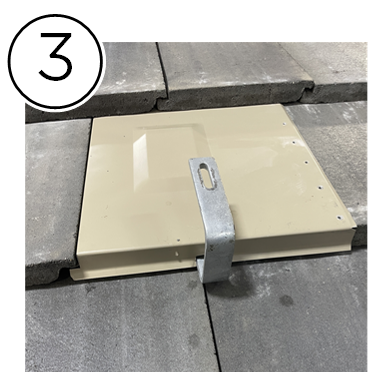
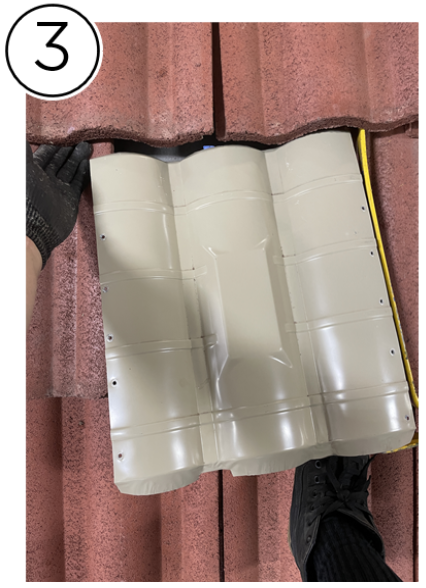
Slightly lift the upper course of Flat-Tiles with your hands or a pry bar and slide
the replacement flashing in place. Ensure the replacement flashing’s down roof edge
aligns with the adjacent Flat-Tiles (this will ensure proper overlap is maintained
between courses) (3).
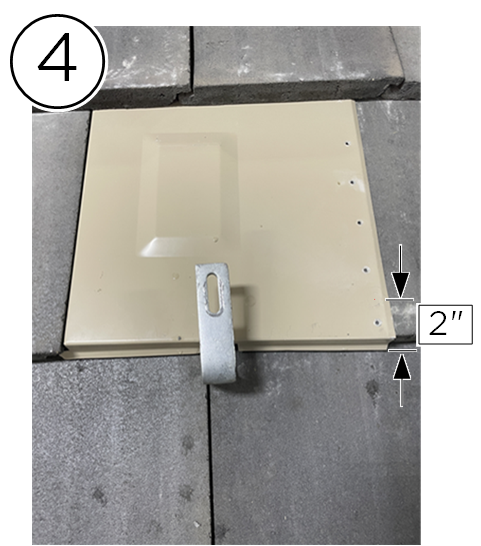
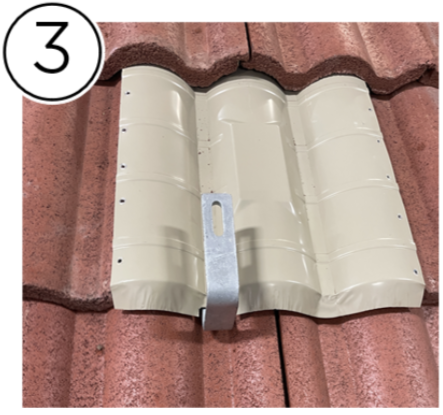
On the overlapping side of the replacement flashing, measure 2-inches from the down
roof edge and ½-inch from the side (4). Drill a hole at this point using a
concrete bit and a hammer drill driver (5).
Note
Pro Tip: Use some tape on
the drill bit as a depth guide to prevent unintentionally hitting the
underlayment.
Fasten a Tapcon Concrete Screw through the pre-drilled hole (6). Only one
screw is required for Flat-Tiles.
W-Tile Replacement Flashing Installation
Place the W-Tile replacement flashing over the dead zone. Mark the replacement
flashing with the Mighty Hook interference (1).
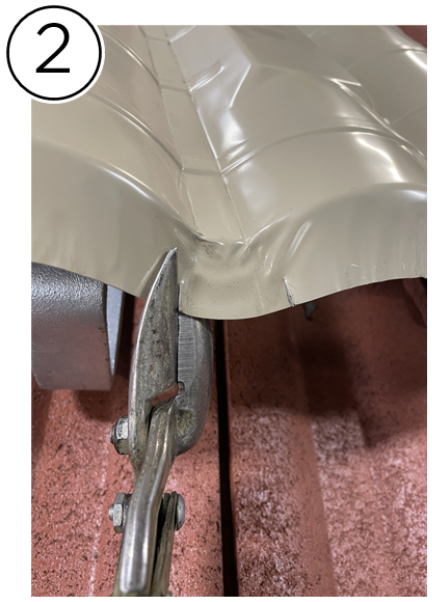
Cut out the marked portion of flashing (this is typically ¼-inch x 1½-inch of
material) (2). This will allow the flashing to sit properly against the roof
without interference.
Slightly lift the upper course W-Tiles using your hand or a pry bar and slide the
replacement flashing into place. Ensure the replacement flashing’s down roof edge
aligns with the adjacent Flat-Tiles (this will ensure proper overlap is maintained
between courses) (3).
On both sides of the replacement flashing, measure 2-inches from the down roof edge
and ½-inch from the side. Drill holes into these points using a concrete bit and a
hammer drill driver (4).
Note
Pro Tip: Use some tape on
the drill bit as a depth guide to prevent unintentionally hitting the
underlayment.
Install one TapCon Concrete Screw per pre-drilled hole using an impact driver. One
screw is required on each side of the W-Tile replacement flashing for a total of two
(5).