STEP 3: Install Mechanical Tubing
-
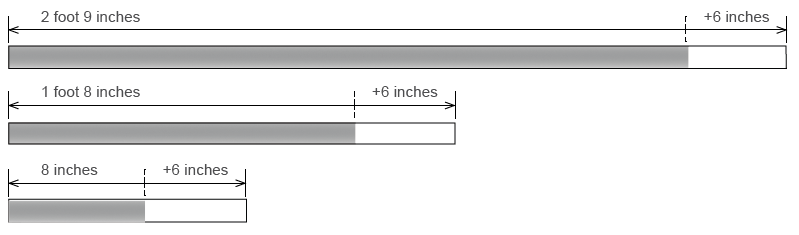
Cut tubing to length.
While the Base Feet are being installed, cut the Mechanical Tubing to the heights specified in the project plan set, plus 6 inches. Use a band saw for this cut. In this instance we will use 8 inches, 1 foot 8 inches, and 2 feet 9 inches as our standard Mechanical Tubing measurements.
-
Mount to base
feet.
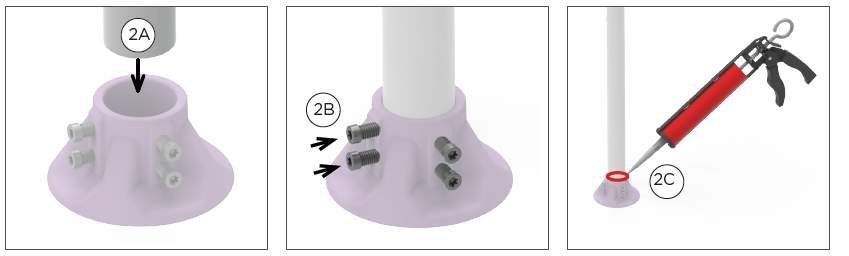
Insert the Mechanical Tubing into the Base Feet (2A) and fasten the Base Feet Set Screws (2B). Apply sealant between the Base Foot and Mechanical Tubing (2C). Refer to the Approved Sealants section for a list of approved sealants.
-
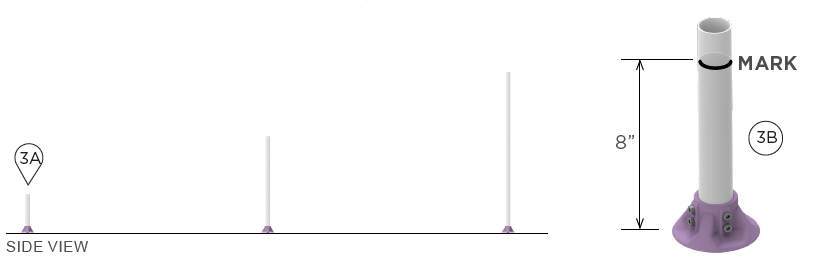
Mark height of shortest length mechanical tubing.
Select the starting Mechanical Tubing (3A), which will be a short-length Mechanical Tubing at the highest elevation on the roof. Use a Measuring Tape to measure out the height specified in project plan set (3B). In case of uneven roof surfaces, begin with the short-length MT at the highest point on the roof.
-
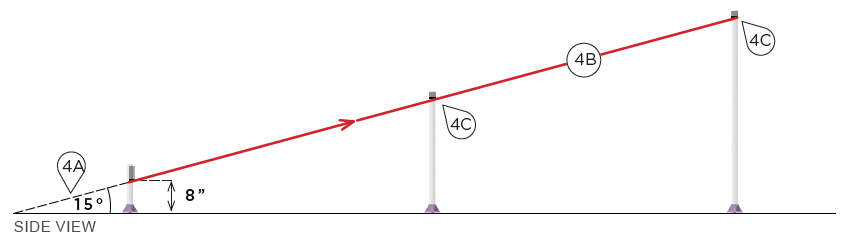
Measure and mark the slope of the first column.
Use a Protractor (4A) and String Line (4B) to measure the slope of the first column according to the slope specified in the project plan set, then mark the Mechanical Tubing (4C) in this column.
-
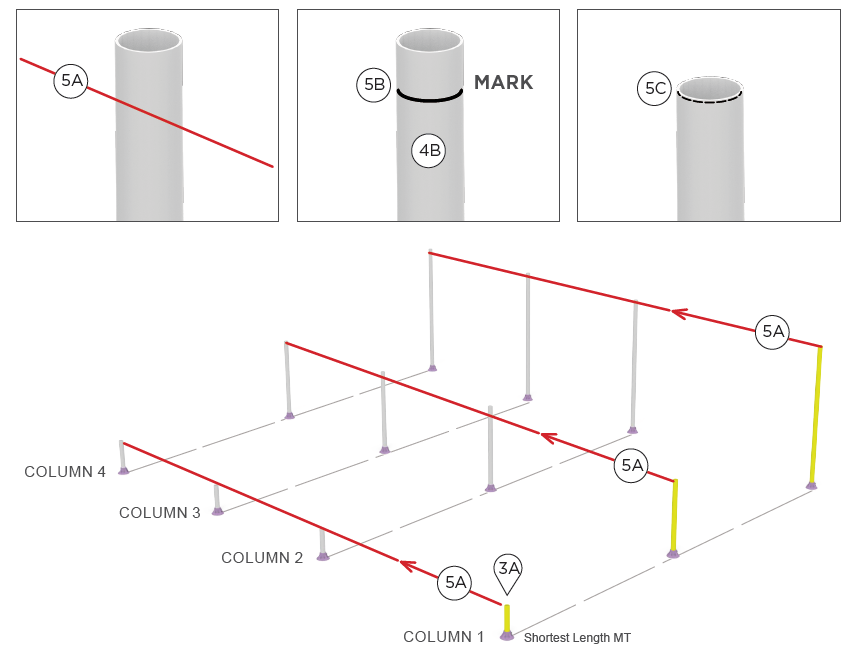
Match other columns.
Use a String Line and Line Level to mark remaining columns of MTs at same height as the first column (5A). Use a Protractor to verify the slope of the each individual columns (same as step 4) according to the project plan set. Make adjustments as needed (5B), then cut all Mechanical Tubing (5C).