Cross Bracing is installed along two axis, in the North-South and in the East-West orientation.
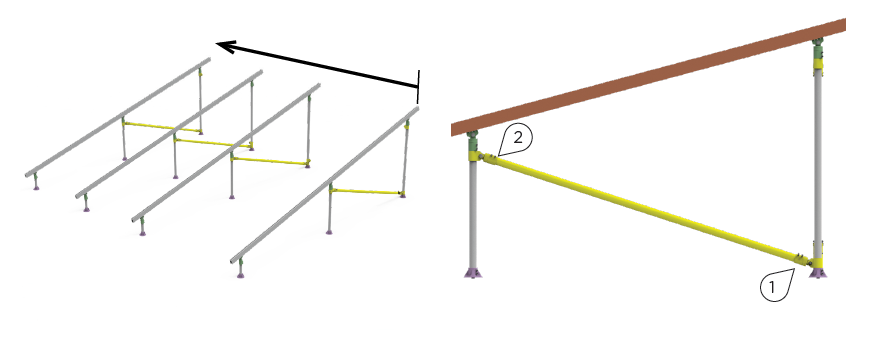
Step 5: North-South Bracing
If North-South Cross Bracing is required, it must be installed on every Rail. Refer
to the project plan set for guidance. North-South Bracing is installed before
East-West Bracing. The mounting sequence is at the lower end first (1), followed by
the upper end (2). Install from one side to the other. Refer to the next page for
detailed instructions.
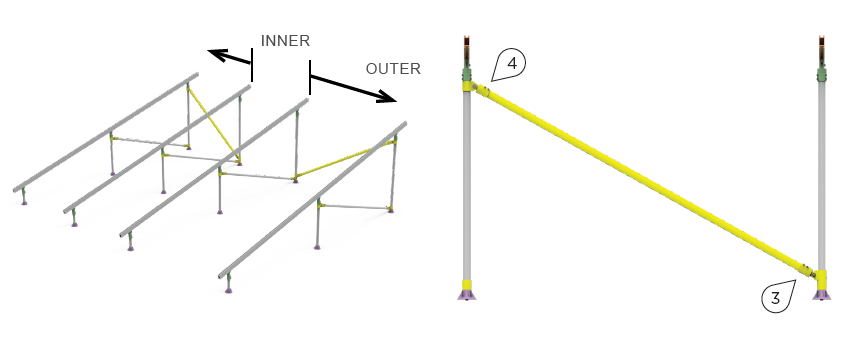
Step 6: East-West Bracing
Refer to the project plan set for guidance on where to install East-West Cross
Bracings. Begin installation at an inner row of MTs (3), followed by the outer end
of the tubing (4). Use a Spirit Level to set the Outer Rail plumb. Refer to the next
page for detailed mounting instructions.
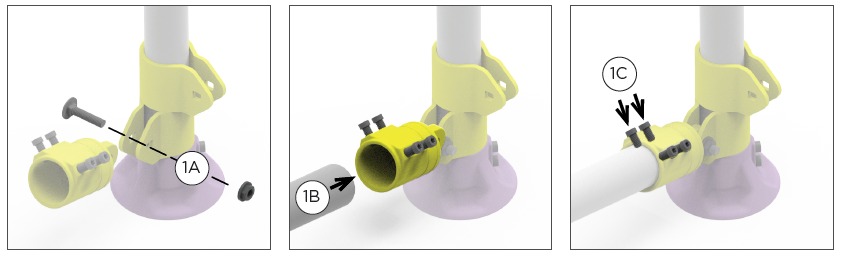
Install the lower end of the tube head.
Set and fasten a
Tube Head at the first Cross Brace Bracket (1A) using an Impact Driver
with a Socket. Then set (1B) and fasten (1C) an MT into the Tube Head
using a Torx Bit.
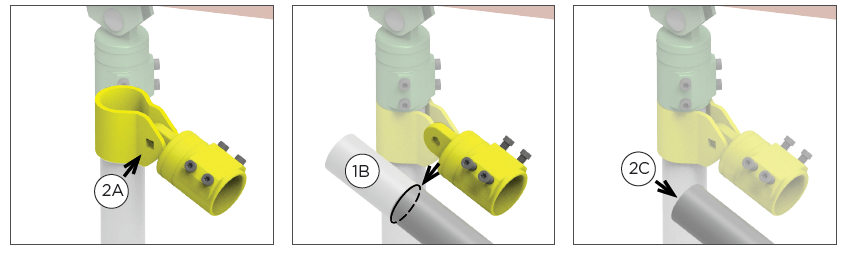
Mark and cut the Mechanical Tubing to length.
Without fastening,
set Tube Head into the Cross Brace Bracket (2A). Raise the MT up to the
second Cross Brace Bracket and mark MT to length between Tube Head
timing marks (2B). Cut MT to length (2C).
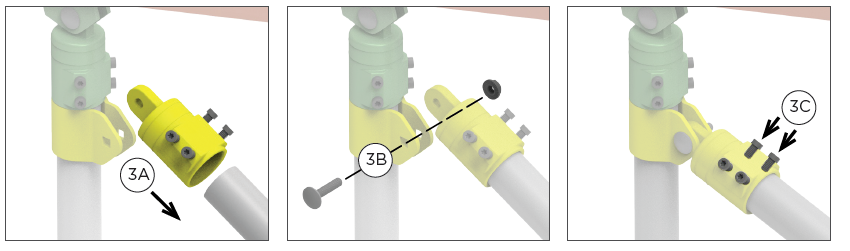
Install the upper end of the tube end.
Fit Tube Head onto
the MT (3A), then set Tube Head into Cross Brace Bracket to ensure
proper fit, adjusting or modifying the MT as needed. Fasten all
fasteners (3B, 3C).