STEP 2: Install Comp Mount
-
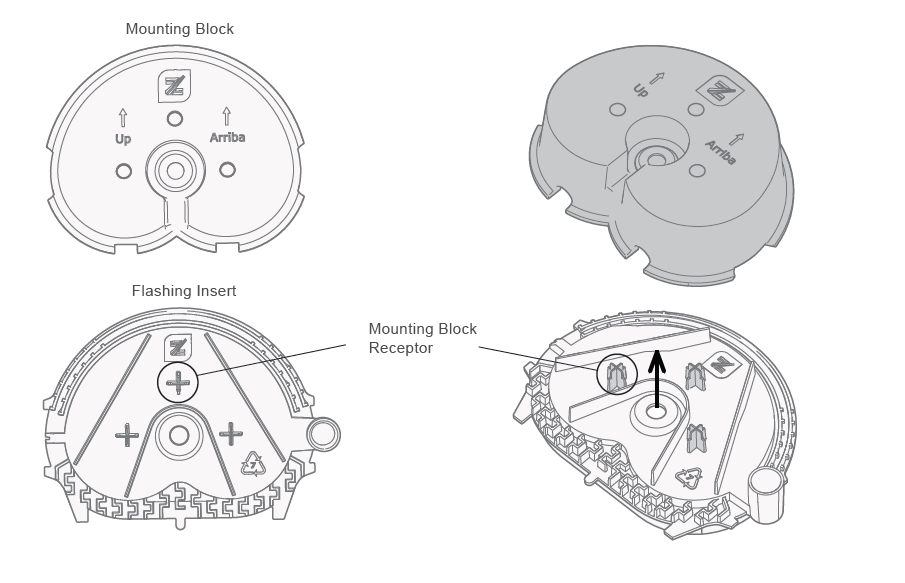
Assemble comp
mount.
Install Flashing Insert onto Mounting Block. The shape of the Mounting Block corresponds exactly with the shape of the Flashing Insert. Apply pressure on all sides of the Flashing Insert to ensure complete installation.
-
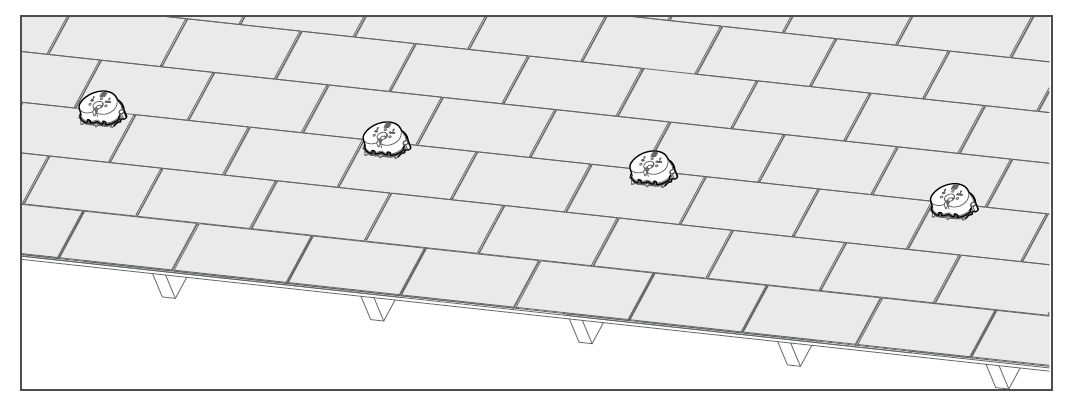
Position comp mount on
roof.
The Comp Mount can be installed anywhere along the drip edge, as long as the Captured Washer Lag placement is outside of the No Drill Zone. If Comp Mount falls over drip edge, apply bead of sealant onto the bottom of the Flashing Insert Foam to ensure a complete seal. Refer to the Approved Sealants section for a list of approved sealants. Penetrations located COMPLETELY WITHIN Alignment Marks have sealant coverage. Lags outside area of complete sealant coverage require card flashing.
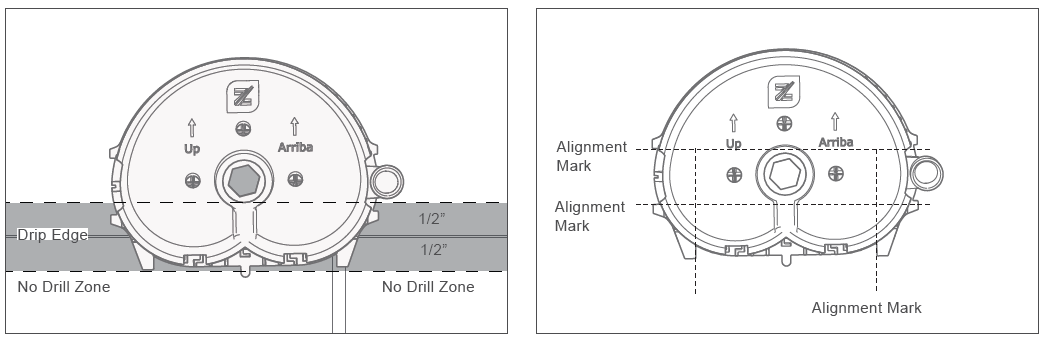
1” No Drill Zone at Shingle Drip Edge
Please refer to Installing ZS Comp on Presidential Shingles for information on how to install ZS comp on presidential shingles.
-
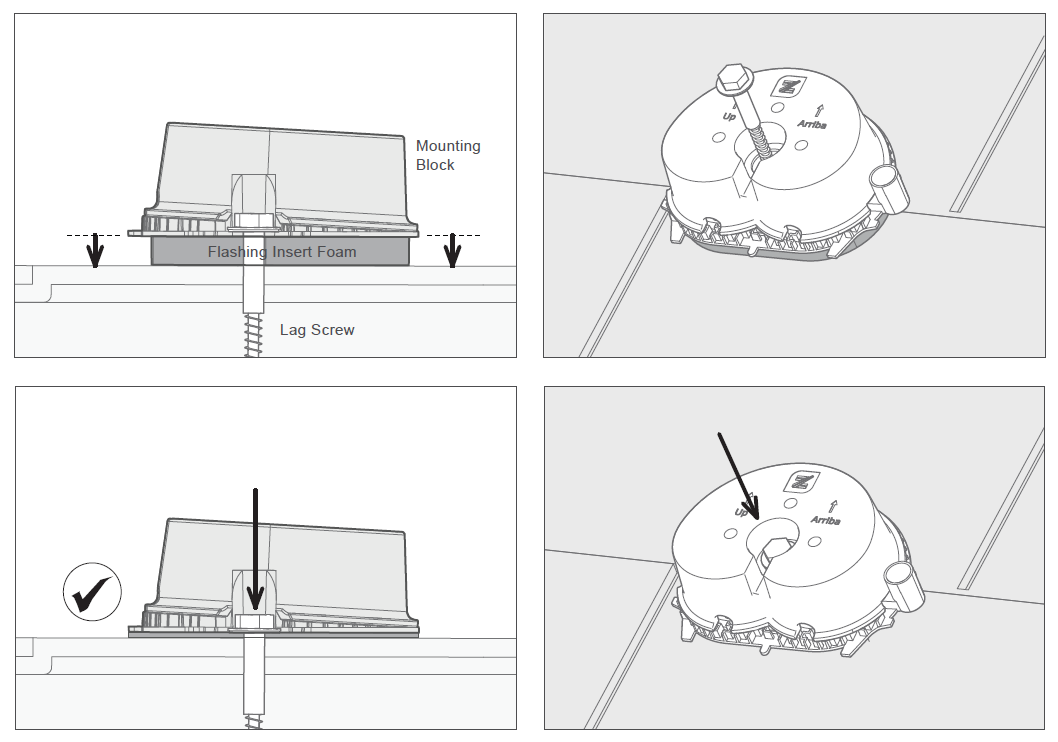
Fasten comp mount to roof.
Insert the Captured Washer Lag into the Lag Slot in the Comp Mount. Point the Comp Mount uproof as indicated by markers. Lags without sufficient purchase, i.e. “spinners” REQUIRE removal, card flashing, and re-installation. Fasten the Comp Mount, compressing the foam all the way to ensure a complete seal. Flashing Insert Foam is used during installation to contain sealant and is NOT the principal barrier to water ingress.
-
Inject moisture curable
sealant into comp mount.
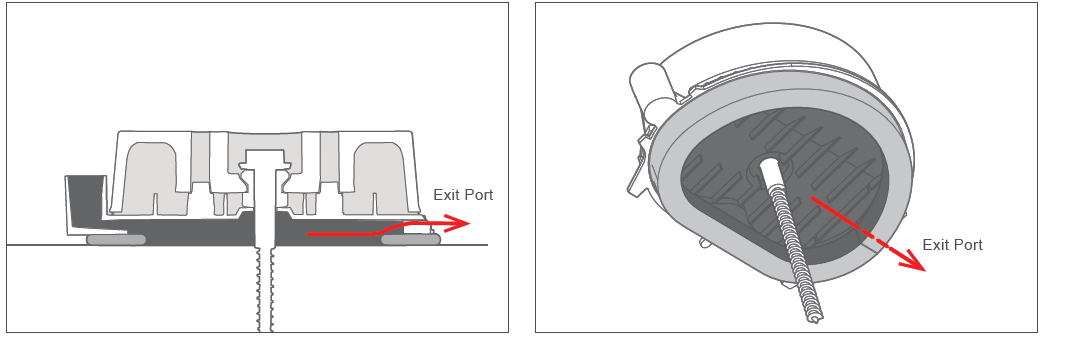
Inject moisture curable sealant through the Flashing Insert Injection Port. See Approved Sealants. Once the sealant completely fills the Flashing Insert, it will exit out of the Exit Port. If more than 7 full pumps are required, remove Comp Mount and seal manually. Sealant should be filled above edge of Injector Port to prevent pooling.
Inject sealant through the Injection Port.
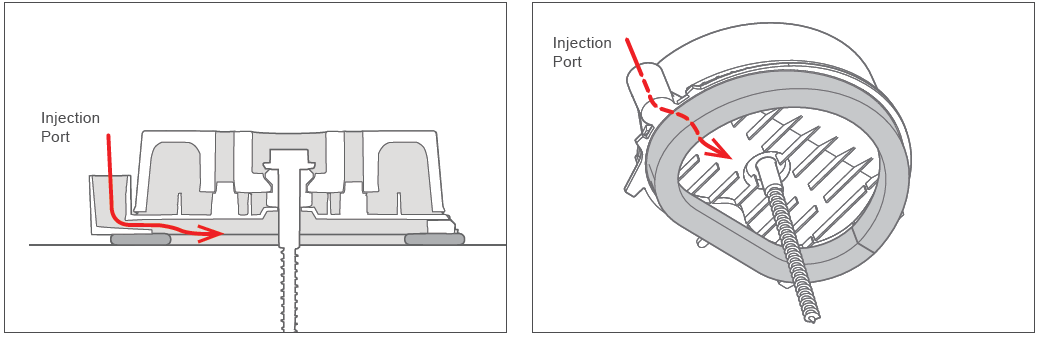 Sealant will exit out of the Exit Port.