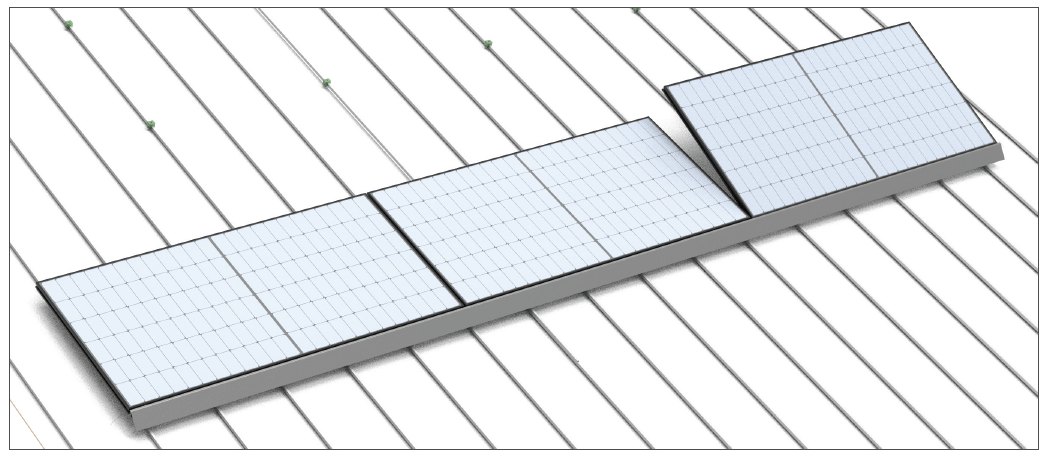
STEP 5: Install First Row of PV Modules
-
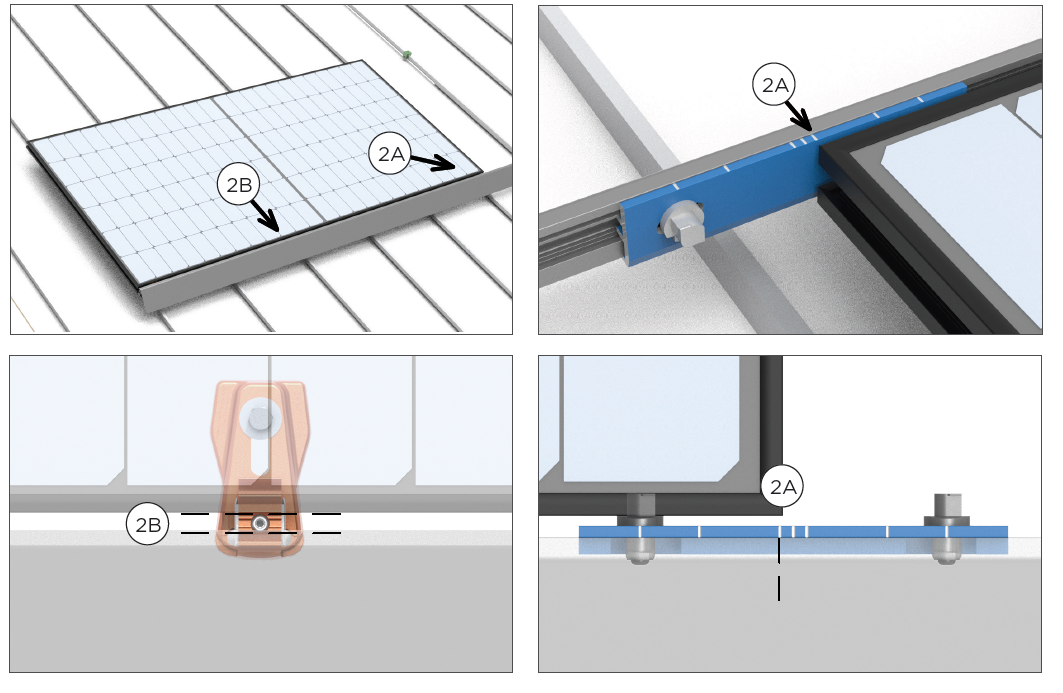
Drop in the first
module.
Position the first module on the tongue side of the front row Leveling Feet, the frame engages at 15 degrees (1A). Rotate module downward almost flat, while pushing module onto tongues of the Leveling Feet and Interlocks (1B). If needed, lift module up slightly, and apply force towards the Leveling Feet to seat the module completely.
Installation is complete at the Array Skirt.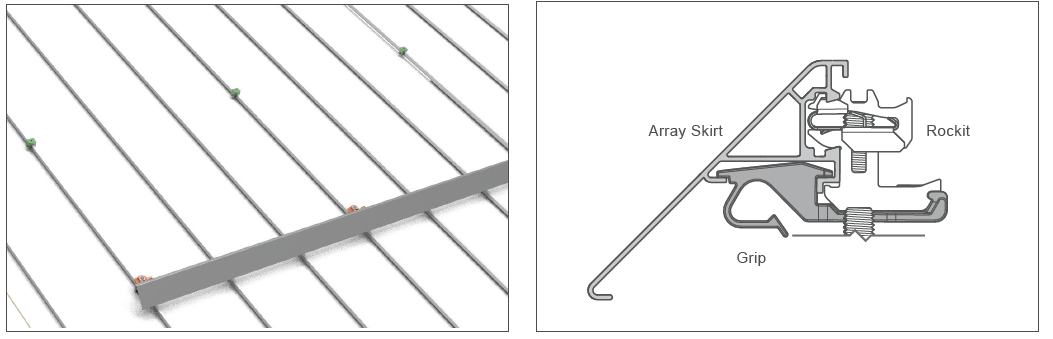 Position the module on the tongue side of the front row.
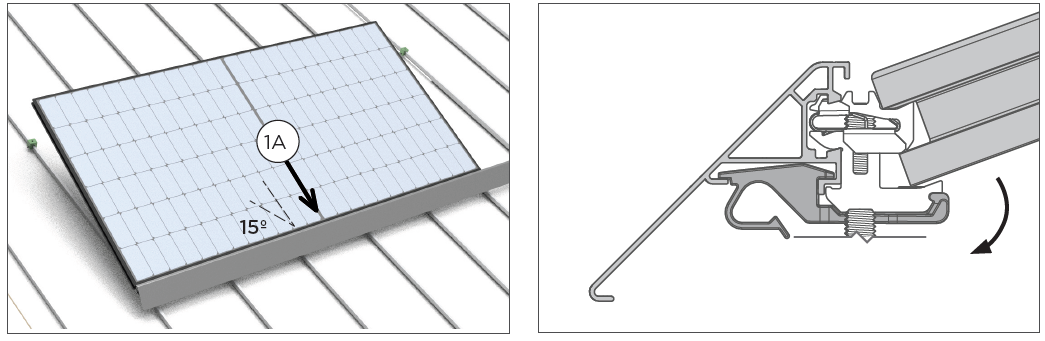 Rock the module down for forced interference.
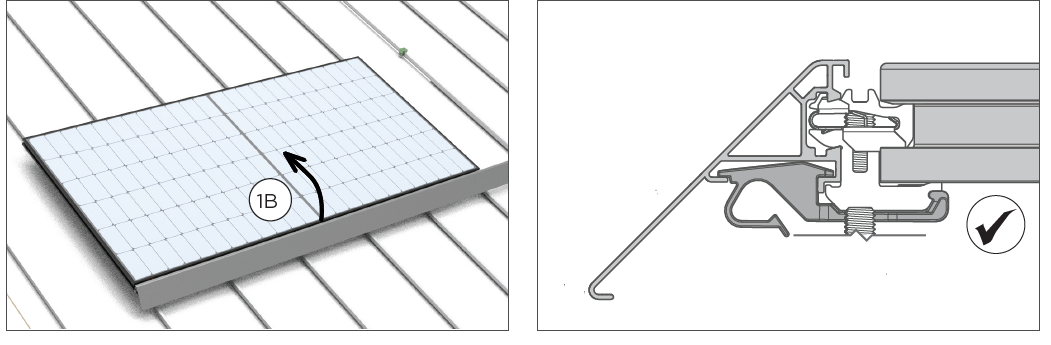
-
Align to Interlock and
Rockit.
Visually check that the module corner is properly aligned to the Interlock timing marks (2A) and correctly seated on the Rockit (2B). Re-seat module if needed.
-
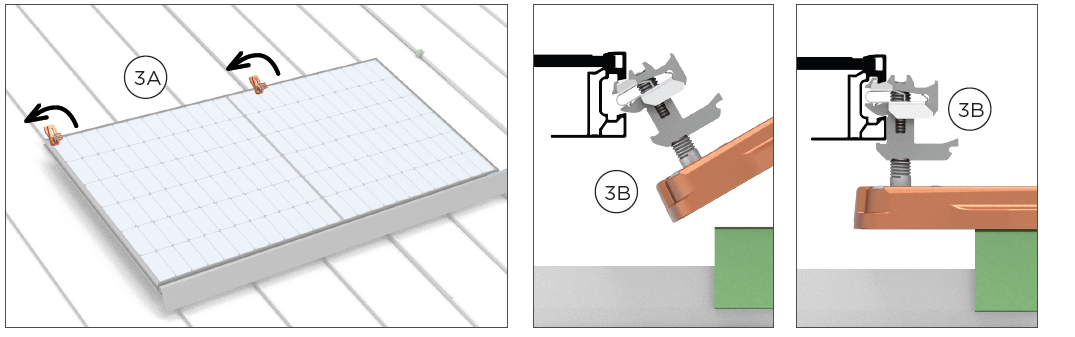
Engage the rear Leveling Feet
in the first row.
Install Leveling Feet at the back of the module at the locations of the Seam Mounts. Visually align and position the Leveling Foot (3A), then insert the Key side into the Zep Groove (3B). Do not fasten the Leveling Foot yet.
-
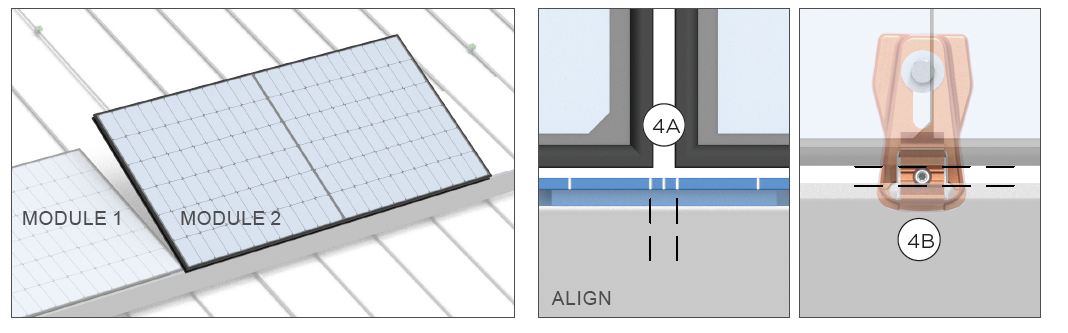
Drop in the second
module.
Drop in the second module. Visually check that the module corner is properly aligned to the Interlock timing marks (4A) and correctly seated on the Rockit (4B). Re-seat module if needed.
-
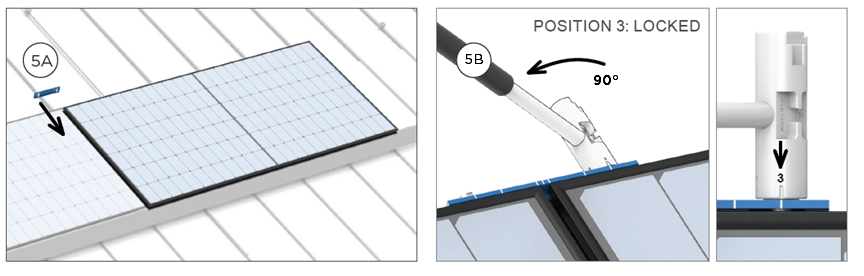
Install the rear Interlock
between modules.
Align and set the Interlock into Zep Groove at the back of the module (5A), then fasten to Position 3 (5B).
-
Rock in the rear Leveling Feet.
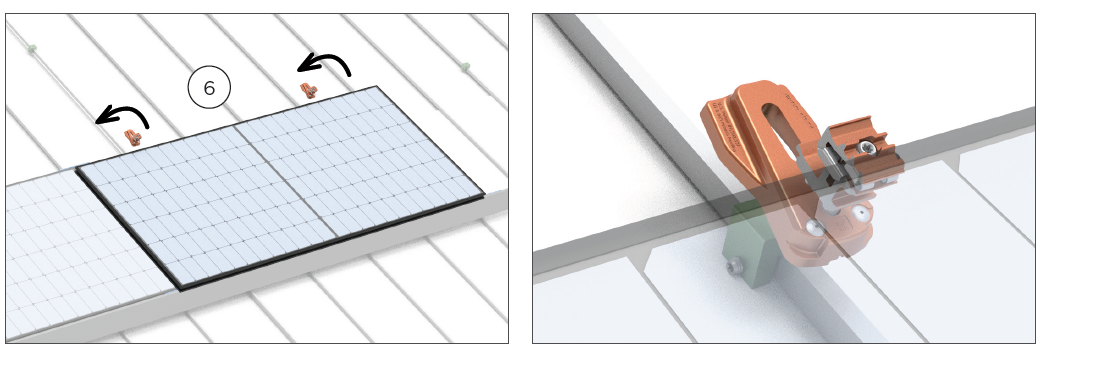
-
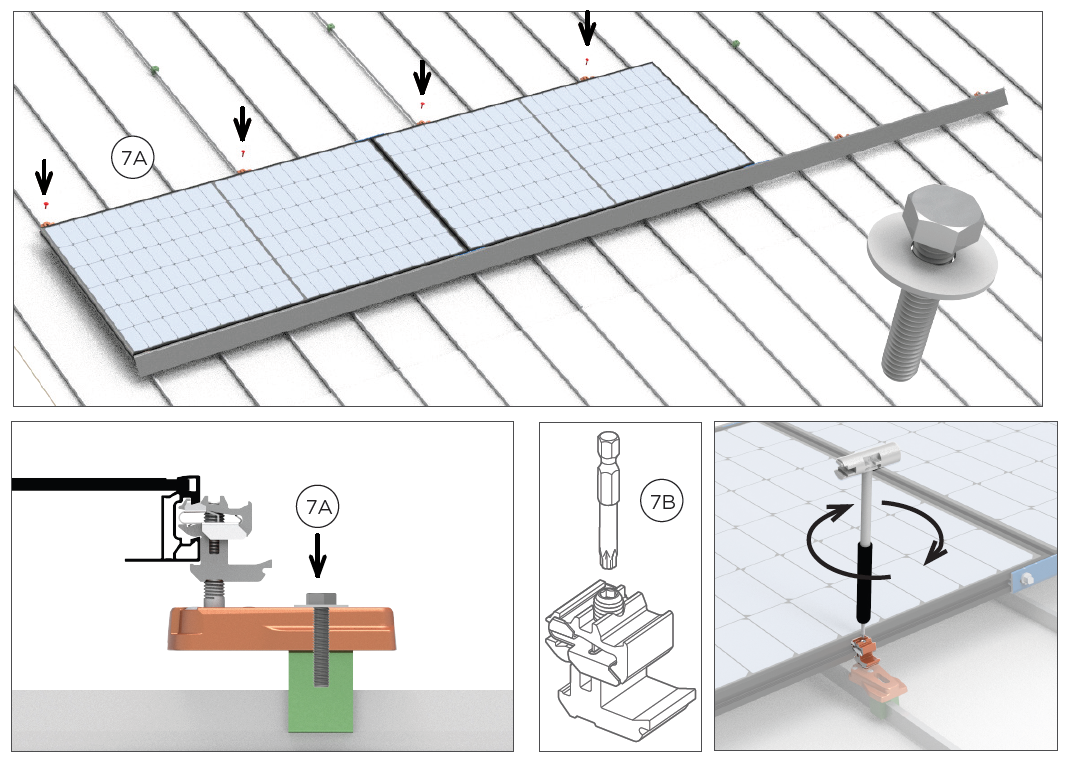
Fasten and level the rear Leveling Feet.
Fasten Leveling Feet to Seam Mounts (7A), then adjust Leveling Foot height (7B) using a Torx Bit to ensure that first row is level and aligned.
-
Drop in the remaining modules in the first row.
Repeat steps to complete installation of first row.