STEP 4: Install Array Skirt
The first-row Array Skirt serves multiple functions: As a templating tool, the Array Skirt is used to mark the outside edges of the array, verify or establish cantilevers, identify potential Interlock and Leveling Foot conflicts, and ensure that the first row or column of modules is straight and level. As an aesthetic feature, the Array Skirt conceals module hardware for a more finished appearance. If desired, the Array Skirt can be removed after installation is complete - or, alternatively, the installer can add finishing touches including End Caps or Corner Caps.
-
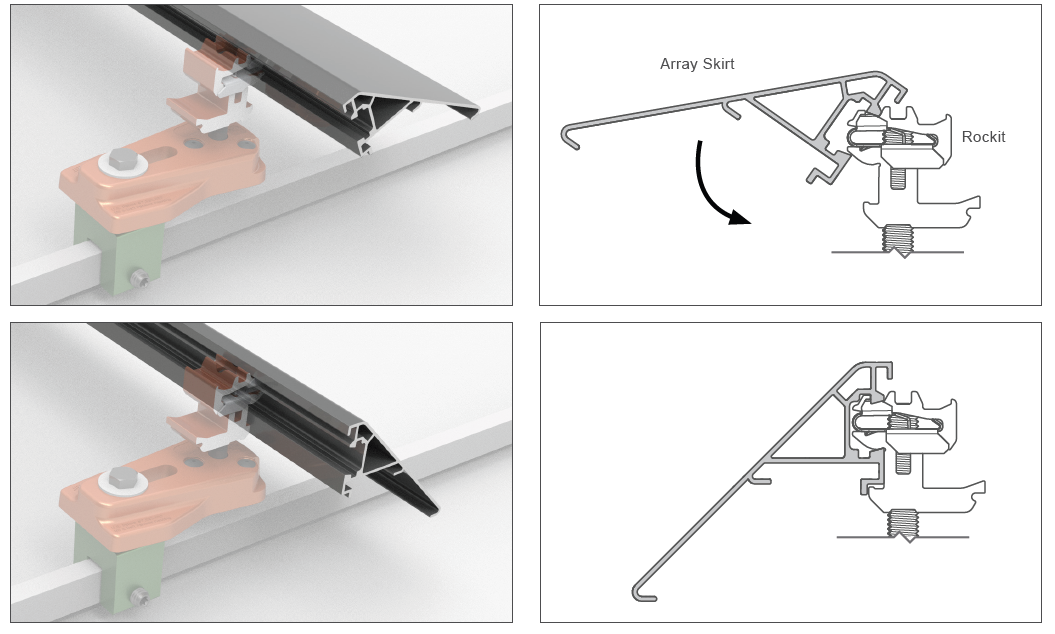
Rock in Array Skirt.
The first Array Skirt should be installed at the front of the system, starting with the Rockits that are closest together. Set the Array Skirt on the Rockit and rock down, making sure to fully engage with the Key side of the Rockit. The Array Skirt should press flush against the Rockit. Rock in the second Array Skirt, aligning it to be flush against the first Array Skirt.
-
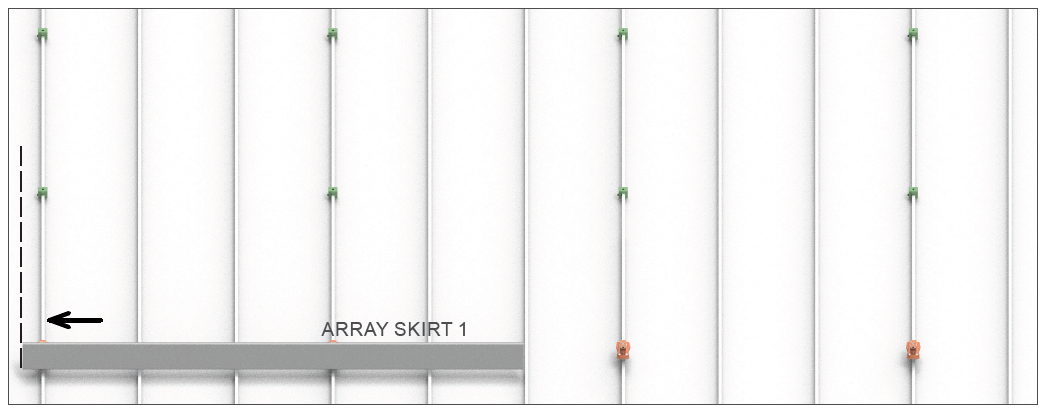
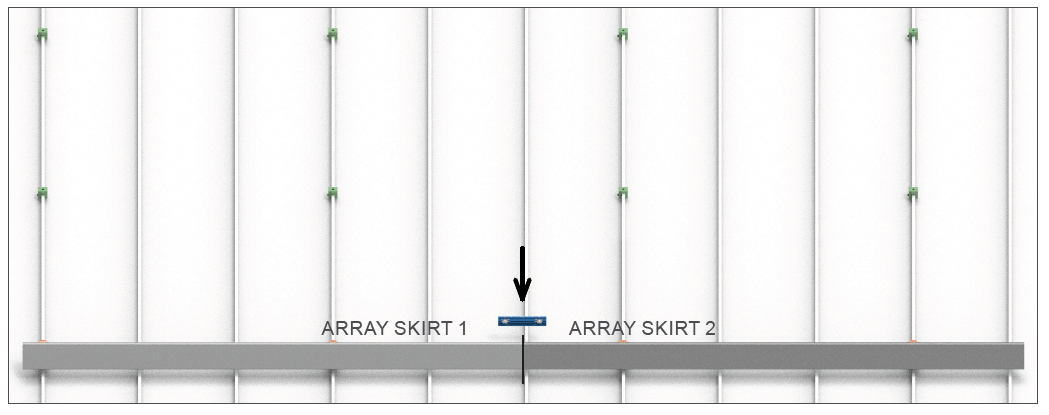
Position according to the edge of the array.
Slide the first Array Skirt sections to the right or the left, to identify the East-West edges of the array. Adjust as needed to avoid conflicts between Interlocks and Leveling Feet, to reduce the need for Hybrid Interlocks where possible.
-
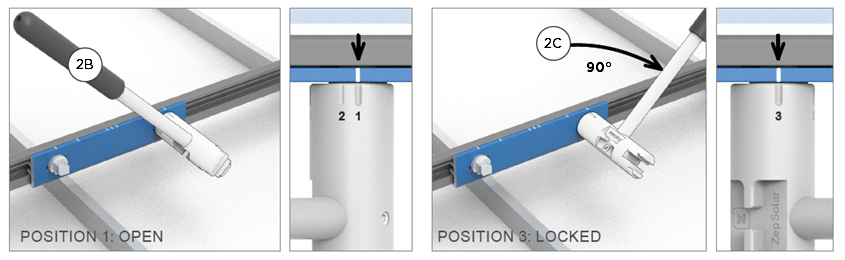
Install Interlocks.
Set Interlock Key-side into Array Skirt, aligning Array Skirt with center Interlock timing mark. Fasten Interlock on one side by rotating the Zep Tool from Position 1 to Position 3. Install second Array Skirt. Pre-assemble two Array Skirt sections if the Leveling Foot spacing is greater than the length of a single Array Skirt.
-
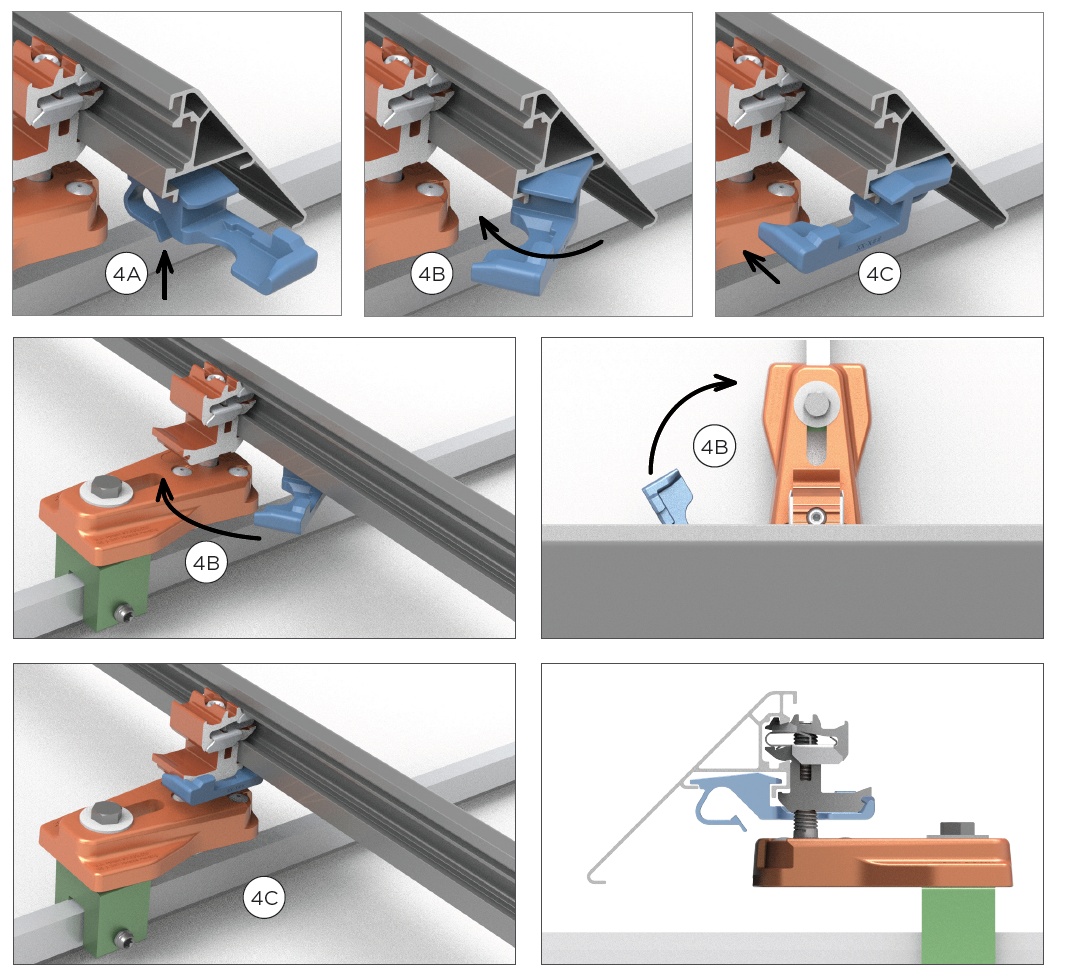
Install grips.
To fully secure the Array Skirt, install a Grip around the Rockit of every front row Leveling Foot. Insert the Grip into the lower channel of the Array Skirt (4A). Lock the Grip into the channel by rotating it (4B). Press upwards and pull towards you to engage the Grip with the Array Skirt. Then side the Grip rest under the Leveling Foot (4C). Notch must insert into Rockit base as shown.