Arc Fault Lockout
Symptoms
If a Powerwall+ / Tesla Solar Inverter experiences five Arc Fault alerts within 24 hours, an Arc Fault lockout will occur. A comprehensive inspection must be performed to identify and remediate the issue(s) causing the alert. The following system components must be inspected:
- System stringing
- Powerwall+ / Tesla Solar Inverter wiring
- Solar junction boxes
- DC Connectors
- MCIs
Open a Arc Fault Tesla One Form
- Open the job in the Tesla One app and add the
appropriate Arc Fault form to the job:
- Tesla Direct Installers: Maintenance-Arc Fault Field Visit form
- Channel Partners: Install - Arc Fault Troubleshooting form
- Complete the form as you complete the following troubleshooting steps, uploading screenshots and/or photos as potential causes are ruled out. If Install Support is required, they will use these screenshots to verify the steps that have been ruled out and can be skipped during the call.
Note
The Arc Fault form acts as a
checklist for the troubleshooting procedure. Follow the steps in the form to
complete the troubleshooting process with no additional instructions
required.
Inspect the Powerwall+ / Tesla Solar Inverter
- On the Tesla One landing page, select Stop System.
- If a System Shutdown Switch is present, push it to initiate Rapid Shutdown.
- If Powerwall+, turn the Powerwall Enable switch OFF, then turn the Powerwall breaker OFF.
- If Tesla Solar Inverter, turn the Solar Inverter breaker OFF.
- Perform Lockout/Tagout to secure
the system against being re-energized.WarningConfirm Powerwall+ is de-energized before investigating any wiring.
- Perform a tug test on each DC string connected to the Powerwall+ terminal block. Ensure they are landed securely.
- For paralleled strings, ensure
the MPPT jumpers are properly installed:
- Valid configuration for Tesla Solar Inverter / Powerwall+: jumper from 1 to 2 or 3 to 4
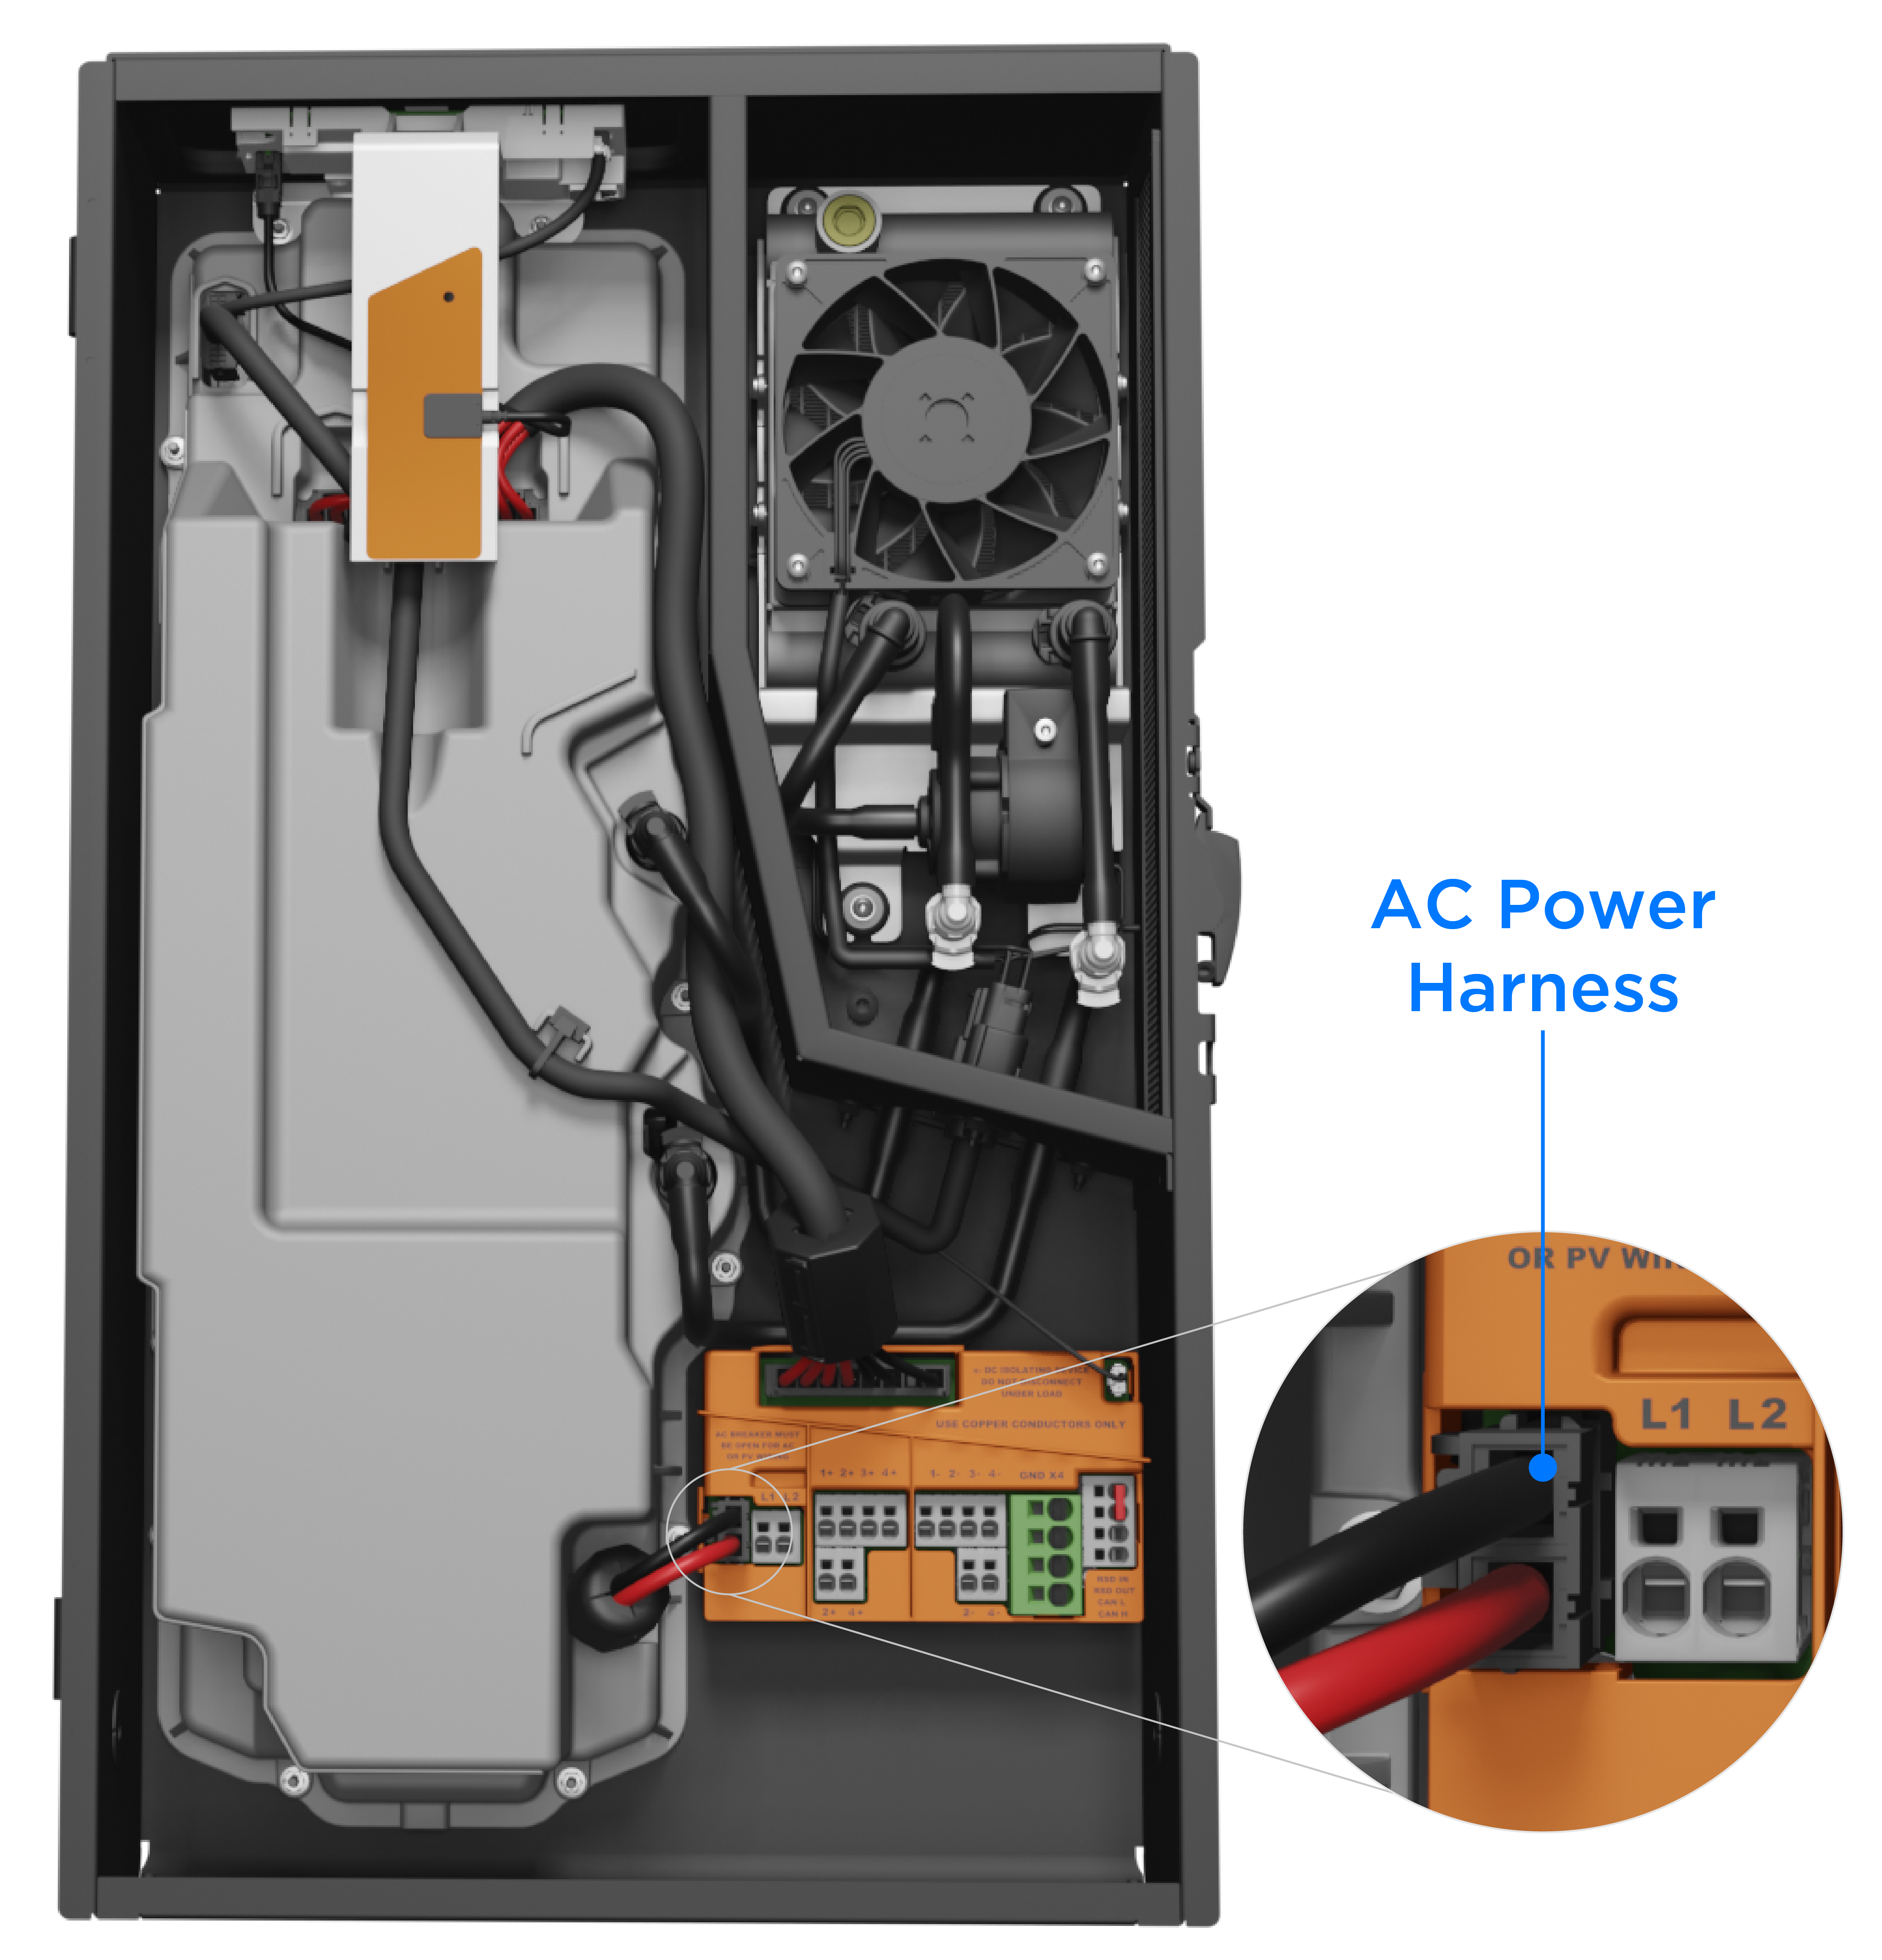
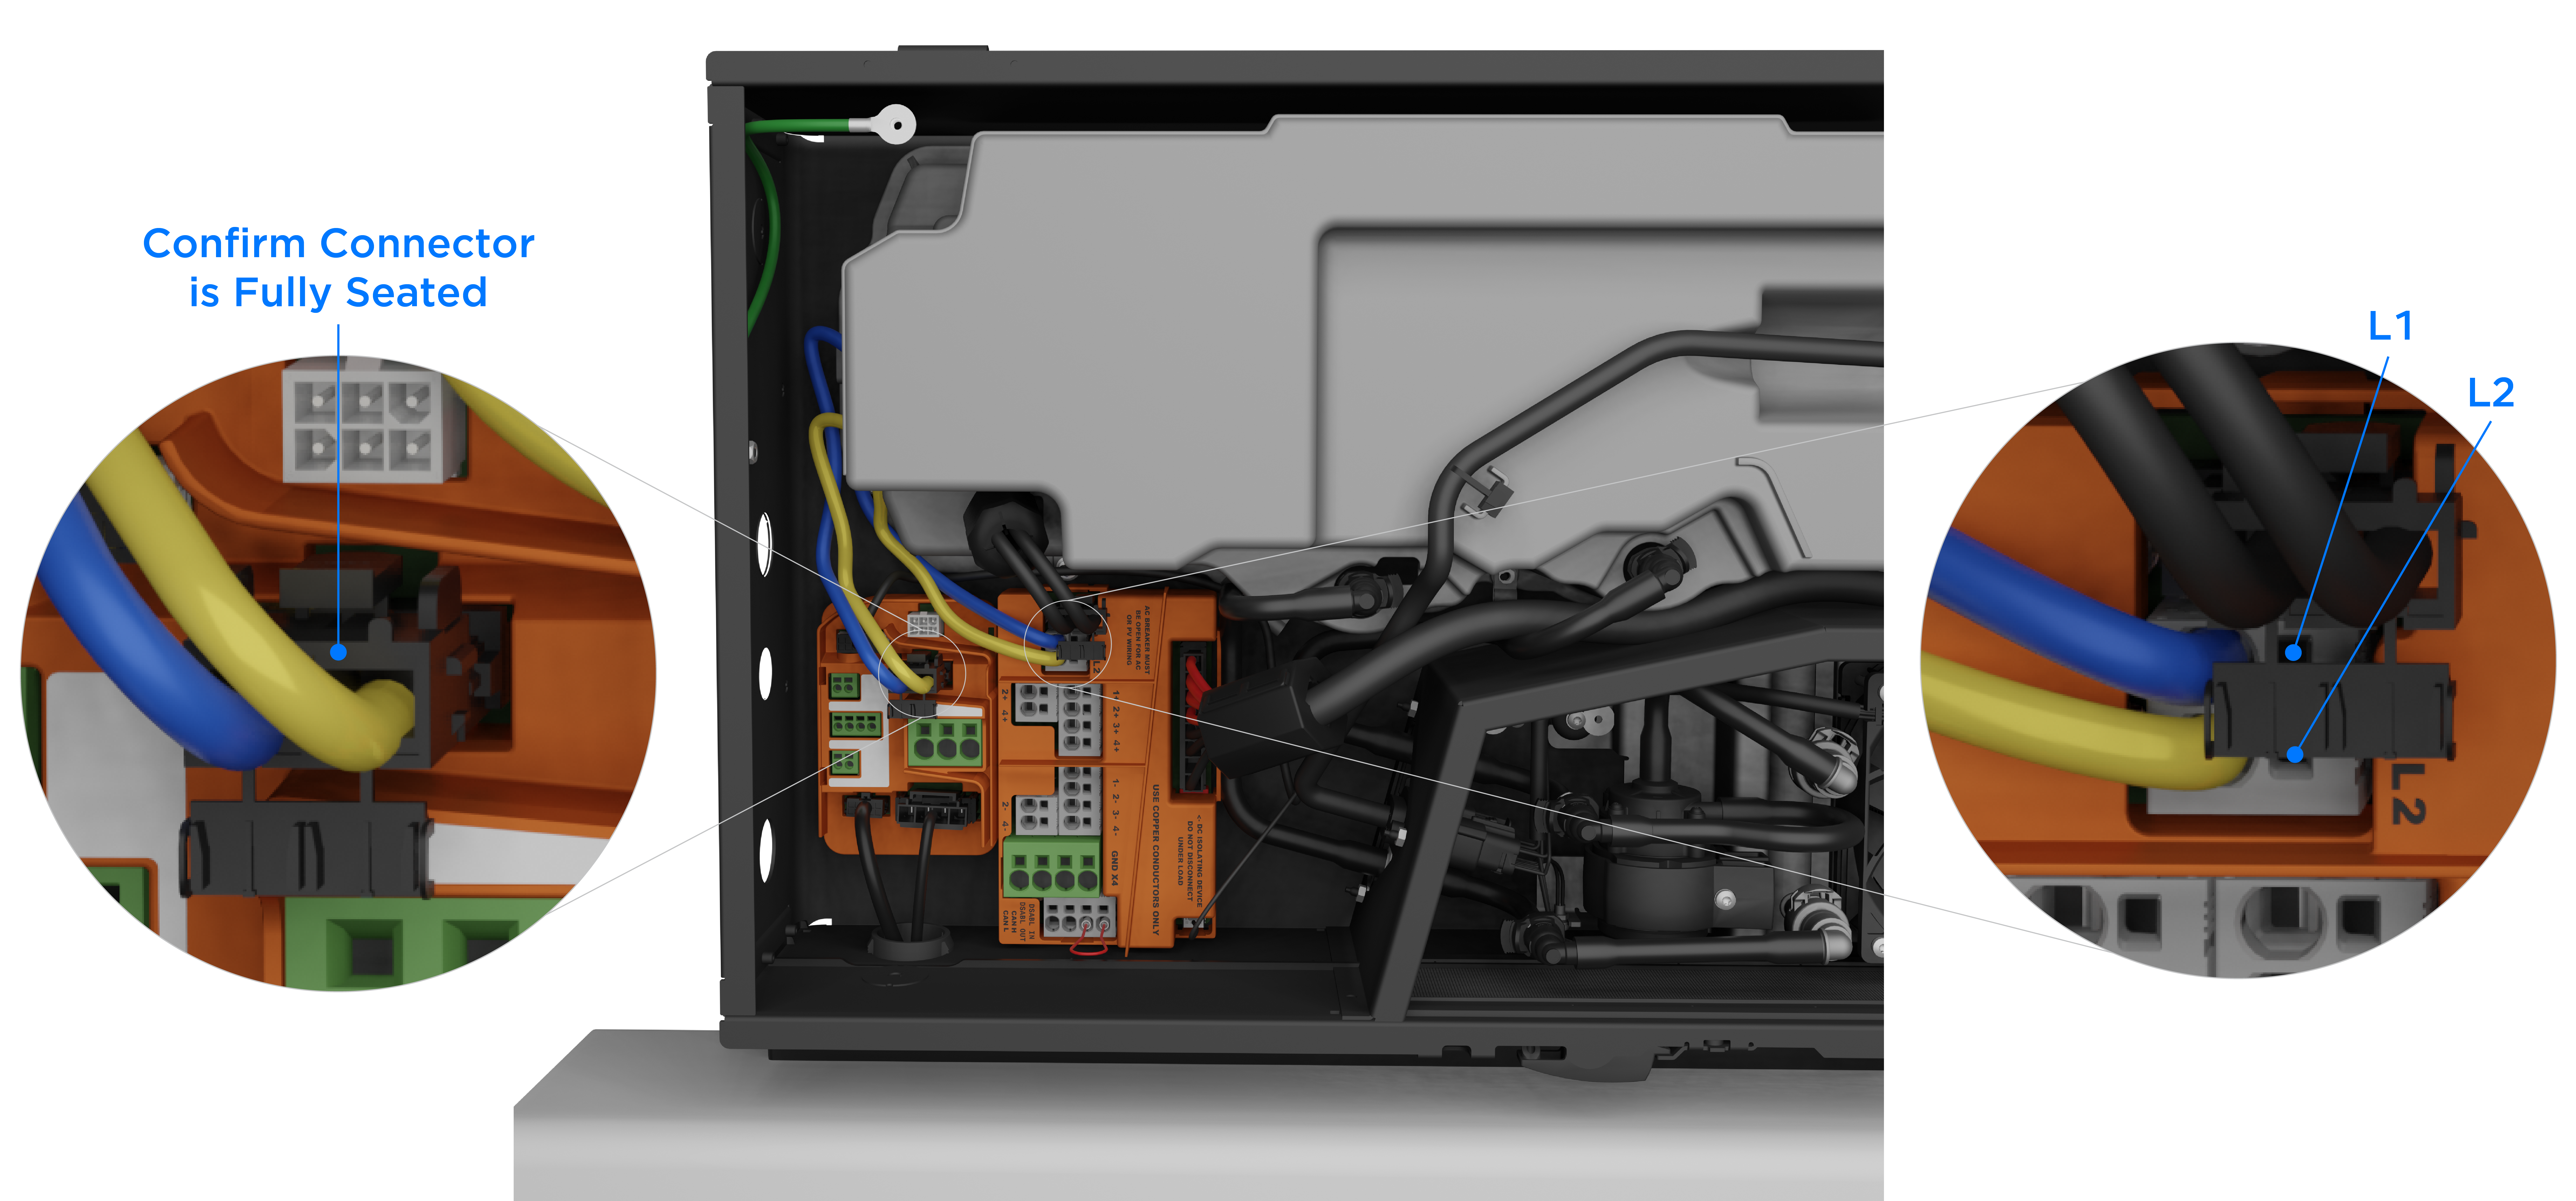
- Check the AC power harness:
- Confirm the harness is snug on both ends and is not making any hissing or arcing noise. If it is, contact Install Support.
- Unplug the harness and inspect the pins for damage.
- If the Tesla Solar Inverter harness is damaged, replace it (Tesla P/N 1545619-00-D).
- If the Powerwall+ harness is damaged, replace it (Tesla P/N 1674892-00-A).
- If the connector on the
terminal block of the Tesla Solar Inverter / Powerwall+ is damaged, the
entire Tesla Solar Inverter / Powerwall+ solar assembly will
be replaced.
Figure 1. Tesla Solar Inverter AC Power Harness 
Figure 2. Powerwall+ AC Power Harness 
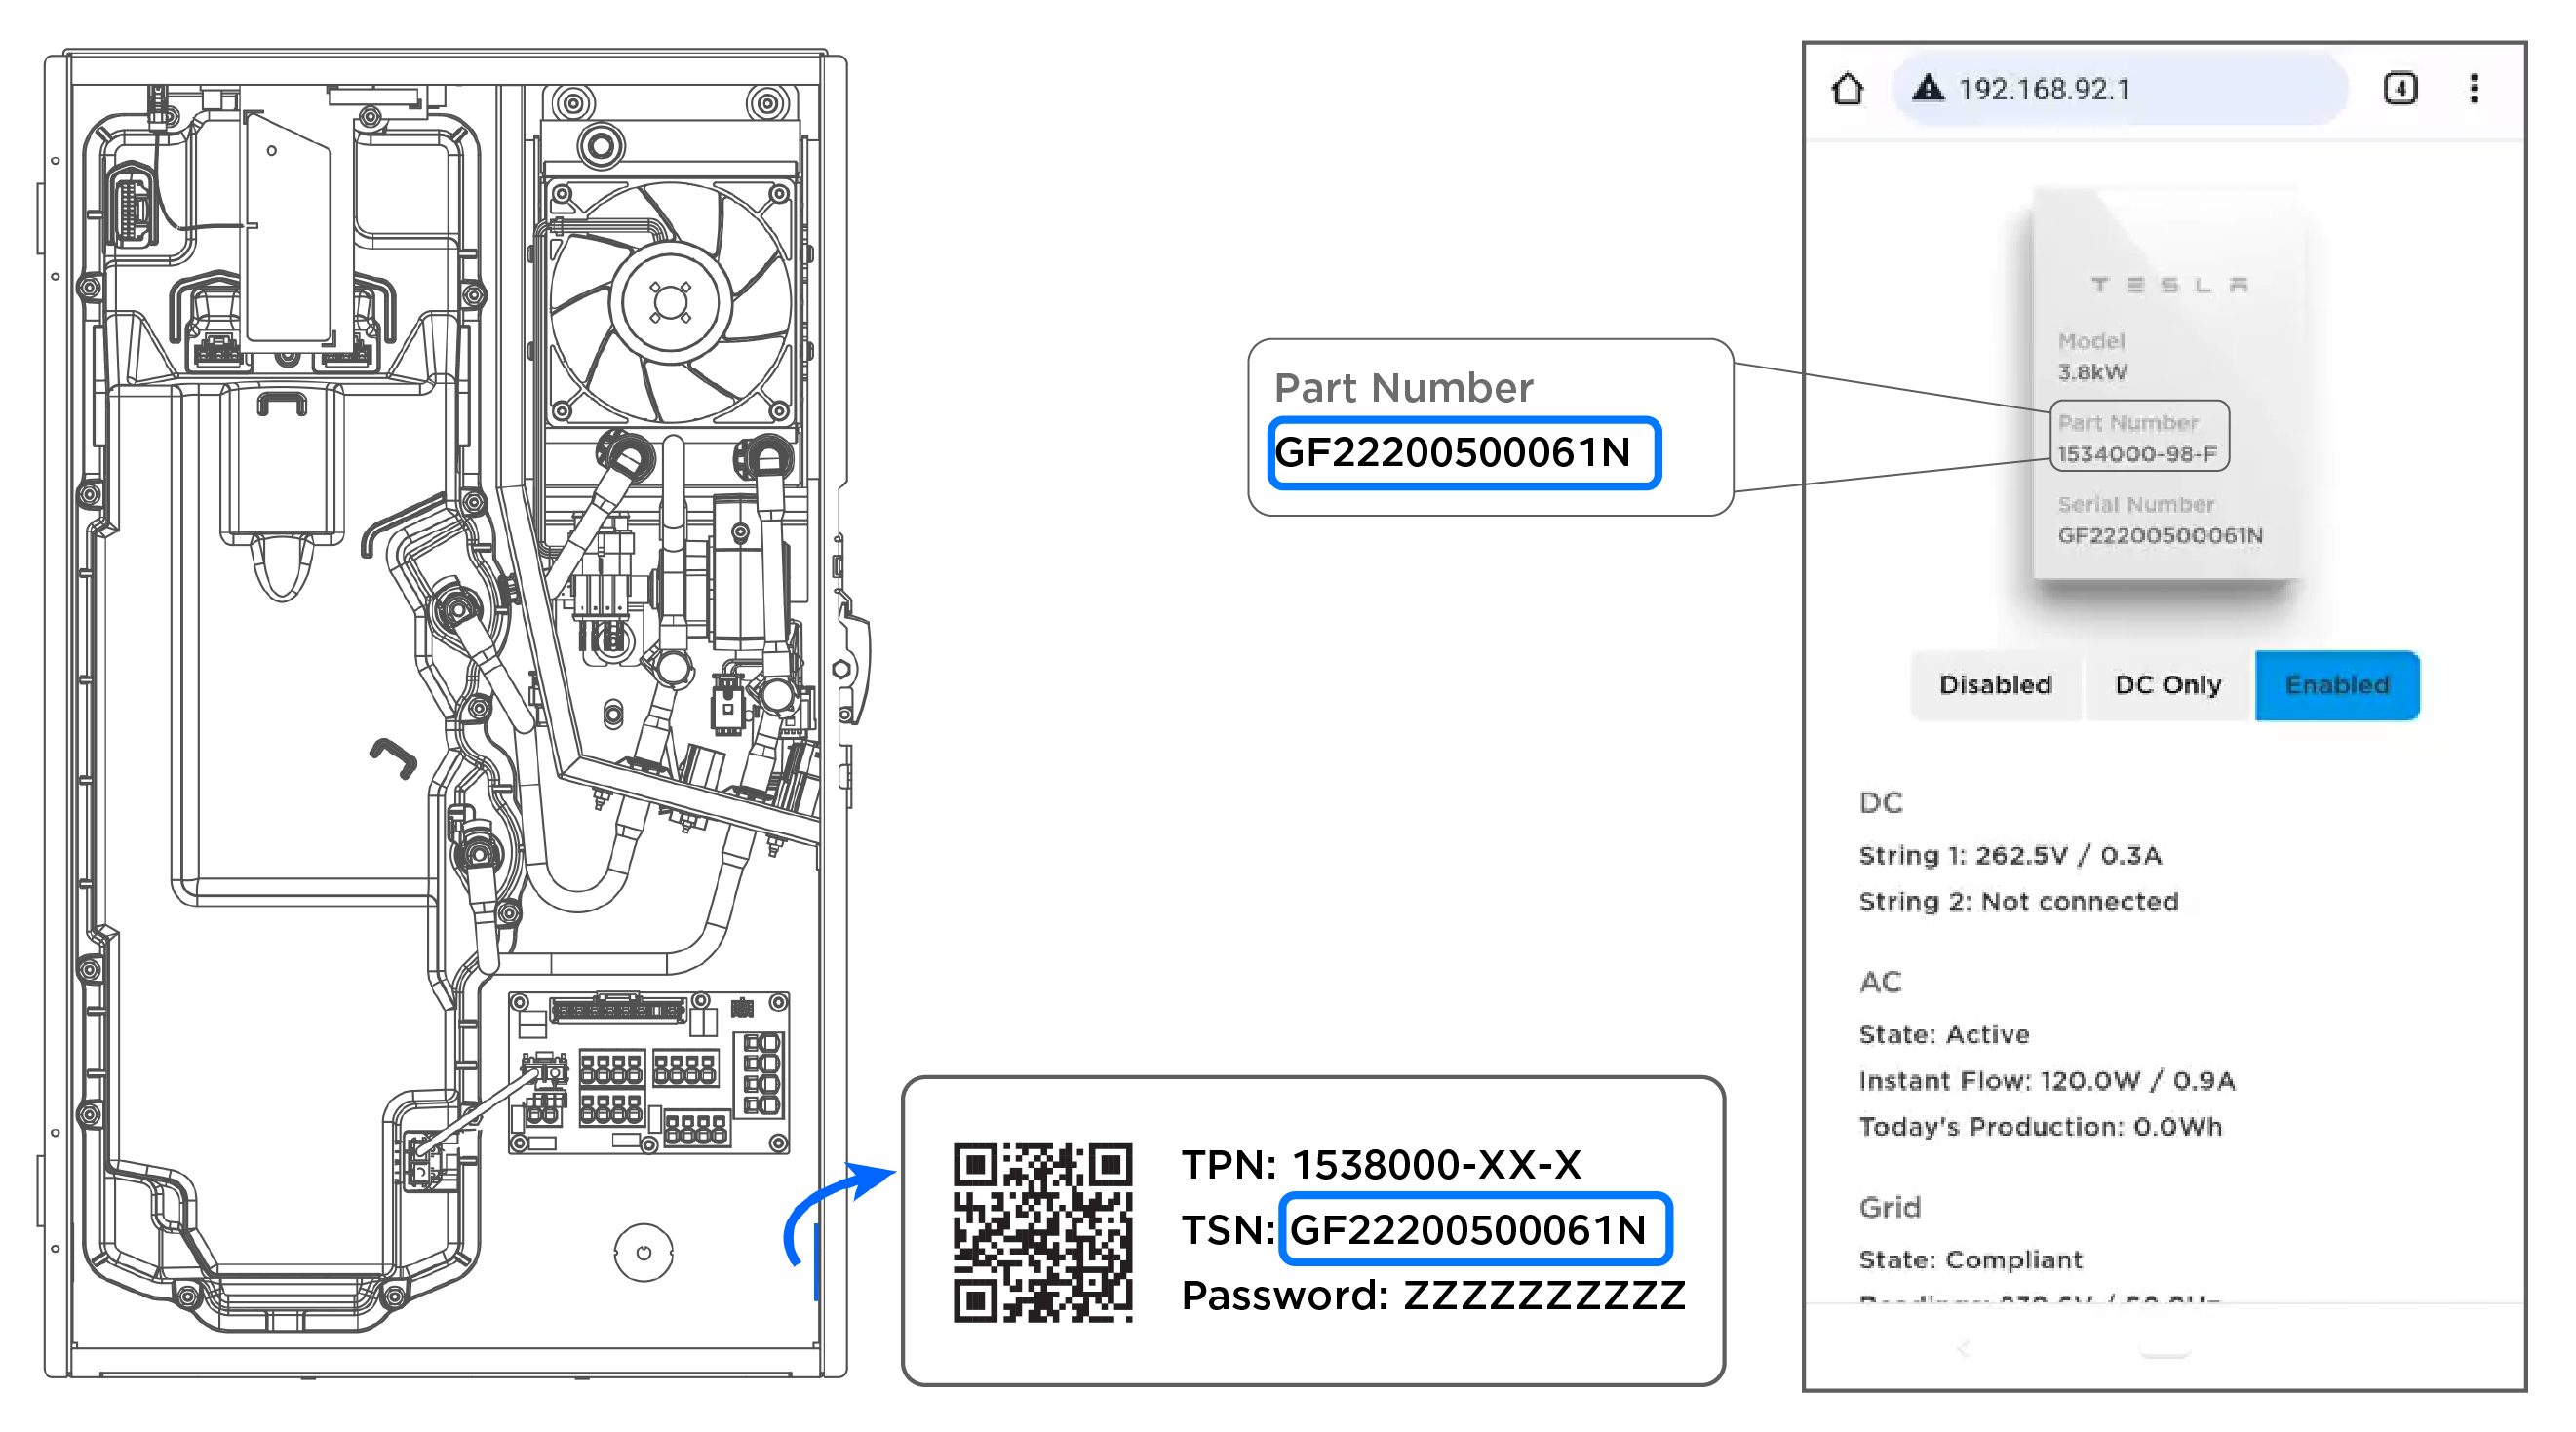
- Take photos of the Powerwall+ / Tesla
Solar Inverter serial number via the
Device Setup interface vs. the serial number on the actual sticker in the
enclosure to confirm they match.
Figure 3. Example Tesla Solar Inverter Serial Number Confirmed in Configuration Interface 
- If the serial numbers do not match, look for other units to confirm you are connected to the correct network and are configuring the correct unit.
- If the serial numbers do not match and there are no other units, or if you have confirmed you are connected to the correct unit, contact Install Support to fix the discrepancy.
- Check all wiring to ensure there are no nicks or cuts in the insulation that might create a short with the ground.
- Take a pullback photo of the Powerwall+ / Tesla Solar Inverter.
Inspect Wiring on the Roof
- Verify all strings are
connected as outlined in the planset and string diagram.
- See Powerwall+ / Tesla Solar Inverter is Under Producing for instructions to check wiring against the planset.
- See Determine True String VOC for instructions to measure each string's
voltage, then compare that voltage with the planset to confirm that
each string is labeled correctly and landed at the correct terminal.
NoteFor instance, if MPPT 4 has been identified as the faulty string, but String 3 is landed there instead of String 4, the installer could spend time troubleshooting a string with no faults. In this case, comparing each string's voltage with the planset would identify this issue and the installer could correct it before moving to the roof to troubleshoot String 4.
- Perform a tug test on all
vulnerable connection points on the roof:
- Wiring in junction boxes (look for frayed wires, conductors pulled too tightly). Ensure jumpers in J-boxes are secure along with wires.
- Ensure all MC4 connectors on the roof are secure and not loose. Check for any signs of thermal damage (deformation, bulging, glossy finish, etc.)
- Confirm all components have been installed to the standards of Tesla AND the original manufacturer (if applicable). Modifications made to wiring terminals or terminal connections can cause unexpected failures.
- See MCI Diode Test and Resistance Test (MCI Health Tests) to determine if a faulty MCI is causing the Arc Fault.
After identifying and addressing the potential cause of the Arc Fault, retry the self-test by toggling the system to Disabled then Enabled. All self-tests should pass to confirm the issue was resolved.