Ethernet Connection is Not Functioning
Symptoms
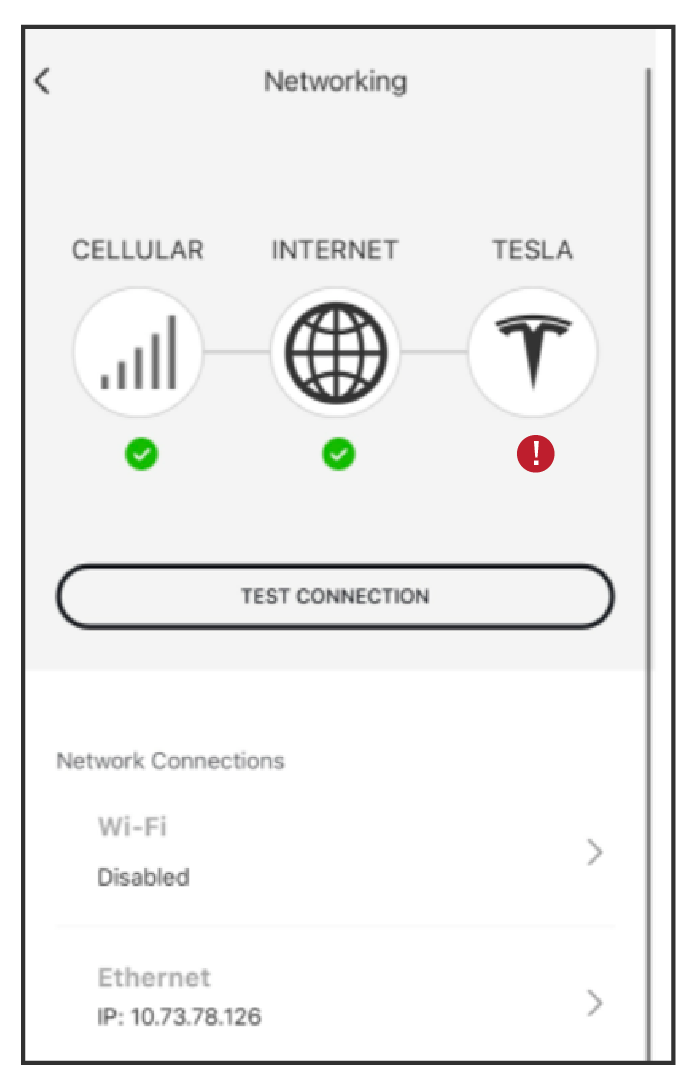
On the Network page, Ethernet has been configured but the system is not connected to Tesla (indicated with a red exclamation point icon).

Steps to Troubleshoot
If you have an Ethernet tester, test the connection on a successfully connected device.
- If the connection is not functioning:
- Select Check Internet Connection. If there is a checkmark next to Local Network Connected but not Tesla Services and Internet Connected, the issue is with the firewall and Backup Gateway 2 / Powerwall+ / Tesla Solar Inverter is unable to connect to Tesla's servers. Contact the customer's internet provider or create another network SSID without restriction that Tesla's servers can connect to.
- Ensure your router is set up for dynamic assignment of IP addresses (DHCP).
- If the Ethernet connection has been set up manually, ensure the Router IP and Subnet Mask are correct.
- Check the functionality of the DHCP connection by looking for the Backup Gateway 2 / Powerwall+ / Solar Inverter Wi-Fi in the network list of the customer router. If the connection was successful, the Backup Gateway 2 / Powerwall+ / Solar Inverter Wi-Fi serial number will be displayed in the list.
- If your device is directly connected to the Backup Gateway 2 / Powerwall+ / Tesla Solar Inverter via Ethernet cable, you can test the functionality of the Ethernet connection by performing a ping test. Set the laptop / device IP to 192.168.90.10 via the Network Adapter Settings.
- If the Backup Gateway 2 / Powerwall+ / Tesla Solar Inverter has successfully connected to the customer router, complex firewalls could have blocked the ports. Ensure that Port 443 is useable by the Backup Gateway 2 / Powerwall+ / Tesla Solar Inverter for in/out communication.
- Confirm the internet connection is functioning and the connection speed is fast enough by streaming a video or using a speed test webpage.
- If the connection is functioning:
- Confirm the Ethernet cable is plugged in at both ends.
- Confirm Ethernet runs are no longer than 150 ft (45 m).
- If the run is longer than 150 ft (45 m), install an Ethernet Power Line Adapter.
- Confirm the Ethernet cable is viable using a data cable tester.
- Verify that Ethernet has a checkmark and an IP address is displayed.
- Confirm the router / modem has power.
- Confirm the Ethernet cable is plugged into a LAN port.
- Power cycle the modem and routers.